ServiceNow Connector
Redwood ServiceNow Connector
The ServiceNow connector is a two-way connector that allows you to list, create, and update ServiceNow incidents from RunMyJobs. You can also run ServiceNow scripts from RunMyJobs, or import and run RunMyJobs Processes from ServiceNow.
Prerequisites
- Platform Version 9.2.9 or later
- API Key component version 1.0.0.2 or greater (dependency handled by the Catalog automatically)
- Connection component version 1.0.0.3 or greater (dependency handled by the Catalog automatically)
- Privileges Required to use Connections
- Privileges Required to use ServiceNow
- Connection information for the ServiceNow connection
- Instance ID
- Username and Password (for a Basic Auth connection)
- An OAuth Client ID and Secret (for an OAuth Connection)
- The 'Redwood Automation Connector' ServiceNow application from the ServiceNow App Store must be installed into your ServiceNow instance.
Connectivity (https) from the central Redwood server to the ServiceNow instance
Connectivity (https) from the secure gateway to the ServiceNow instance
- To use the Inbound communication features from ServiceNow -> RMJ (e.g. Running RMJ Processes from ServiceNow), ONE of the following is required:
- Connectivity (https) from the ServiceNow instance to the Redwood central server
- Connectivity from a ServiceNow Mid Server to the Redwood central server (see the Redwood Automation Connector section below for more details)
Installation
From the Redwood UI, launch the Catalog and select the ServiceNow Connector. Right click on it and select 'Install Specific Version'. Select the desired version, and click the Install button. All dependencies will be installed automatically.
Contents of the Component
| Object Type | Name | Description |
|---|---|---|
| Application | GLOBAL.Redwood.REDWOOD.ServiceNow | Integration connector with the ServiceNow platform |
| Constraint Definition | REDWOOD.Redwood_SNOWAssignmentGroupConstraint | Constraint for ServiceNow Assignment Group fields |
| Constraint Definition | REDWOOD.Redwood_SNOWConnectionConstraint | Constraint for ServiceNow Connection fields |
| Constraint Definition | REDWOOD.Redwood_SNOWImpactConstraint | Constraint for ServiceNow Impact fields |
| Constraint Definition | REDWOOD.Redwood_SNOWJobNameConstraint | Constraint for ServiceNow Job fields |
| Constraint Definition | REDWOOD.Redwood_SNOWUrgencyConstraint | Constraint for ServiceNow Urgency fields |
| Extension Point | REDWOOD.Redwood_ServiceNow_Connection | ServiceNow Connection UI |
| Extension Point | REDWOOD.Redwood_ServiceNow | Inbound API for the ServiceNow Redwood Automation Connector application |
| Job Definition | REDWOOD.Redwood_SNOW_CreateIncident | Create a ServiceNow incident |
| Job Definition | REDWOOD.Redwood_SNOW_GetIncident | Fetch incident information from ServiceNow |
| Job Definition | REDWOOD.Redwood_SNOW_UpdateIncidentTemplate | Template for updating a ServiceNow incident |
| Job Definition | REDWOOD.Redwood_SNOW_UserMessageTemplate | Template User Message that will create a ServiceNow Incident and can be responded to from ServiceNow |
| Job Definition | REDWOOD.Redwood_SNOW_RunJob | Execute a script that is defined in the Redwood Jobs section of the Redwood ServiceNow application. |
| Job Definition Type | REDWOOD.Redwood_ServiceNow | ServiceNow Definition Type |
| Library | REDWOOD.Redwood_ServiceNow | Library for ServiceNow Connector |
Create a Connection To ServiceNow
- Navigate to Custom > Connections and choose
.
- Choose ServiceNow under Select a Connection Type.
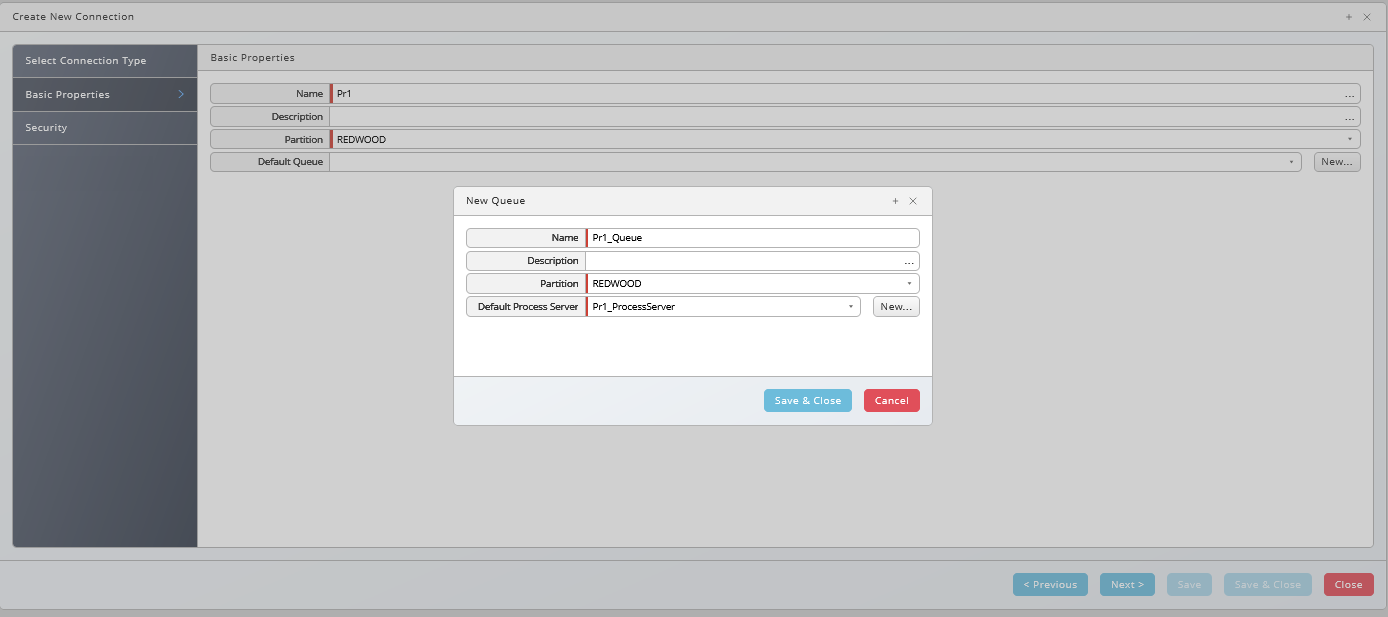
- Choose Next or Basic Properties, this is a screen for all components, you create a queue and process server for your ServiceNow connection. When you create the Queue and Process Server through this dialog, all required Process Server Services are added automatically to the new Process Server. If you have any queues that contain Process Servers that have all the required services, they will appear in the dropdown list.
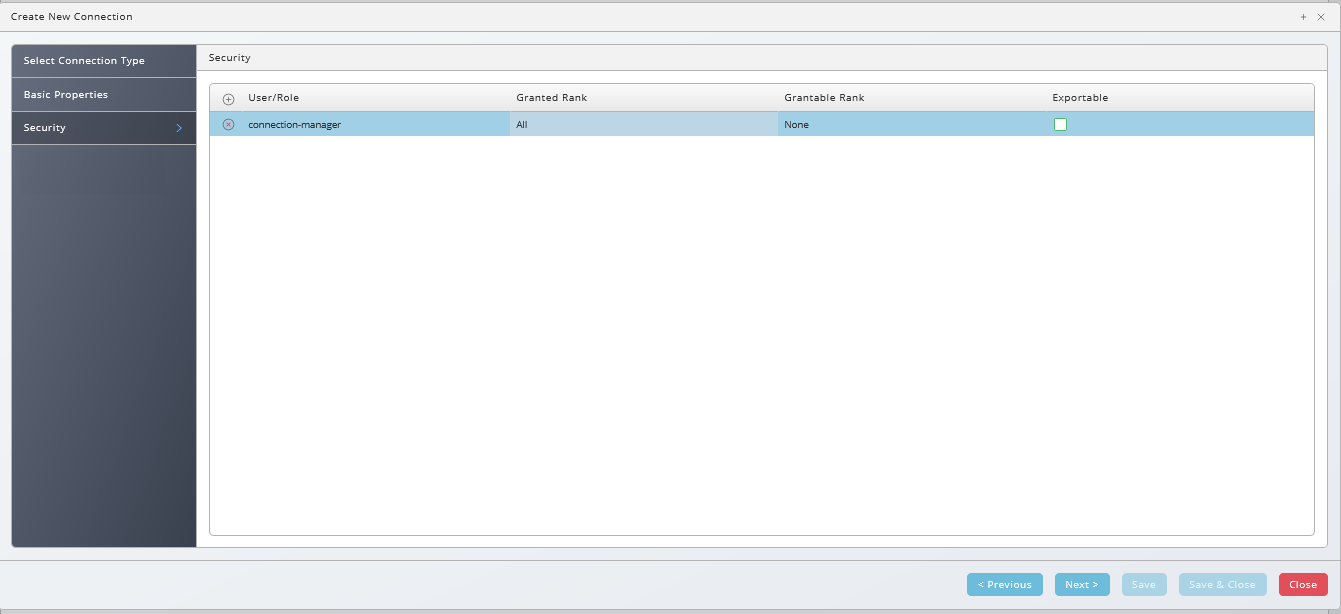
- Choose Next or Security, this is a screen for all components, choose
to specify which roles can access the connection information.
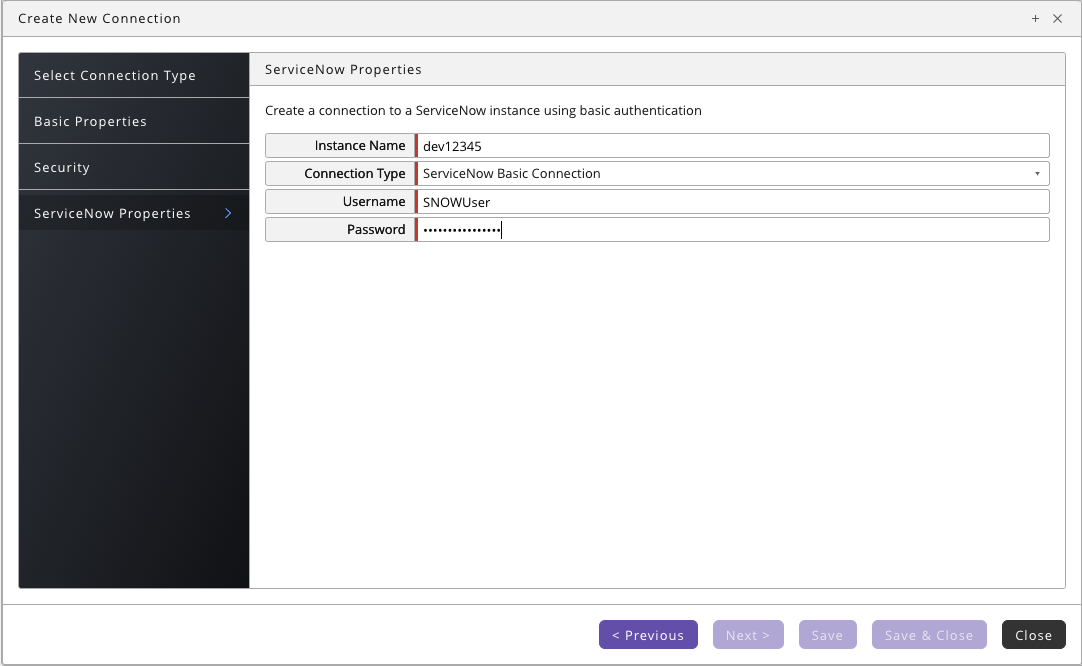
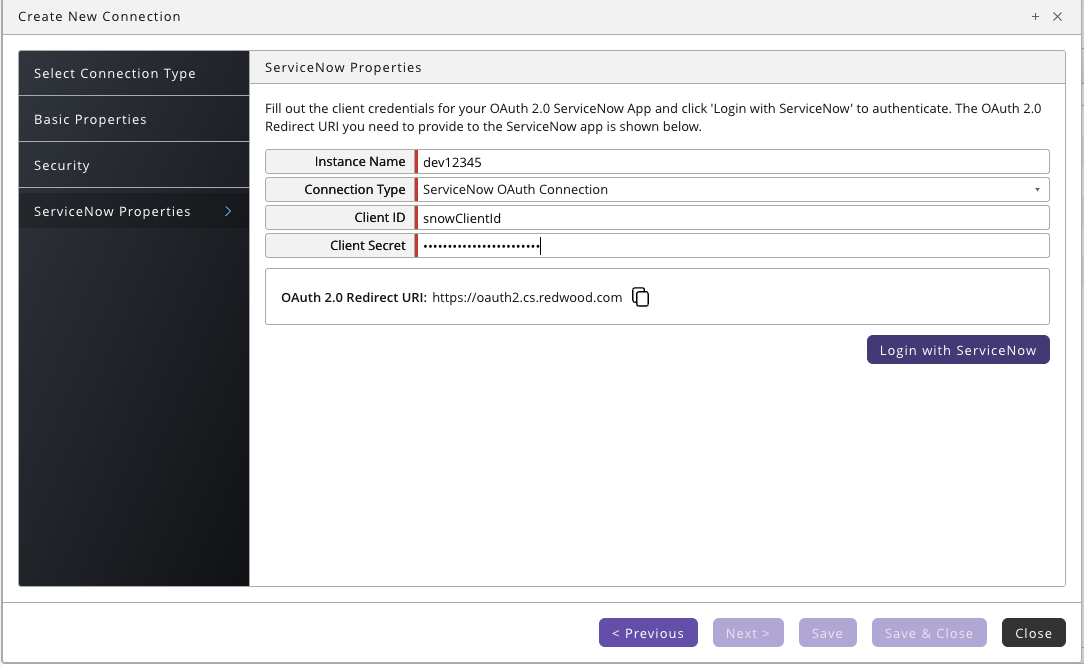
- Choose Next ServiceNow Properties, Here you choose between Basic and OAuth authentication:
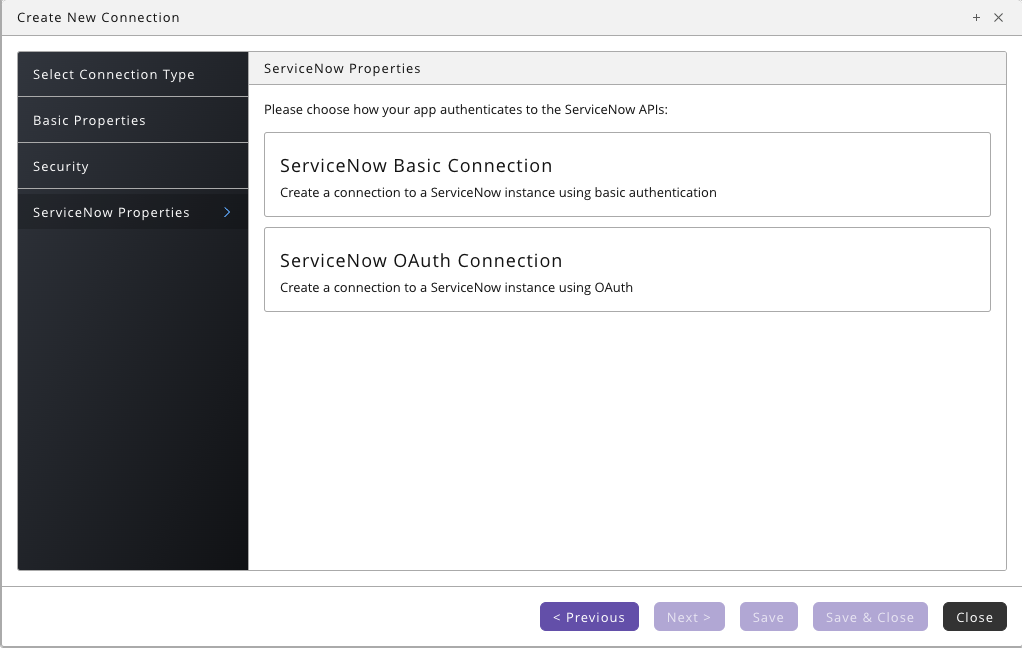
- For Basic authentication, you specify Instance Name, Username, and your Password.
- For OAuth authentication, you specify Instance Name, Client ID, and your Client Secret. After filling out the information, use the 'Login With ServiceNow' button to open a popup and log in to authorize RunMyJobs to connect to ServiceNow. After successfully logging in, close the dialog and save the connection.
- For Basic authentication, you specify Instance Name, Username, and your Password.
note
To use OAuth Authentication, OAuth must be enabled on your ServiceNow Instance, and you must create an "OAuth Endpoint for External Clients" using the Application Registries page in ServiceNow. Consult the ServiceNow documentation for more details about enabling OAuth. Once you have created the OAuth Application in ServiceNow, you can copy your Client ID and Client Secret from there into the RMJ connection.
Process Definitions
note
The Redwood Automation Connector application must be installed in the target ServiceNow instance before the Process Definitions can be used. See the Redwood Automation Connector section below for details.
Redwood_SNOW_CreateIncident
Create a ServiceNow Incident. Provide the details required to create the incident, and the new Incident Number is returned as an Output Parameter after the Process completes successfully.
Parameters
| Name | Description | Documentation | Data Type | Direction |
|---|---|---|---|---|
| connection | Connection | The Connection object that defines the connection to the ServiceNow application. | String | In |
| description | Description | Description of the incident to create | String | In |
| shortDescription | Short Description | Short description of the incident to create | String | In |
| impact | Impact | Impact of the incident to create | String | In |
| urgency | Urgency | Urgency of the incident to create | String | In |
| assignmentGroup | Assignment Group | Assignment Group of the incident to create | String | In |
| UserMessage_UniqueId | Reference Business Key | Local object for which responses need to be included in the incident request | Number | In |
| sysId | Sys Id | Sys Id of the created incident | String | Out |
| incidentNumber | Incident Number | The incident number of the created incident | String | Out |
| priority | Priority | Priority of the created incident | String | Out |
Redwood_SNOW_GetIncident
Fetch incident information from a ServiceNow instance. Provide the Incident Number of the incident to fetch, and its details will be printed to the stdout.log file and also in a job file called IncidentInfo.rtx which can be used if downstream processing is required.
Parameters
| Name | Description | Documentation | Data Type | Direction | Default Expression | Values |
|---|---|---|---|---|---|---|
| connection | Connection | The Connection object that defines the connection to the ServiceNow application. | String | In | ||
| incidentNumber | Incident Number | The incident number of the incident to retrieve (example: INC0010023) | String | In | ||
| displayValue | Display Value | Whether the Display Value should be returned or the raw table values. | String | In | N | Y: Returns the display values for all fields. N: Returns the actual values from the database. |
| incidentInfo | Incident Info | Table | Out |
Redwood_SNOW_RunJob
Execute a script that is defined in the Background Jobs section of the Redwood Automation Connector ServiceNow application. See the Redwood Automation Connector section of the document for more details about creating Background Jobs.
Note about Logging: It is not possible to automatically correlate logs in ServiceNow to a particular job. If you would like log entries from the job to be written to the stdout.log file of the Redwood Process, add a prefix (e.g. "Job1:" to all of your log messages in the ServiceNow script, then add that same prefix as the value of the logPrefix parameter. Any log entries with that prefix will be collected and added to the log file of the Redwood process.
Parameters
| Name | Description | Documentation | Data Type | Direction |
|---|---|---|---|---|
| connection | Connection | The Connection object that defines the connection to the ServiceNow application. | String | In |
| jobName | Job Name | The name of the ServiceNow job to run | String | In |
| logPrefix | Log Prefix | Fetch log entries based on this prefix | String | In |
| sysId | Sys Id | Sys Id of the started run job | String | Out |
Redwood_SNOW_UpdateIncidentTemplate
Template for updating one or more fields of an existing incident in ServiceNow. To use this, clone the template to create a new definition. In the cloned definition, provide the connection name and the incident number to update. If you are providing a default connection, use this syntax: EXTConnection:Partition.ConnectionName, e.g. EXTConnection:GLOBAL.ServiceNowConnection.
Any fields you want to update can be added as Job Parameters in the parameter group called 'Update Fields'. The name of the parameter should be the name of the Incident Field from the incident schema (e.g. short_description). The value of the parameter is the value to assign to that field.
Some default parameters are provided on the template as an example, but you can remove those or add different ones as needed. Only the fields specified as parameters on the Process will be updated.
Parameters
| Name | Description | Documentation | Data Type | Direction |
|---|---|---|---|---|
| connection | Connection | The Connection object that defines the connection to the ServiceNow application. | String | In |
| incidentNumber | Incident Number | The incident number of the incident to retrieve (example: INC0010023) | String | In |
| state | State | The updated State value for the incident | String | In |
| impact | Impact | The updated Impact value for the incident | String | In |
| urgency | Urgency | The updated Urgency value for the incident | String | In |
| short_description | Short Description | The updated Short Description value for the incident | String | In |
| description | Description | The updated Description value for the incident | String | In |
| sysId | Sys Id | Sys Id of the updated incident | String | Out |
Redwood_SNOW_UserMessageTemplate
Template User Message that will create a ServiceNow Incident and can be responded to from ServiceNow.
Usage: The User Message template can be used to create an incident from an RMJ workflow and wait for a response before continuing. For example, If a process fails, the next step in the chain can be a clone of this User Message Template that creates an incident in ServiceNow. The User Message Process will then wait for a response before completing.
Unlike the Create Incident Process, when an Incident is created from this User Message template, it will appear in the Incidents view in the Redwood Automation Connector application in ServiceNow. From there, a ServiceNow user can choose one of the Response options provided by the User Message. When that is done, ServiceNow will send the UserMessage response to Redwood, the User Message process will complete, and the workflow can continue.
Note: This User Message is a Template definition and cannot be modified directly. You must create a new User Message definition from the template, then provide the details for the connection, the incident to create, and the desired response options.
Parameters
| Name | Description | Documentation | Data Type | Direction | Default Expression | Values |
|---|---|---|---|---|---|---|
| connection | Connection | The Connection object that defines the connection to the ServiceNow application. | String | In | ||
| description | Description | Description of the incident to create | String | In | ||
| shortDescription | Short Description | Short description of the incident to create | String | In | ||
| impact | Impact | Impact of the incident to create | String | In | ||
| urgency | Urgency | Urgency of the incident to create | String | In | ||
| assignmentGroup | Assignment Group | Assignment Group of the incident to create | String | In | ||
| UserMessage_Attach | Attach notification? | Attach the notification Task to this user message? | String | In | Y | |
| NotificationJob | Notification definition to be started | The value of this parameter is expected to be in business key format ( like JobDefinition:PartitionName.My_System_UserMessage_Notification ) | String | In | JobDefinition:REDWOOD.Redwood_SNOW_CreateIncident | |
| UserMessage_SelectedAction | Selected action | String | Out | |||
| UserMessage_Comment | Provided comment | String | Out | |||
| UserMessage_NotifyMethod | Notify Method | String | InOut | UserMessageNotificationMethod |
Example Use Case: Create a ServiceNow Incident from an Alert
One use case of this connector could be to automatically create a ServiceNow incident when a RunMyJobs alert is raised. Use the instructions and sample code below as a starting point for that setup.
- Create an alert source
- Create a Process Alert Source or Process Server Alert Source and configure it to raise an alert for the desired objects and events.
- Create an Alert Gateway that will perform the action to create the incident
- Create a new Email Alert Gateway. Provide a Name, Partition, and optionally a Description and Application.
- Set the Address Pattern to an alias or address that matches the address in the desired Alert Source(s).
- Click the '+' button next to the Headers tab, and select Actions from the drop-down menu to create a new 'Pre-Send' Action.
- Select an action subject. This is the context that will be used to process the action. The chosen subject must have Read permission on the desired ServiceNow Connection, and Submit permission on the Redwood_SNOW_CreateIncident Process Definition.
- Add code to the Source field to submit the Redwood_SNOW_CreateIncident definition to create a ServiceNow incident when the alert is raised. Use the sample code below as a starting point. At a minimum, you will need to change the value of the 'connectionKey' variable to the correct value for your confifgured ServiceNow connection.
{
  Alert alert = jcsEmailAlertGatewayPreSendActionContext.getAlert();

  // Prevent sending the email since we want to create an incident instead
  jcsEmailAlertGatewayPreSendActionContext.setSend(false);

  // Reply to the Operator Message and acknowledge the alert
  OperatorMessage operatorMessage = alert.getOperatorMessage();
  operatorMessage.setReply("Acknowledged");
  alert.setStatus(AlertStatus.Acknowledged);

  // Set up the business key for the ServiceNow connection to use.
  // It must be in the format "EXTConnection:<ConnectionPartition>.<ConnectionName>",
  // EXAMPLE: EXTConnection:GLOBAL.MyServiceNowConnection
  String connectionKey = "EXTConnection:GLOBAL.MyServiceNowConnection";

  // Prepare the incident descriptions based on the object type that caused the alert
  String shortDescription = "";
  String description = "";
  SchedulerEntity schedulerEntity = operatorMessage.getSenderObject();
  if (schedulerEntity instanceof Job)
  {
    Job requestingProcess = (Job)schedulerEntity;
    shortDescription = "Job " + requestingProcess.getJobId() + " " + requestingProcess.getDescription() + " ended in status " + requestingProcess.getStatus();
    description = "Job " + requestingProcess.getJobId() + " " + requestingProcess.getDescription() + " ended in status " + requestingProcess.getStatus();
  }
  else if (schedulerEntity instanceof ProcessServer)
  {
    ProcessServer requestingProcessServer = (ProcessServer)schedulerEntity;
    shortDescription = "Process Server " + requestingProcessServer.getName() + " is in status " + requestingProcessServer.getStatus();
    description = "Process Server " + requestingProcessServer.getName() + " is in status " + requestingProcessServer.getStatus();
  }
  else
  {
    return;
  }

  // Submit the job to create the incident
  JobDefinition jd  = BusinessKeyLookup.getJobDefinitionByBusinessKey(jcsSession, "REDWOOD.Redwood_SNOW_CreateIncident");
  Job process = jd.prepare();
  process.getJobParameterByName("connection").setInValueString(connectionKey);
  process.getJobParameterByName("shortDescription").setInValueString(shortDescription);
  process.getJobParameterByName("description").setInValueString(description);
  process.getJobParameterByName("impact").setInValueString("3 - Low");
  process.getJobParameterByName("urgency").setInValueString("3 - Low");
  process.getJobParameterByName("assignmentGroup").setInValueString("Scheduling Alerts");
}
Redwood Automation Connector ServiceNow Application
The Redwood Automation Connector is an application that is available in the ServiceNow app store. It provides tables, views, and additional functionality in ServiceNow to provide two-way communication with the Redwood Scheduler.
Installation
Follow the instructions on the Redwood Automation Connector listing in the ServiceNow App Store to install the Redwood Automation Connector application into your ServiceNow instance.
Provided Components
Configuration
The Redwood Automation Connector provides a Guided Setup page (Redwood Guided Setup) to guide you through the configuration process. The configuration process should be performed by someone with administrative permissions in ServiceNow. They will need permissions to create the integration user, and also need the x_rsnbv_redwood_nw.admin role to be able to see and edit the configuration page.
Set up an Integration user: This is the user that you will use in the ServiceNow Connection object in the Redwood Scheduler to perform the actions in ServiceNow. Grant the user the roles defined in the setup process.
Configuration Page:
- API Details: Here you can configure the connection information for the Redwood Scheduler. This section is only required if you plan to use the functionality where ServiceNow performs actions in the Redwood system (running Processes, responding to User Messages, etc). After you fill out all the details, use the Test Connection button to test the connectivity to the Redwood Scheduler.
tip
If you only want to use a one way integration from Redwood to ServiceNow (using the Redwood process definitions to create/update ServiceNow incidents), then you can skip this section.
* Redwood Instance URL: This is the full URL for the extension point in your scheduler. This should be: <your redwood scheduler endpoint>/api-extension/External/REDWOOD/Redwood_ServiceNow/rest/v1. Example: https://region.runmyjobs.cloud/mycompany/test/api-extension/External/REDWOOD/Redwood_ServiceNow/rest/v1
* Redwood Application API Key: To communicate with the Redwood Scheduler, a valid API Key is required. Follow the instructions on the [API Key Component](APIKeyComponent) page to create an API key for the desired user, then paste the key value into this field in ServiceNow.
* Mid Server: If your scheduler is not directly accessible from ServiceNow, the communication from ServiceNow to the Scheduler can be routed through a mid server. Provide the name of an existing Mid Server that has connectivity to the Redwood Scheduler.
* ServiceNow Integration User: Enter the name of the Integration User that was created during the guided setup.
- Incident Management: This section allows you to provide default values for some incident fields for incidents that are created by the Redwood Scheduler. Use these fields to provide default category, sub-category, configuration item, and contact type if desired.
Available Actions
The following actions are available in the Redwood Automation Connector application:
Responding to Redwood Incidents
The Incidents view in the Redwood Automation Connector is different from the regular Incidents table. This will only show incidents that were created from the Redwood Platform that require some type of response (e.g. an incident created from the Redwood_SNOW_UserMessage). When you click on one of the incidents from this table view, you will see a Process Remediation tab with a drop-down that allows you to select an option. These options directly map to the options that were provided by the Redwood User Message. When you select an option and click 'Execute', the connector will respond to the User Message that opened the incident, allowing the Redwood workflow to continue.
Required Roles: x_rsnbv_redwood_nw.user
Configuring Background Jobs
In the Background Jobs view, you can configure scripts to run either on a schedule or on-demand to perform actions in the ServiceNow platform. These scripts can be invoked from the Redwood Scheduler using the Redwood_SNOW_RunJob definition.
Log messages from these scripts (output from gs.info() statements or error details if the script fails) can be found in the Redwood Logs view.
Required Roles: x_rsnbv_redwood_nw.admin
Importing and Running Redwood Processes
The Redwood Automation Connector allows you to invoke Redwood Processes from within ServiceNow. To import Redwood Processes into ServiceNow, use the Gather Processes button on the App Configuration page (this will only work after you have configured the connection to the Redwood Scheduler). When you do this, any Redwood Processes that have been exported as a Web Service will be imported into the ServiceNow instance. You can see the list of imported processes in the Redwood Processes view in the Redwood Automation Connector application.
To run a process, select it from the list in the Redwood Processes view. On the page that opens describing the Process, click the Submit Published Process button. This will open a dialog allowing you to configure details for the process run, such as the Description, Queue, Submit Frame, and process parameters.
Required Roles:
- x_rsnbv_redwood_nw.admin to import processes from the Configuration page
- x_rsnbv_redwood_nw.user to view the Redwood Processes page
