Azure Data Factory Connector
Prerequisites
- Version 9.2.9 or later
- Connections component (automatically installed by Catalog)
- Azure Subscriptions component (automatically installed by Catalog)
- Privileges Required to use Azure Subscriptions
- Privileges Required to use Azure Data Factory
Installation
You use the catalog to locate the Azure DataFactory component in the Catalog, select version 2.0.0.0 and install it.
In order to connect to your Data Factory instance, you need to create an app registration with a service principle in Azure Active Directory. (see https://docs.microsoft.com/en-gb/azure/active-directory/develop/howto-create-service-principal-portal#register-an-application-with-azure-ad-and-create-a-service-principal). This client application needs to be assigned the Data Factory Contributor permission.
From the app registration register the following settings:
- Tenant ID
- App/Client ID
- Client Secret
- Subscription ID
And from the Data Factory:
- Resource Group Name
- Factory Name
With this information you create a Connection and one or more Azure Subscriptions to connect to Data Factory.
- Navigate to Custom > Connections and choose
.
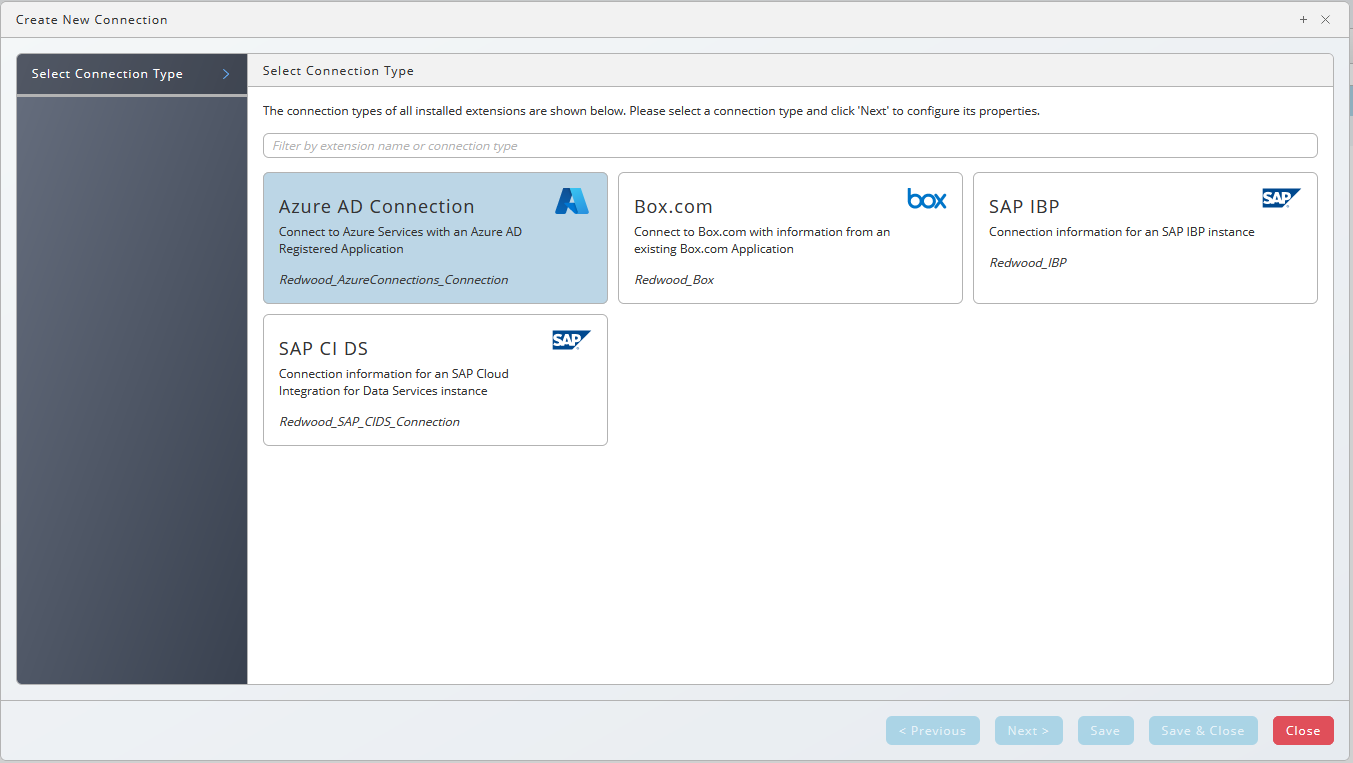
- Choose Azure under Select a Connection Type.
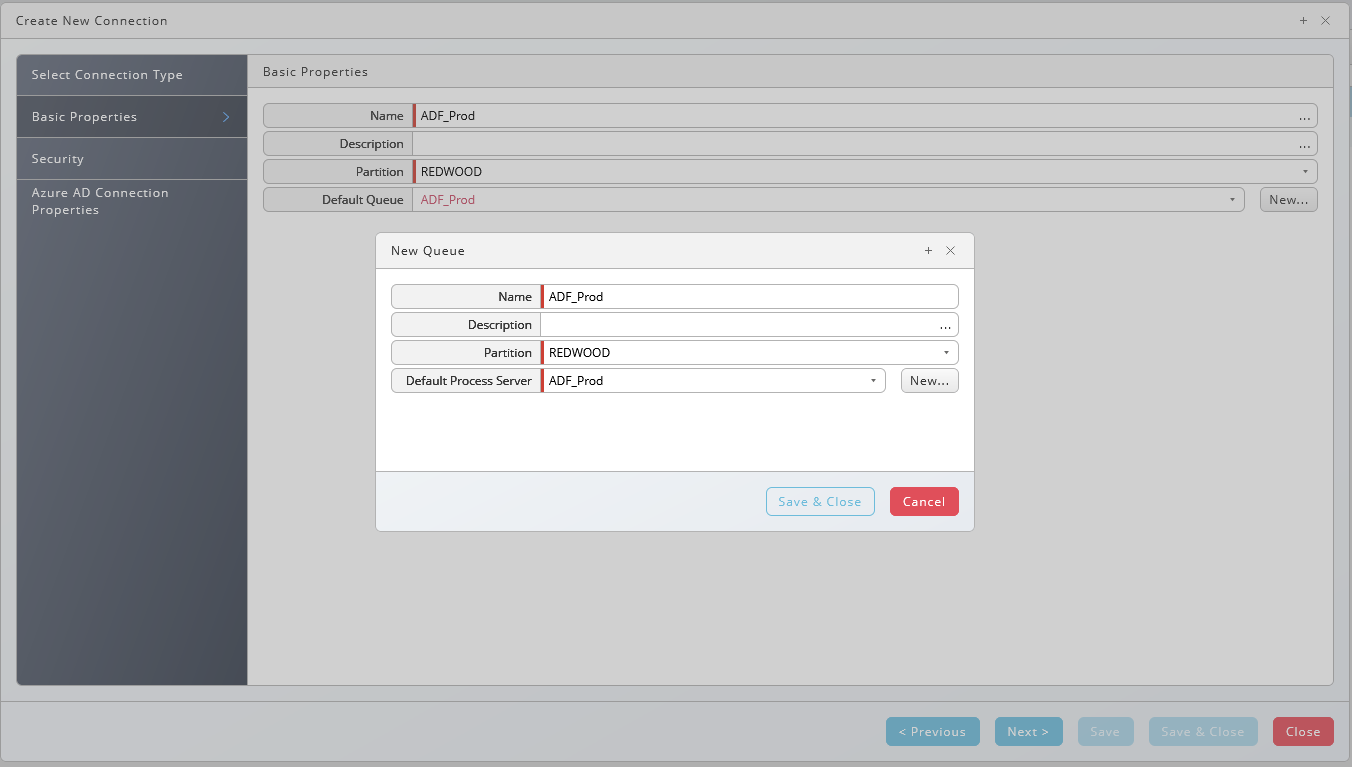
- Choose Next or Basic Properties, you create a queue and process server for your Azure connection, all required settings will be set automatically. The process server needs the ServiceForRedwood_DataFactory process server service.
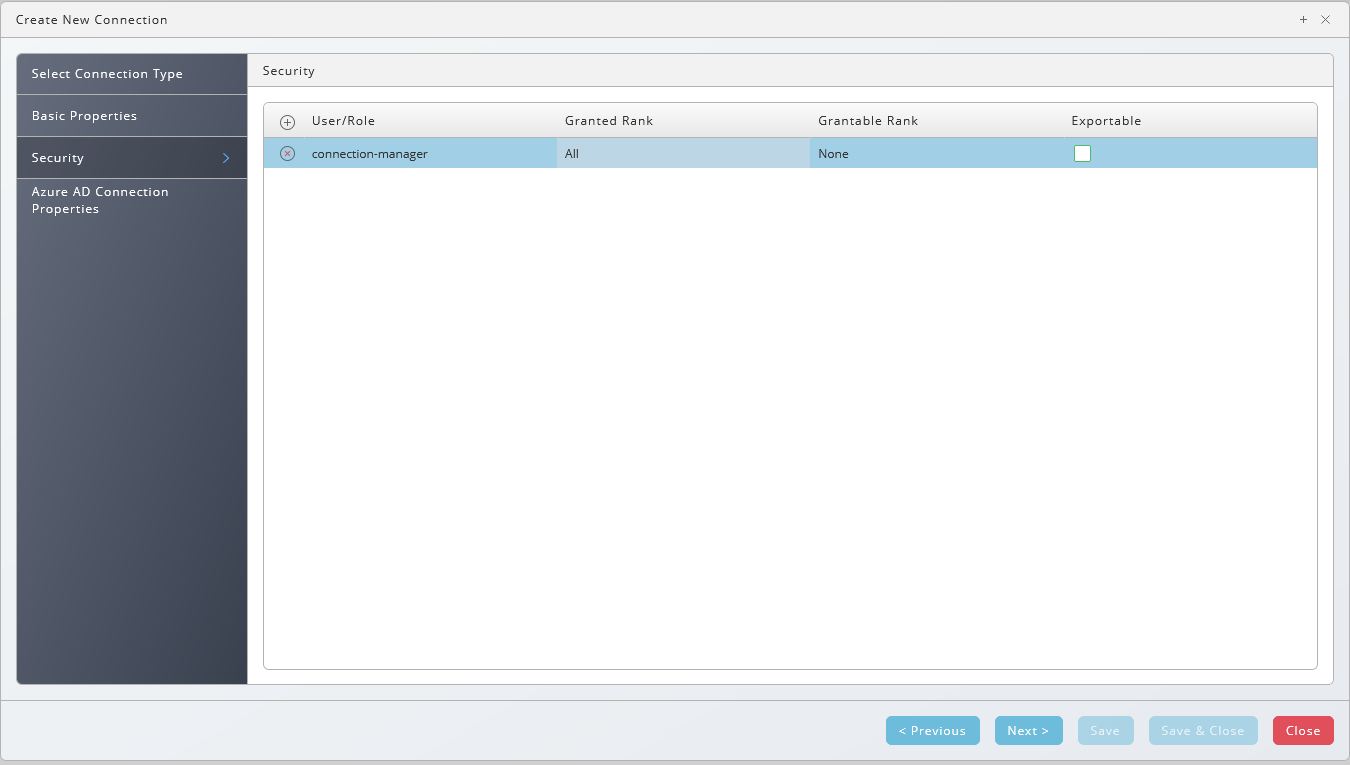
- Choose Next or Security, this is a screen for all components, choose
to specify which roles can access the connection information. It is recommended to grant the role at least the following additional privileges: View on the DataFactory process server and ServiceForRedwood_DataFactory service, View Processes on the DataFactory queue, View on library Redwood_DataFactory, and Submit on any process definitions users with this role are to submit.
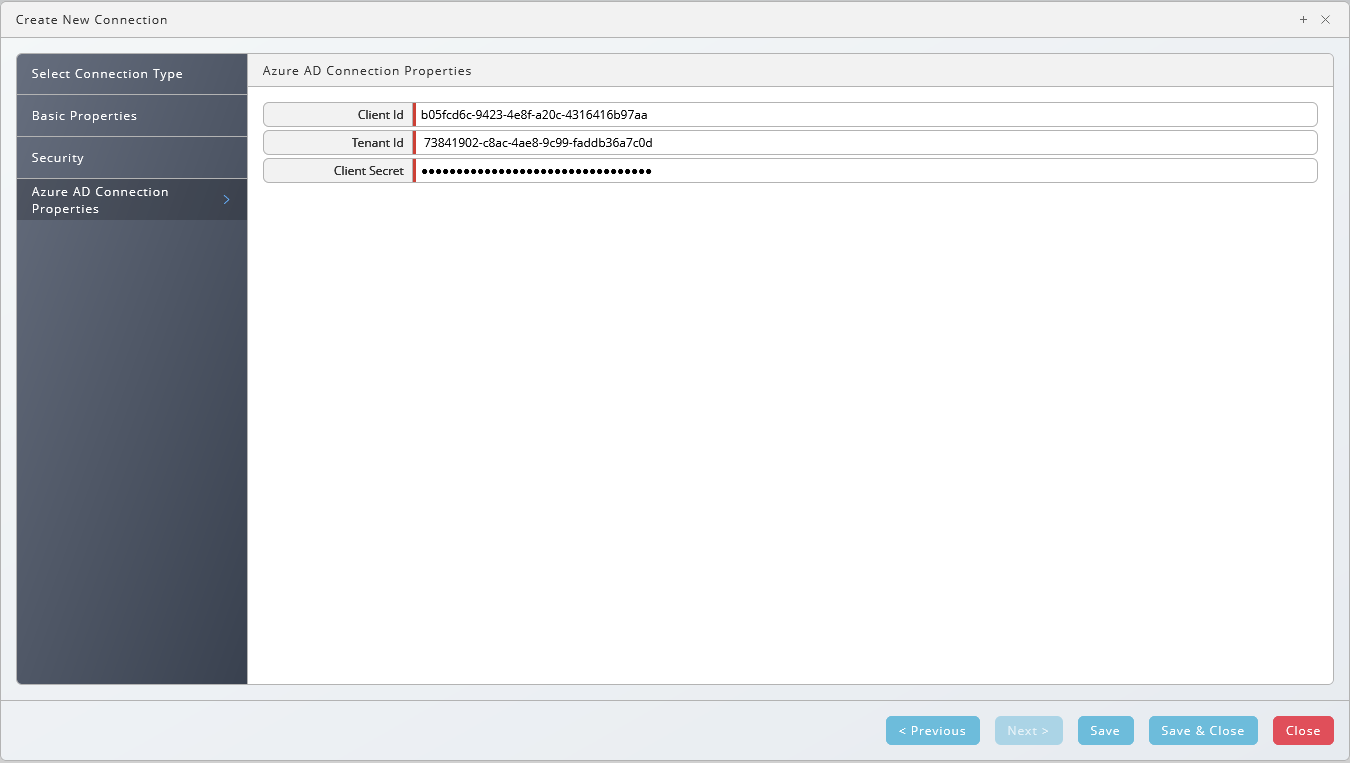
- Choose Next or Azure AD Connection Properties, fill Client ID, Tenant ID, and Client Secret fields; choose Save & Close.
Contents of the Component
| Object Type | Name |
|---|---|
| Application | GLOBAL.Redwood.REDWOOD.DataFactory |
| Process Definition | REDWOOD.Redwood_DataFactory_ImportJobTemplate |
| Process Definition | REDWOOD.Redwood_DataFactory_ShowPipelines |
| Process Definition | REDWOOD.Redwood_DataFactory_RunPipeline |
| Process Definition | REDWOOD.Redwood_DataFactory_Template |
| Library | REDWOOD.DataFactory |
| Process Server Service | REDWOOD.ServiceForRedwood_DataFactory |
Running Data Factory Processes
The Resource Group name is defined on the Azure Subscription.
Finding Data Factory Pipelines
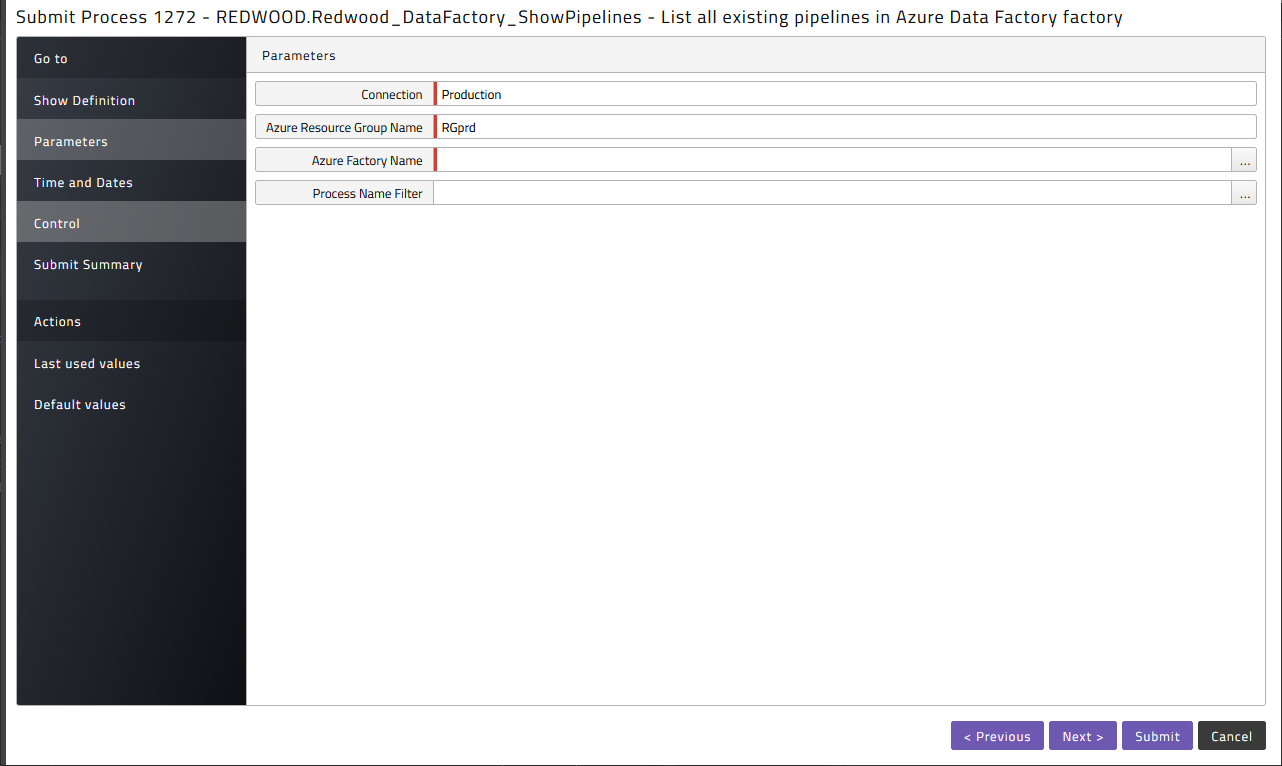
To retrieve the list of pipelines available for scheduling got to the Redwood_DataFactory application, navigate to Applications > Redwood_DataFactory > DataFactory_ShowPipelines and submit it.

Select a Connection, the Resource Group Name and the Factory Name you want to list the pipelines from. You can filter the list by adding a Process Name filter.
Once the process has finished, choose stdout.log, and you will see the output as follows:

Here you can find the value later used as pipeline name, the first element straight after the index.
Schedule a Data Factory Pipeline
In the Redwood_DataFactory application choose DataFactory_RunPipeline and submit it

Again, specify the Subscription Id, the Resource Group Name and the Factory Name you want to run the pipelines from, as well as the name of the pipeline to execute.
Import Pipelines as Process Definitions
Submit DataFactory_ImportJobTemplate to import a pipeline as a process definition.
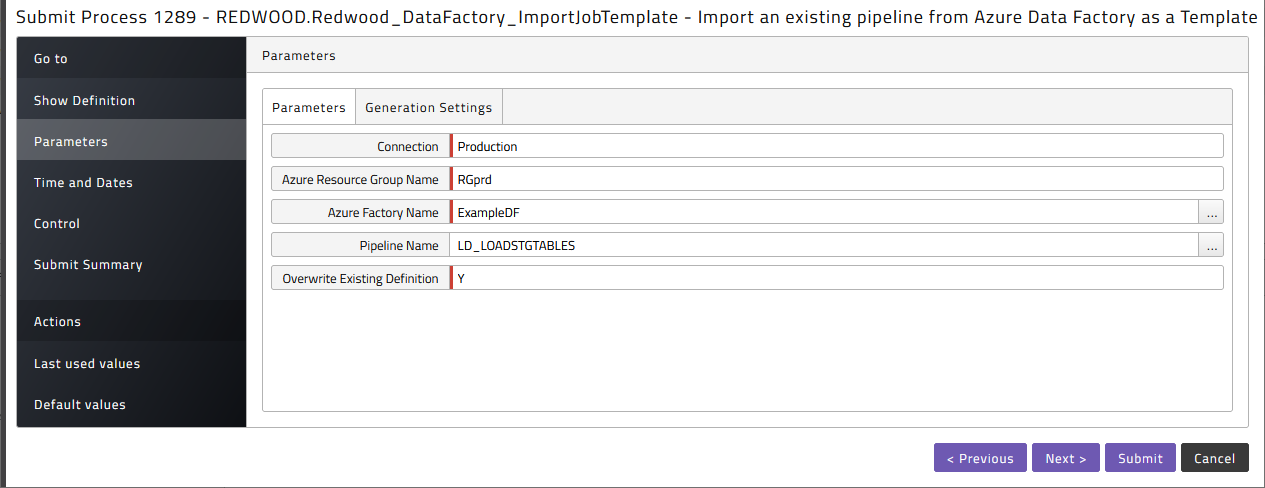
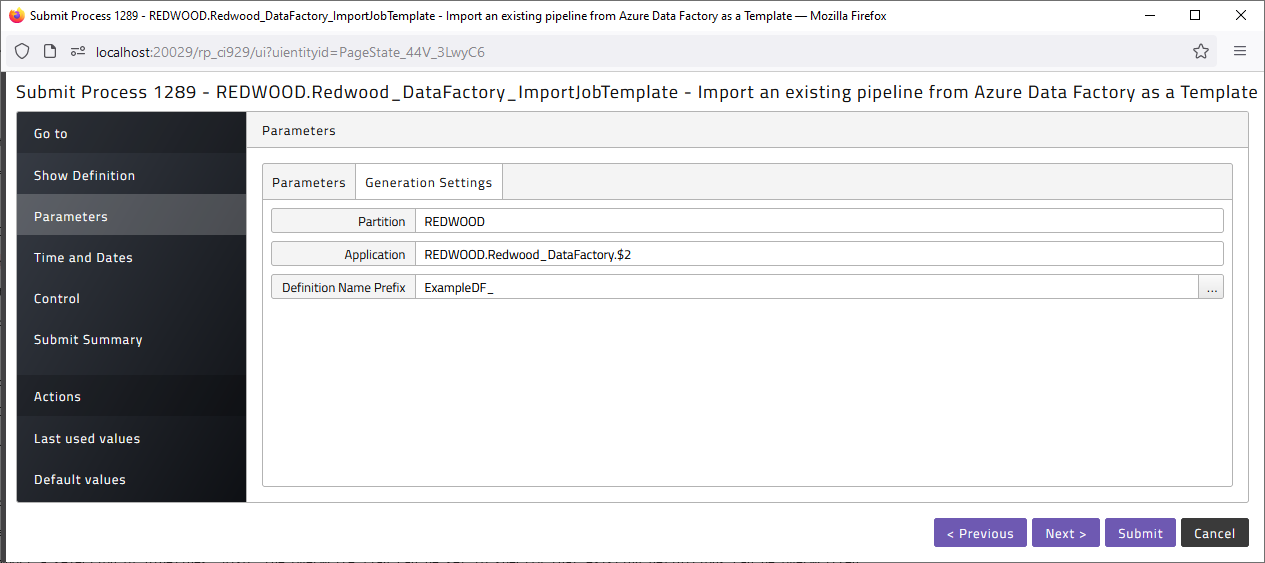
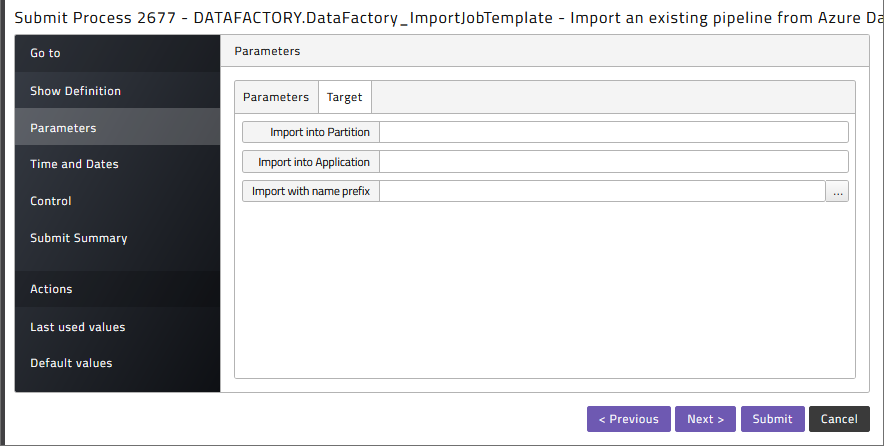
Here the pipeline name can be used to only import a selection of pipelines. Also, the Overwrite flag can be set to specify that existing definitions can be overwritten. On the Target tab it allows you to specify a target Partition, Application and prefix for the generated definition:
Troubleshooting
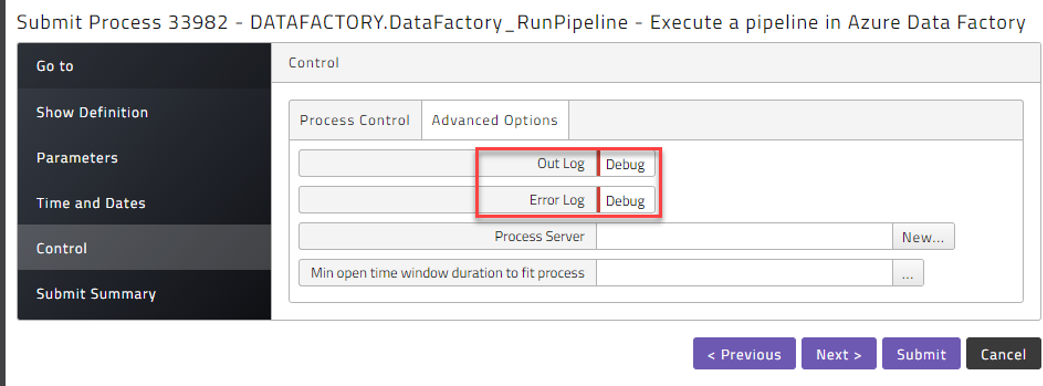
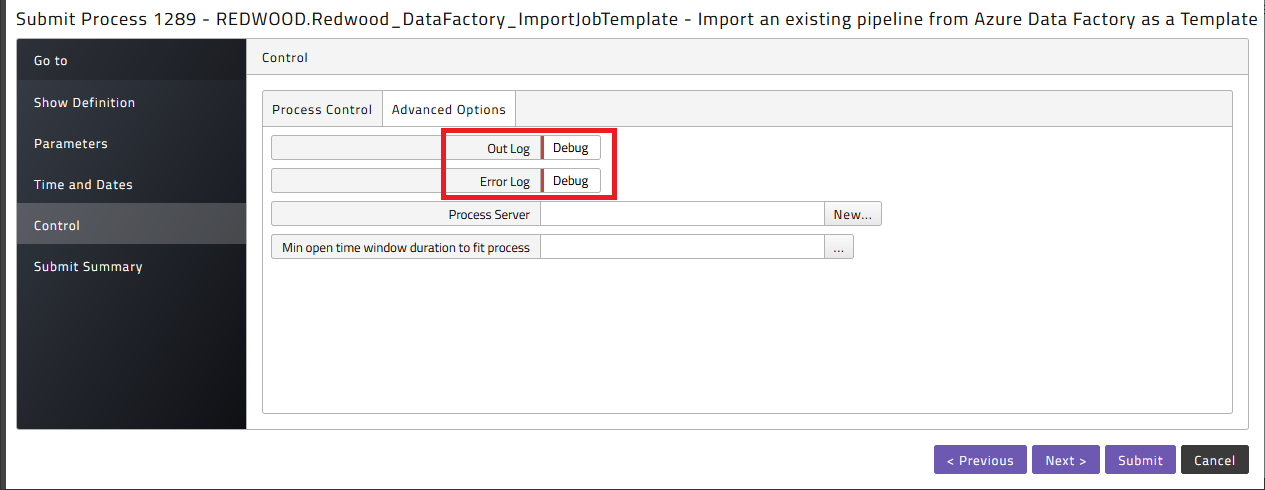
In the Control step of the submit wizard, where you select the queue, you can add additional logging to stdout.log by selecting debug in the Out Log and Error Log fields on the Advanced Options tab.
Prerequisites
The Redwood Azure Data Factory is packaged as a separate car file.
- Central Redwood server 9.2.6 or later
data-factory.carfile for import
Installation
The .car file can be installed using standard promotion. By default, the Data Factory car file requires the Partition DATAFACTORY to exist before it can be imported.
Please create this Partition before importing or select an existing Partition when importing.
Contents of the car file
The car file consists of the following objects:
| Object Type | Name |
|---|---|
| Application | DATAFACTORY.Redwood_DataFactory |
| Process | Definition DATAFACTORY.DataFactory_ImportJobTemplate |
| Process | Definition DATAFACTORY.DataFactory_ShowPipelines |
| Process | Definition DATAFACTORY.DataFactory_RunPipeline |
| Process | Definition DATAFACTORY.DataFactory_Template |
| Library | DATAFACTORY.Redwood_DataFactory |
Setup
Data Factory processes need their own Process Server and Queue. The Process Server and Queue must not be in Partition GLOBAL. By default, all the Data Factory objects live in the Partition DATAFACTORY in on-premises environments and your Partition in cloud environments.
In order to connect to your Data Factory instance, you need to create an app registration with a service principle in Azure Active Directory. (see https://docs.microsoft.com/en-gb/azure/active-directory/develop/howto-create-service-principal-portal#register-an-application-with-azure-ad-and-create-a-service-principal). This client application needs to be assigned the Data Factory Contributor permission.
From the app registration register the following settings:
- Tenant ID
- App/Client ID
- Client Secret
- Subscription ID
And from the Data Factory:
- Resource Group Name
- Factory Name
With this information we can setup a Credential to connect to Data Factory:
- Partition: Generally, Credentials need to be either in the Partition of your Process Server or in Partition GLOBAL; with this connector, the Process Server must not reside in GLOBAL, so the credential must not either.
- Protocol: soap
- Real User: App/Client ID
- Password: Client Secret
- Endpoint: Tenant ID
- Virtual User: the name of your Data Factory Process Server
Example of a credential:
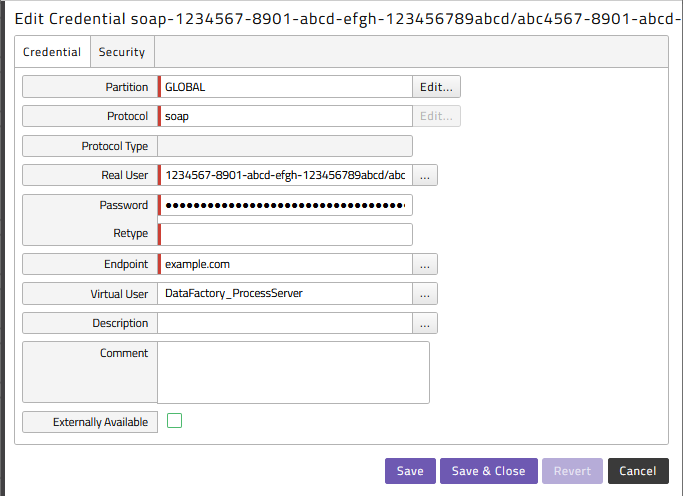
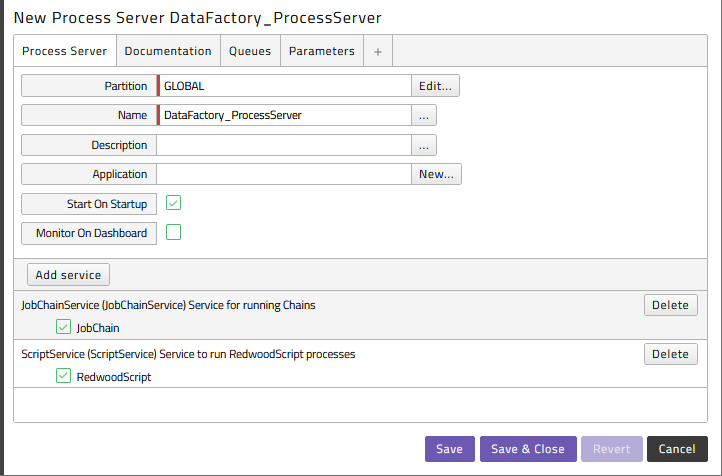
The Process Server DataFactory_ProcessServer is used as an example to set up the connection to a Data Factory instance system. In order to connect to more than one Data Factory system, duplicate the DataFactory_ProcessServer Process Server and create a new queue and a credential of type SOAP for that Data Factory system. Make sure that the ScriptService with the RedwoodScript definition type and the JobChainService with JobChain definition type are enabled on the Process Server.
Example of a process server:
Running Data Factory processes
Finding Data Factory pipelines
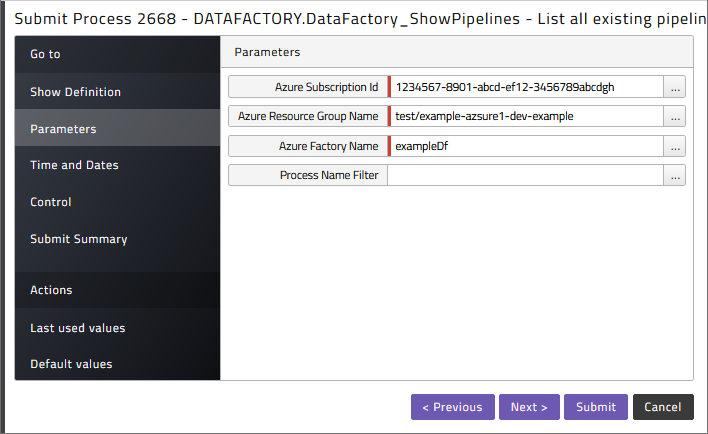
To retrieve the list of pipelines available for scheduling got to the Redwood_DataFactory application, click on Applications > Redwood_DataFactory > DataFactory_ShowPipelines and submit it.

Specify the Subscription Id, the Resource Group Name and the Factory Name you want to list the pipelines from. You can filter the list by adding a Process Name filter.
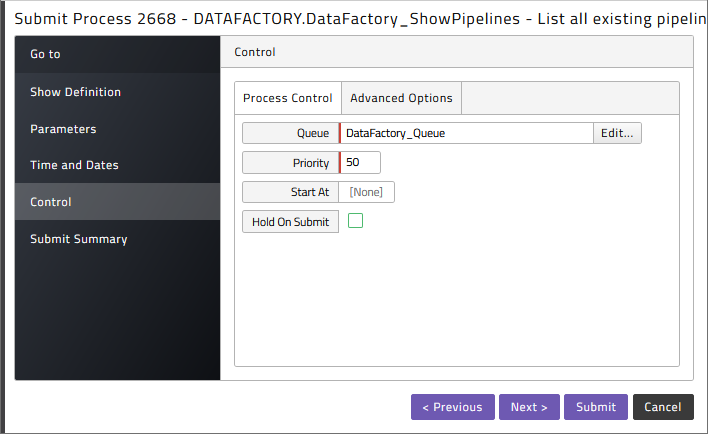
Select the correct Queue
Once the process has finished, click on the stderr.log, and you will see the output as follows:

Here you can find the value later used as pipeline name, the first element straight after the index.
Schedule a Data Factory pipeline
In the Redwood_DataFactory application choose DataFactory_RunPipeline and submit it
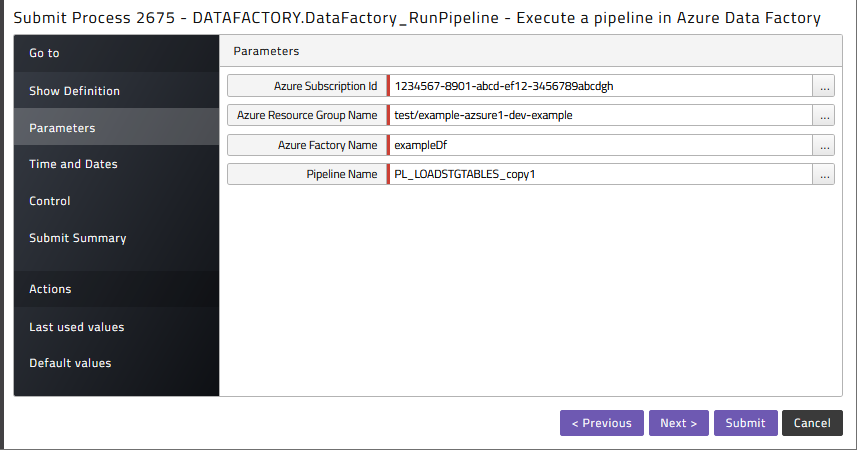
Again, specify the Subscription Id, the Resource Group Name and the Factory Name you want to run the pipelines from, as well as the name of the pipeline to execute.
Import Pipelines as Process Definitions
Submit DataFactory_ImportJobTemplate to import a pipeline as a process definition.
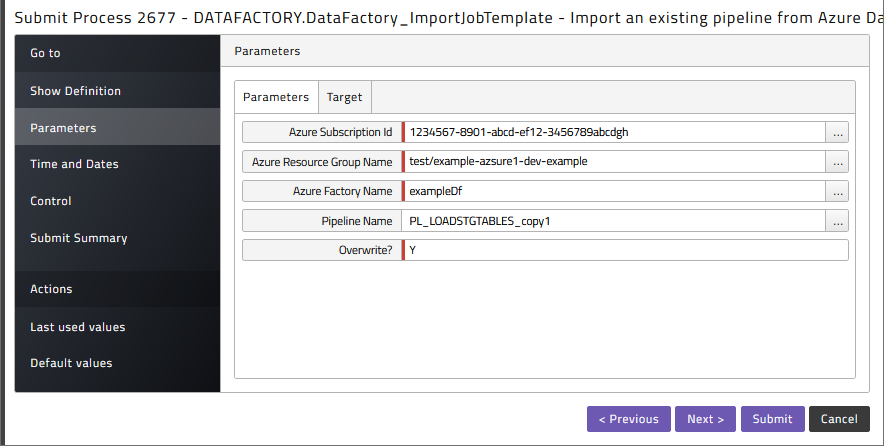
Here the pipeline name can be used to only import a selection of pipelines. Also, the Overwrite flag can be set to specify that existing definitions can be overwritten. On the Target tab it allows you to specify a target Partition, Application and prefix for the generated definition:
Troubleshooting
In the Control step of the submit wizard, where you select the queue, you can add additional logging to the output files by selecting debug in the Out Log and Error Log fields on the Advanced Options tab.
