 Inbox User Guide
Inbox
The Inbox allows a business user to interact with automated processes in order to respond to messages and requests within a workflow. The users gain access to all necessary data for interaction with the process workflows for which they are responsible. Filtering and grouping criteria help to localize and structure certain messages efficiently; these features include the ability to:
- Review data that has been created or collected by a process
- Provide structured data to the process
- Decide on how to proceed with the process
The Inbox offers additionally the opportunity to delegate messages and requests to other users and the ability to add additional documents and notes.
Open the Inbox
You can open the Inbox either from the Inbox tile on the Home screen or from the tool bar in the Control Center.
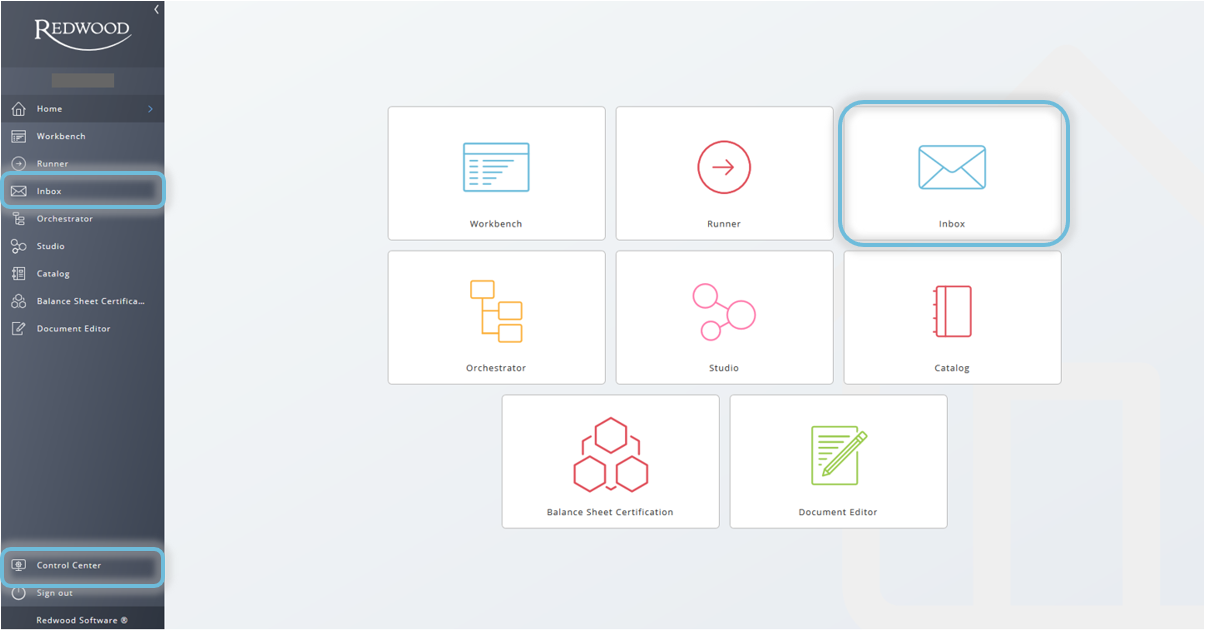
Figure 1: Open the Inbox from the Home Screen
To open the Inbox from the tool bar:
- Click Control Center at the bottom on the left-hand navigation bar.
- The Monitoring Dashboard will display in the main window pane.
- Click the Inbox icon on the tool bar that appears above the Monitoring Dashboard as shown in the image below.
- Tip: Hovering over the icons displays the name of each icon.
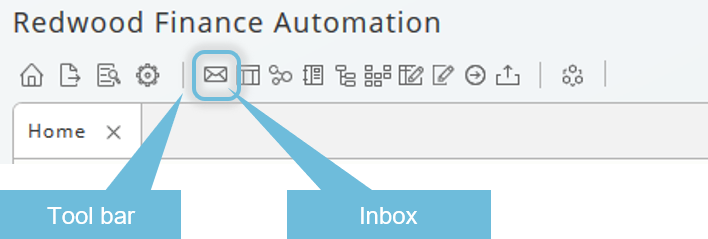
Figure 2: The Inbox Icon
Inbox - Overview
The Inbox has two sections:
- A list view of all messages assigned to the user in the upper panel
- The message details in the lower panel
The columns in the upper panel can be organized, adjusted, and grouped. Use filters to select specific messages.
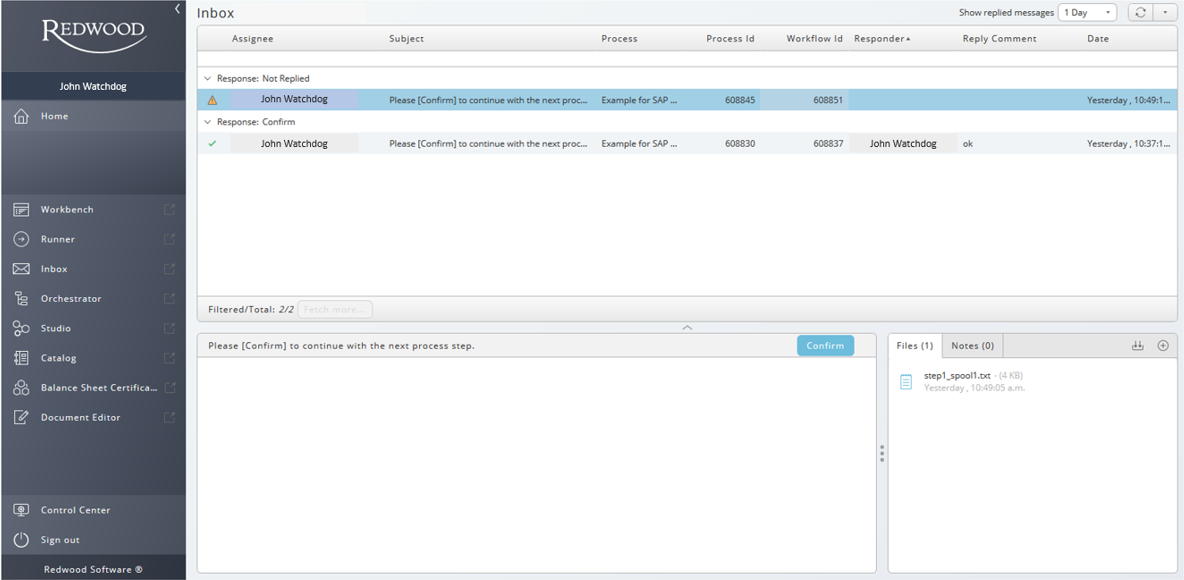
Figure 3: The Inbox
The blue line shows which message has been selected. The message details displayed in the lower panel are related to the message selection.
The size of the panes can also be adjusted. To resize the panels:
- Hover the mouse over the gray bars in between the panels.
- The cursor will become a double-sided arrow in areas that can be resized.
- Click and drag the panes vertically or horizontally to resize them.
To show or hide details, click on the Up or Down Arrow icons in between the upper and lower panes.
Use of the Inbox
There are three ways to use the inbox:
- Select and filter messages
- Review the details
- Choose an appropriate action
The different colors and icons shown on the envelopes on the left image border, as well as the column Replied help track the messages that have been responded to and the type of reply. Red indicates a negative reply, and green indicates a positive reply. Whether a reply is positive or negative depends on the current workflow configuration. For a multi-stage workflow, the Continue and Restart options can be positive, as opposed to the Abort option.
| Icon | Description |
|---|---|
| No reply given until now | |
| Negative reply | |
| Positive reply |
When no date appears in the Date column, that indicates the current date.
Column Chooser and Filters
To change the layout of the Inbox:
- Right click in the upper section of the Inbox.
- Choose Column Chooser from the Context menu dropdown.
- Drag and drop the column names from the Available Columns list to the Display Columns list, or reorder the Display Columns using the drag and drop functionality.
Within the Column Chooser there are three sections.
- Display Columns: The columns already displayed in the Inbox
- Available Columns: The available columns, or those which are removed from the view
- GroupBy Columns: Are already displayed and are used for grouping.
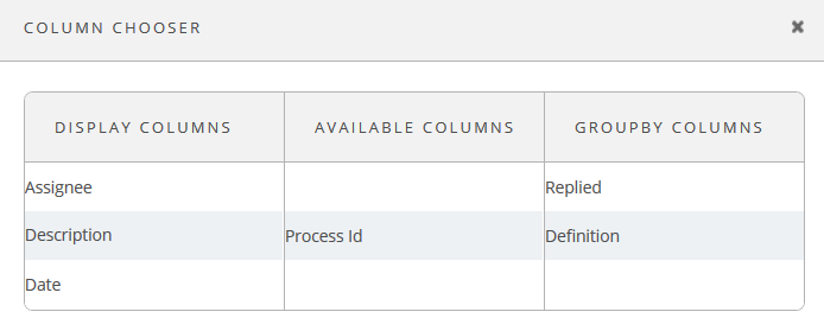
Figure 4: The Column Chooser
Filters can be added in the empty line between the column titles and the list of messages. The type of filter depends on the type of column, for example, adding a filter on the Subject column would require entering a string of characters.
An add filter tooltip appears when it is possible to add a filter.
In the image below the input "re" is enough to limit the list to all entries where the response was Reject.

Figure 5: Filtering the Response Column
When the column displays a number or date, sliders or calendars help filter specific ranges.

Figure 6: Filtering on the Process ID Column Displays a Slider

Figure 7: Filtering on the Date Column - Absolute versus Relative Dates
The filter is automatically active when the first entry is made. To deactivate the filter, click on the filter icon. Filters are temporary. If you close the Inbox, all filter settings are discarded.
Message Details
All relevant details of the process run are displayed in the lower section of the Inbox.
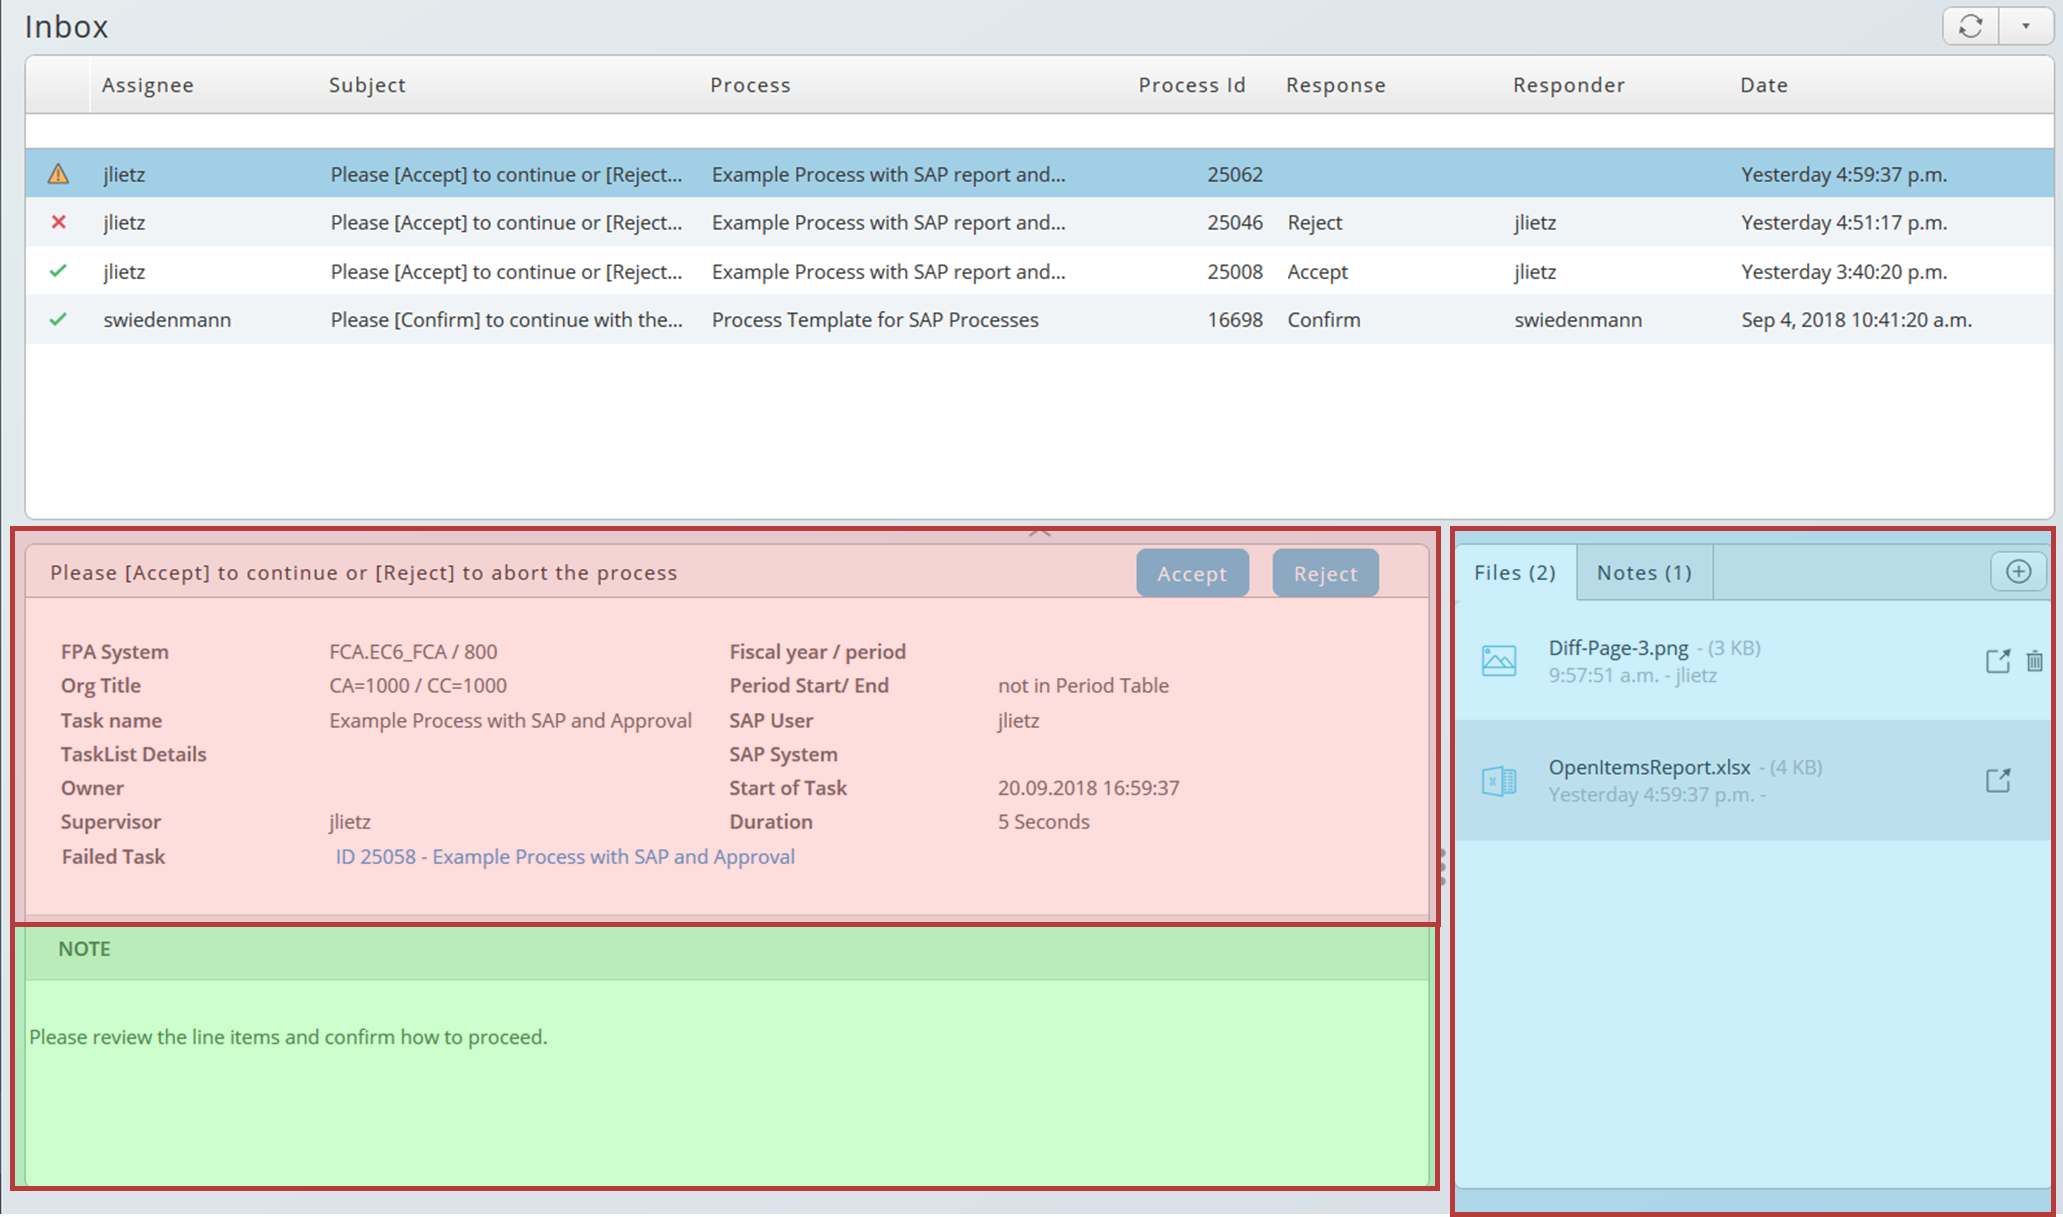
Figure 8: Message Details Section
- Red area: Organizational information, for example, Company Code or Supervisor
- Green area: Workflow-specific information and requests, depending on the design of the workflow
- Blue area: Files and notes, either delivered by the workflow or self-created
In the Files and Notes section, click on the left- or right-hand icons to open the file. Use the Trashcan icon to delete files. Deletion is only possible on files added by a user. Files delivered by the workflow and the automated process cannot be deleted.

Figure 9: Open Files and Notes Icons
note
In version 9.2.3 the Download and Download All buttons were added.
Add Additional Files and Notes
The Plus (+) icon in a circle on the top right indicates that additional notes or files can be added. File upload is only possible on messages that have not been replied to.
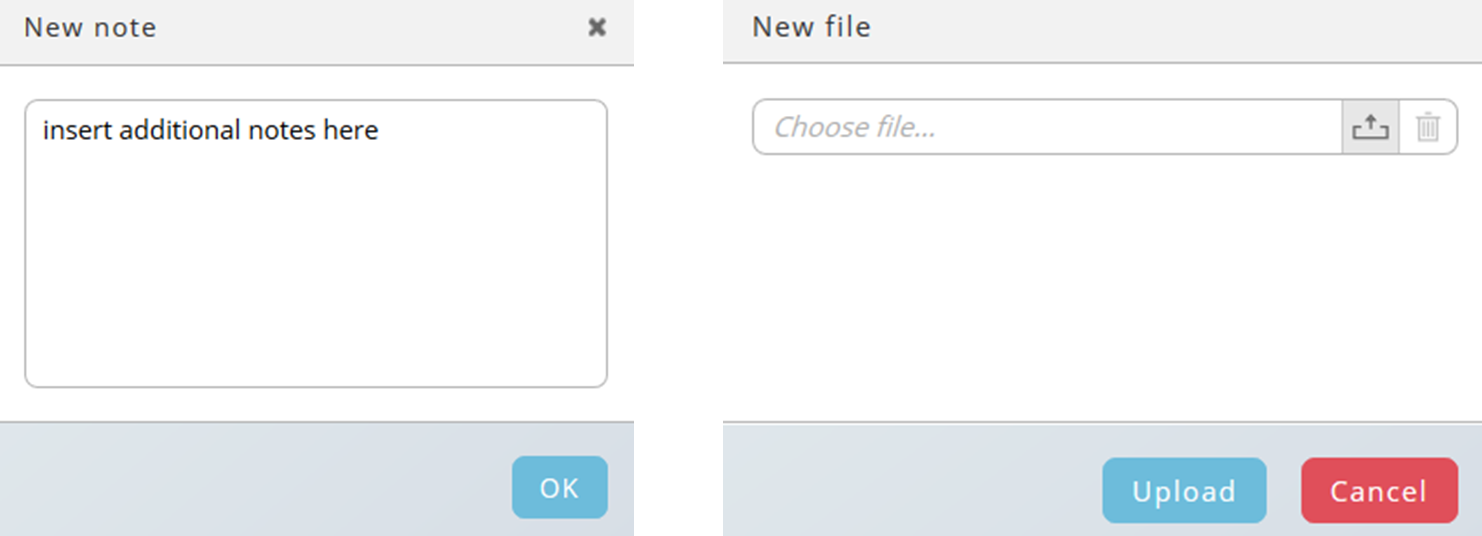
Figure 10: Add a New Note or File Prompts
The added notes or files will appear in the list with a time stamp, and they can be deleted by clicking on the Trashcan icon.
Actions
Right clicking in the upper section of the Inbox will display the Context menu, which contains available actions. On messages that have not been replied to, the entire list of options is displayed.
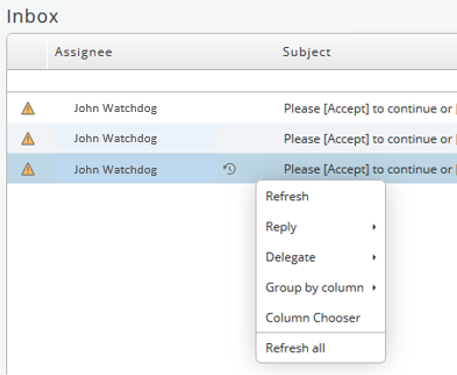
Figure 11: Context-Menu Actions
On messages that have already been replied to, the Reply and Delegate options are omitted.
- Refresh refreshes the Inbox content. For this action you have also a button top right. Top right you can set an automatic refresh as well. Next to the refresh options a filter for replied messages is available. Not yet replied message are always visible.
![]()
Figure 12: Refresh
- Reply allows to respond to the message. It depends on the workflow, which is part of the process, how many and which replies are available. In our example Accept and Reject are the possible answers. It is also possible that no reply is required or that only specific users can reply.
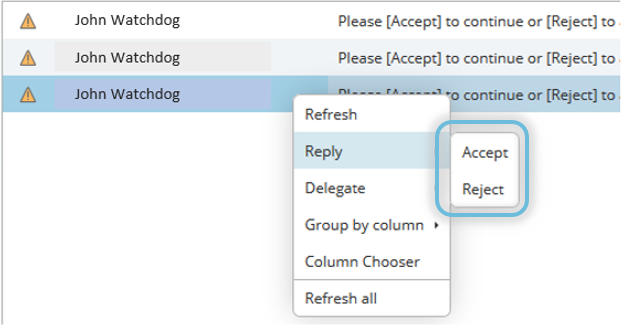
Figure 13: Reply
- Delegate is an opportunity to forward messages to other Redwood users. The person to whom the message has been delegated, will appear in column Assignee.
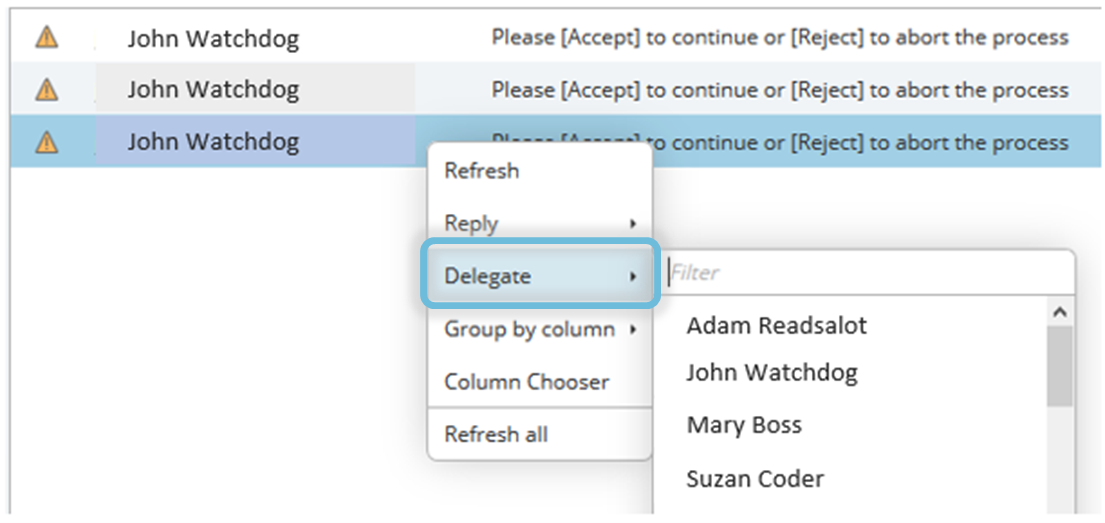
Figure 14: Delegate
After choosing a person from the list, an approval popup appears in which you can add optional comments. Clicking the icon next to the assignee displays Delegation History, which allows you to track the entire delegation path.

Figure 15: Delegation History
note
You have the ability to disable the Delegate option. To do this, access the Control Center and modify the user message process definition that is responsible for generating the message in the inbox. Add a parameter to the user message and assign it a Name of Inbox_SuppressDelegation and give it a Default Expression of Y.
- Group by column offers the ability to structure the messages into groups as shown in the image below. The selectable options can be combined with each other. You can expand or collapse the groups by clicking on the Show or Hide Arrows to the left of the group name.

Figure 16: Group by Column
financeTopic
