 Data Extractor User Guide
Data Extractor
The Data Extractor allows to extract data from unstructured sources and create a structured output using the RTX format. Process data is stored in Redwood in Redwood-specific XML documents, Redwood Table XML (RTX). These documents reflect a data table which can be used for calculations or transformations. Currently PDF is the only available input format.
Often, input is only available as documents with no clear indication of the relevant data. You can select input data areas easily using dragging functionality. Selected input data can be enriched and prepared for data transformation.
The structured RTX format allows processing the data with the Data Transformer or with other process definitions. The RTX table contains standardized data types which facilitate further processing.
Open the Data Extractor
To open the Data Extractor, click on Control Centre on the left-hand bar and press the Data Extractor icon on the tool bar.
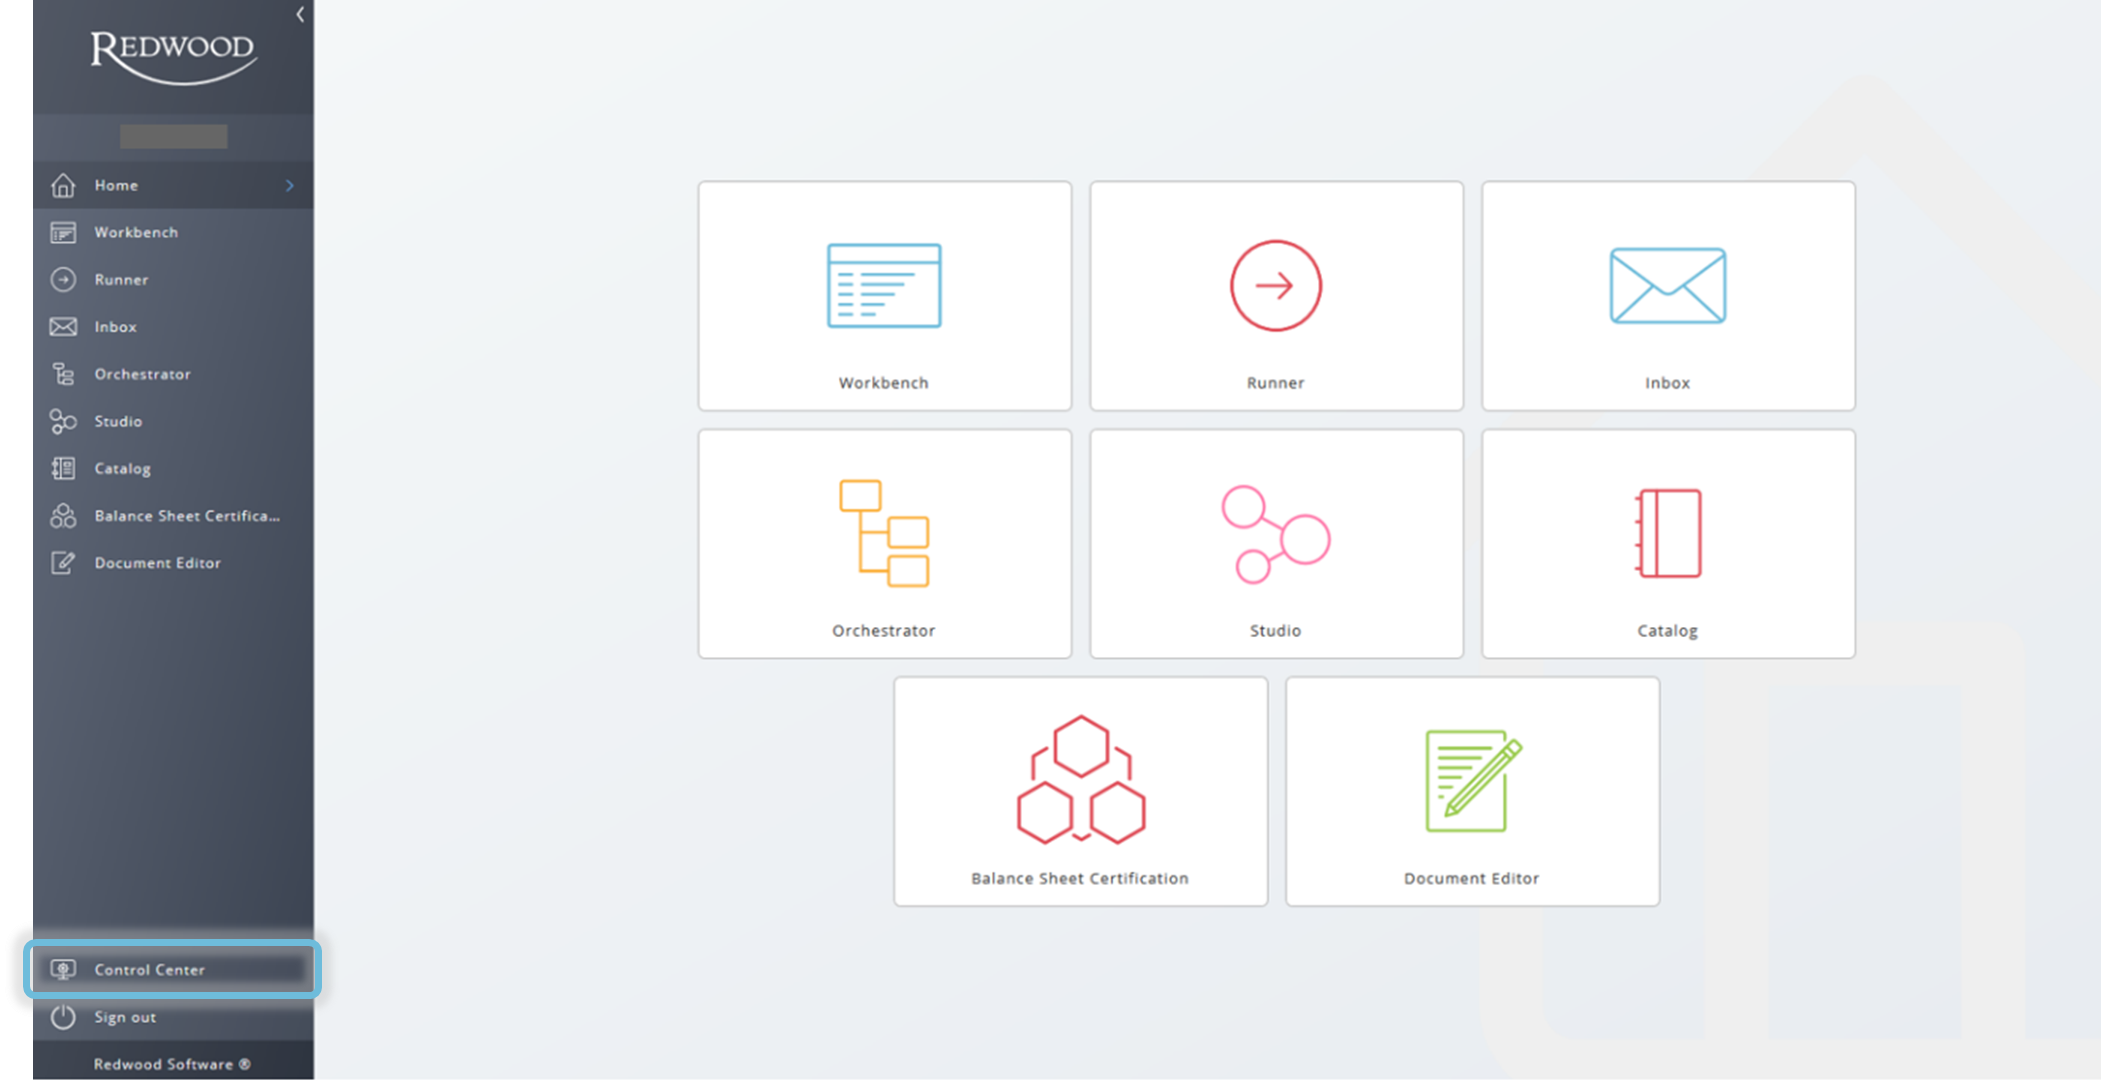
To open the Data Extractor from the tool bar click on Control Center on the left-hand bar and press the Data Extractor icon on the tool bar.
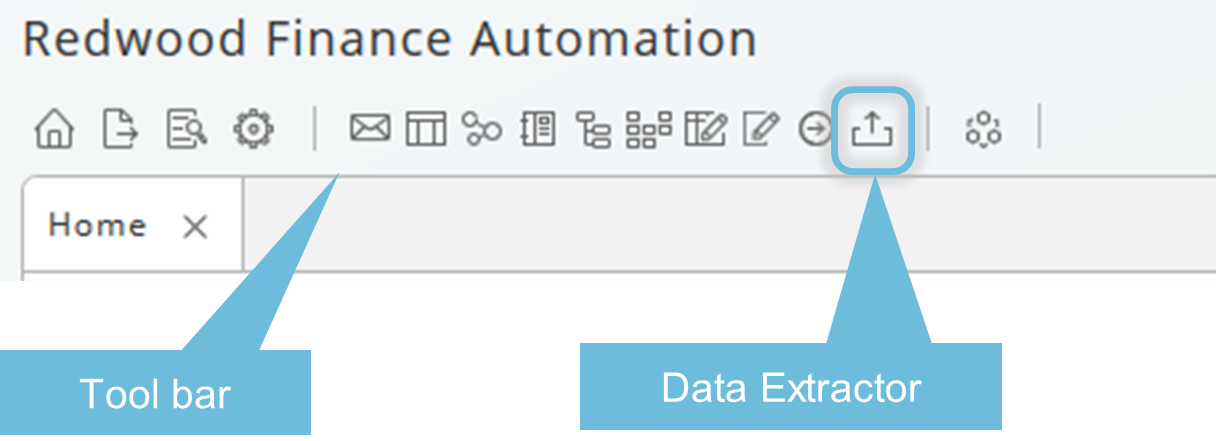
Create a New Data Extractor Definition
On starting the Data Extractor, a popup appears allowing to open existing data extracting definitions or to create a new one. Creating a new Data Extractor will end up in a Data Extractor object, a definition which can be re-used in processes.
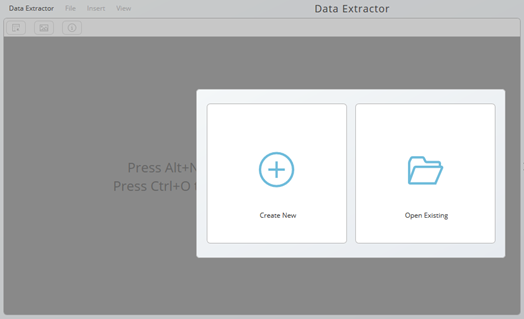
When you press Create New, you will be requested to choose or drop an input file in a valid format (currently pdf).
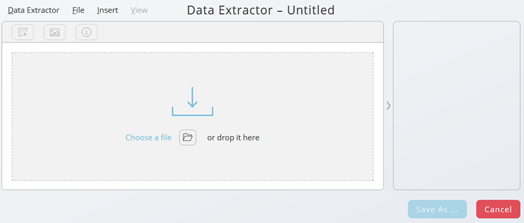
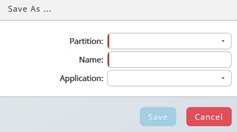
As long the new Data Extractor is not saved, the name is "Untitled". Press "Save As..." button and specify at least Partition and Name, the required information indicated with red stripes left-hand.
Data Extractor - Overview
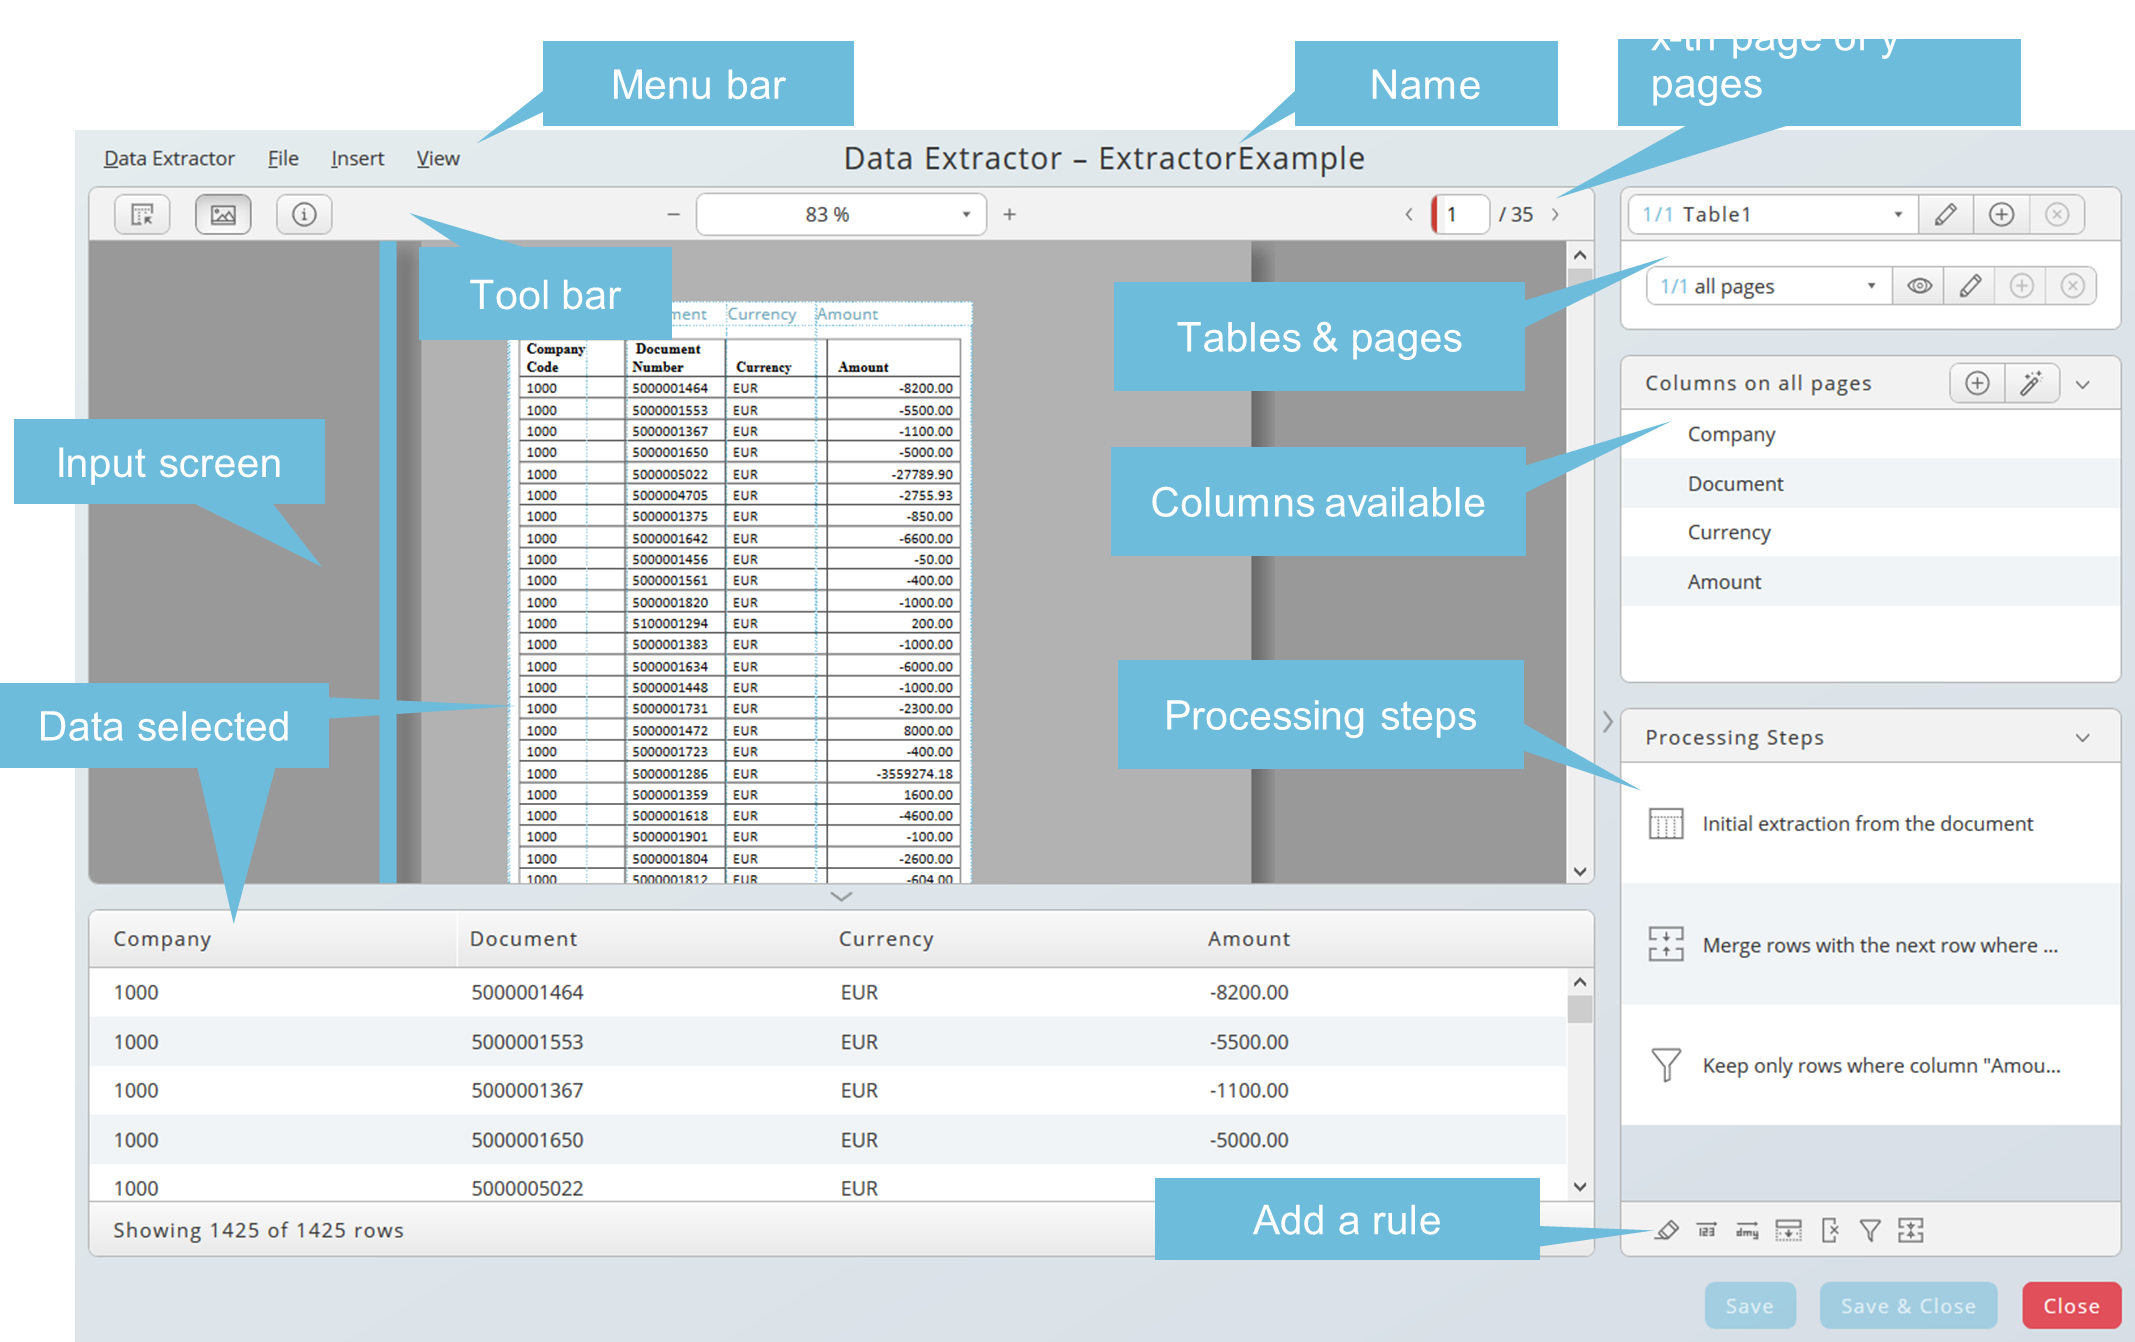
The Data Extractor has three resizable areas:
- Top left the dragging area with the loaded input file
- Beneath the RTX of the selected data
- Table and page selection as well as the processing steps on the right-hand side
You can hide the RTX area using the down arrow icon and the right-hand area using side arrow icon. Double arrows appear as a tooltip when it is possible to resize these areas.
Menu Bar
The menu bar consists of four items:
Data Extractor
- Create a new Data Extractor definition
- Create a new Data Extractor definition using a template
- Open an existing Data Extractor definition
- Open one of the last opened Data Extractor definition, including submenu
- Refuse all changes until the last saving
- Save all changes
- Save all changes to a new Data Transformer definition
- Save all changes and close the dialog
- Close the dialog
File
Open a PDF document
Insert
- Create a new table
- Create a new page selection
- Create a new column
- Create new processing steps, submenu of available processing steps (see Section 2.3 for more details)

View
- Several zooming options
- Most of the options you can find in the menu bar are also available in the middle of the upper frame of the input screen
Tool Bar
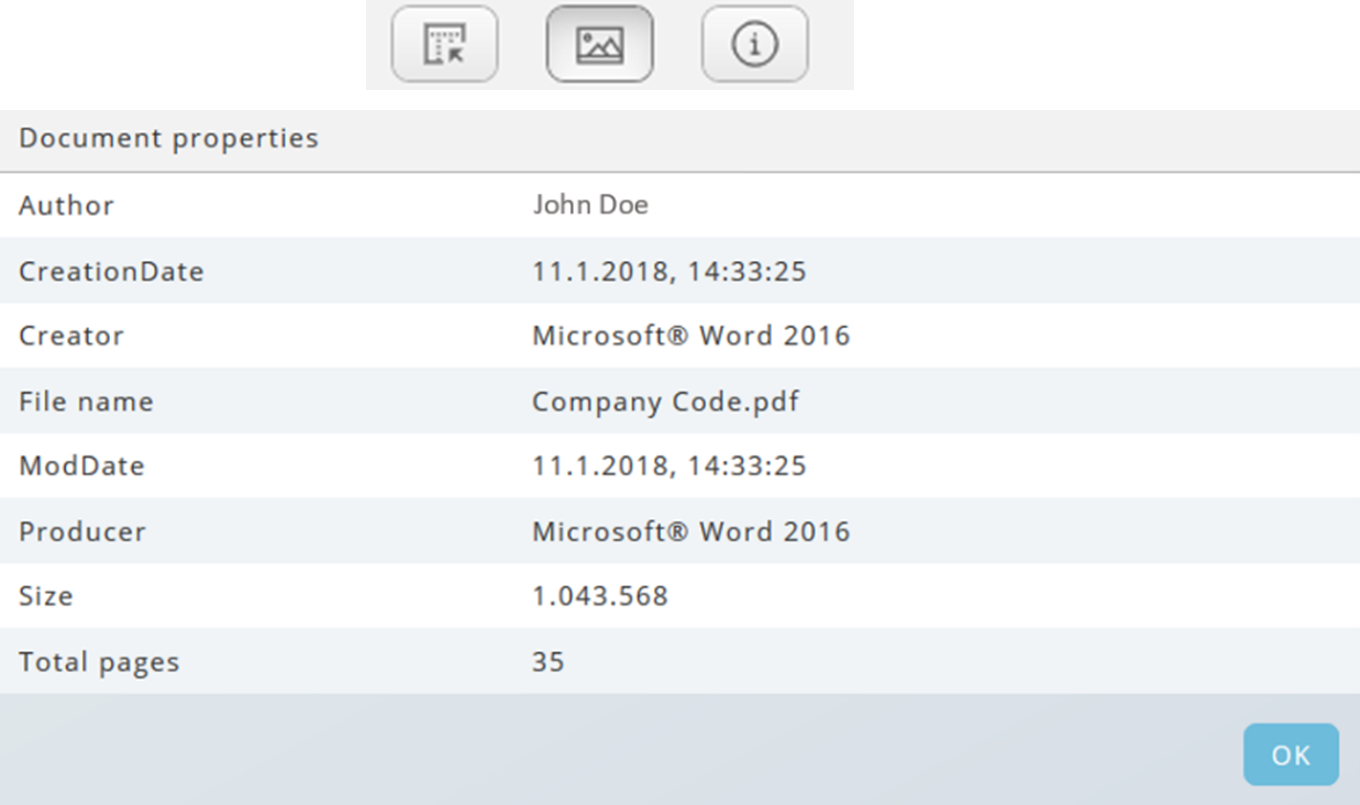
The tool bar contains the dragging tool on the left, the options to hide colours and graphics in the middle and information about the document properties on the right.
Use of the Data Extractor
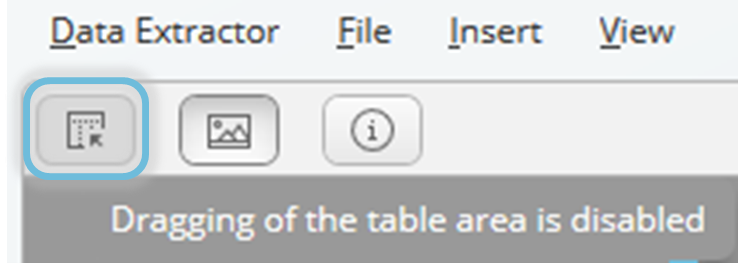
The use of the Data Extractor begins with the selection of data using the dragging functionality. Click on the icon top left to enable the dragging functionality when the input file has been loaded. Your pointer changes now into a black cross. Drag the desired area of input data and release the pointer when it is done. The selected area is highlighted.
The selected data will appear automatically in the RTX table beneath the input screen. Columns will also be detected automatically, and column titles proposed. After the first detection the data needs to be prepared under the following aspects:
- Table selection (can be more than one)
- Page and column selection
- Define the rules how to process the input data
Tables and Columns
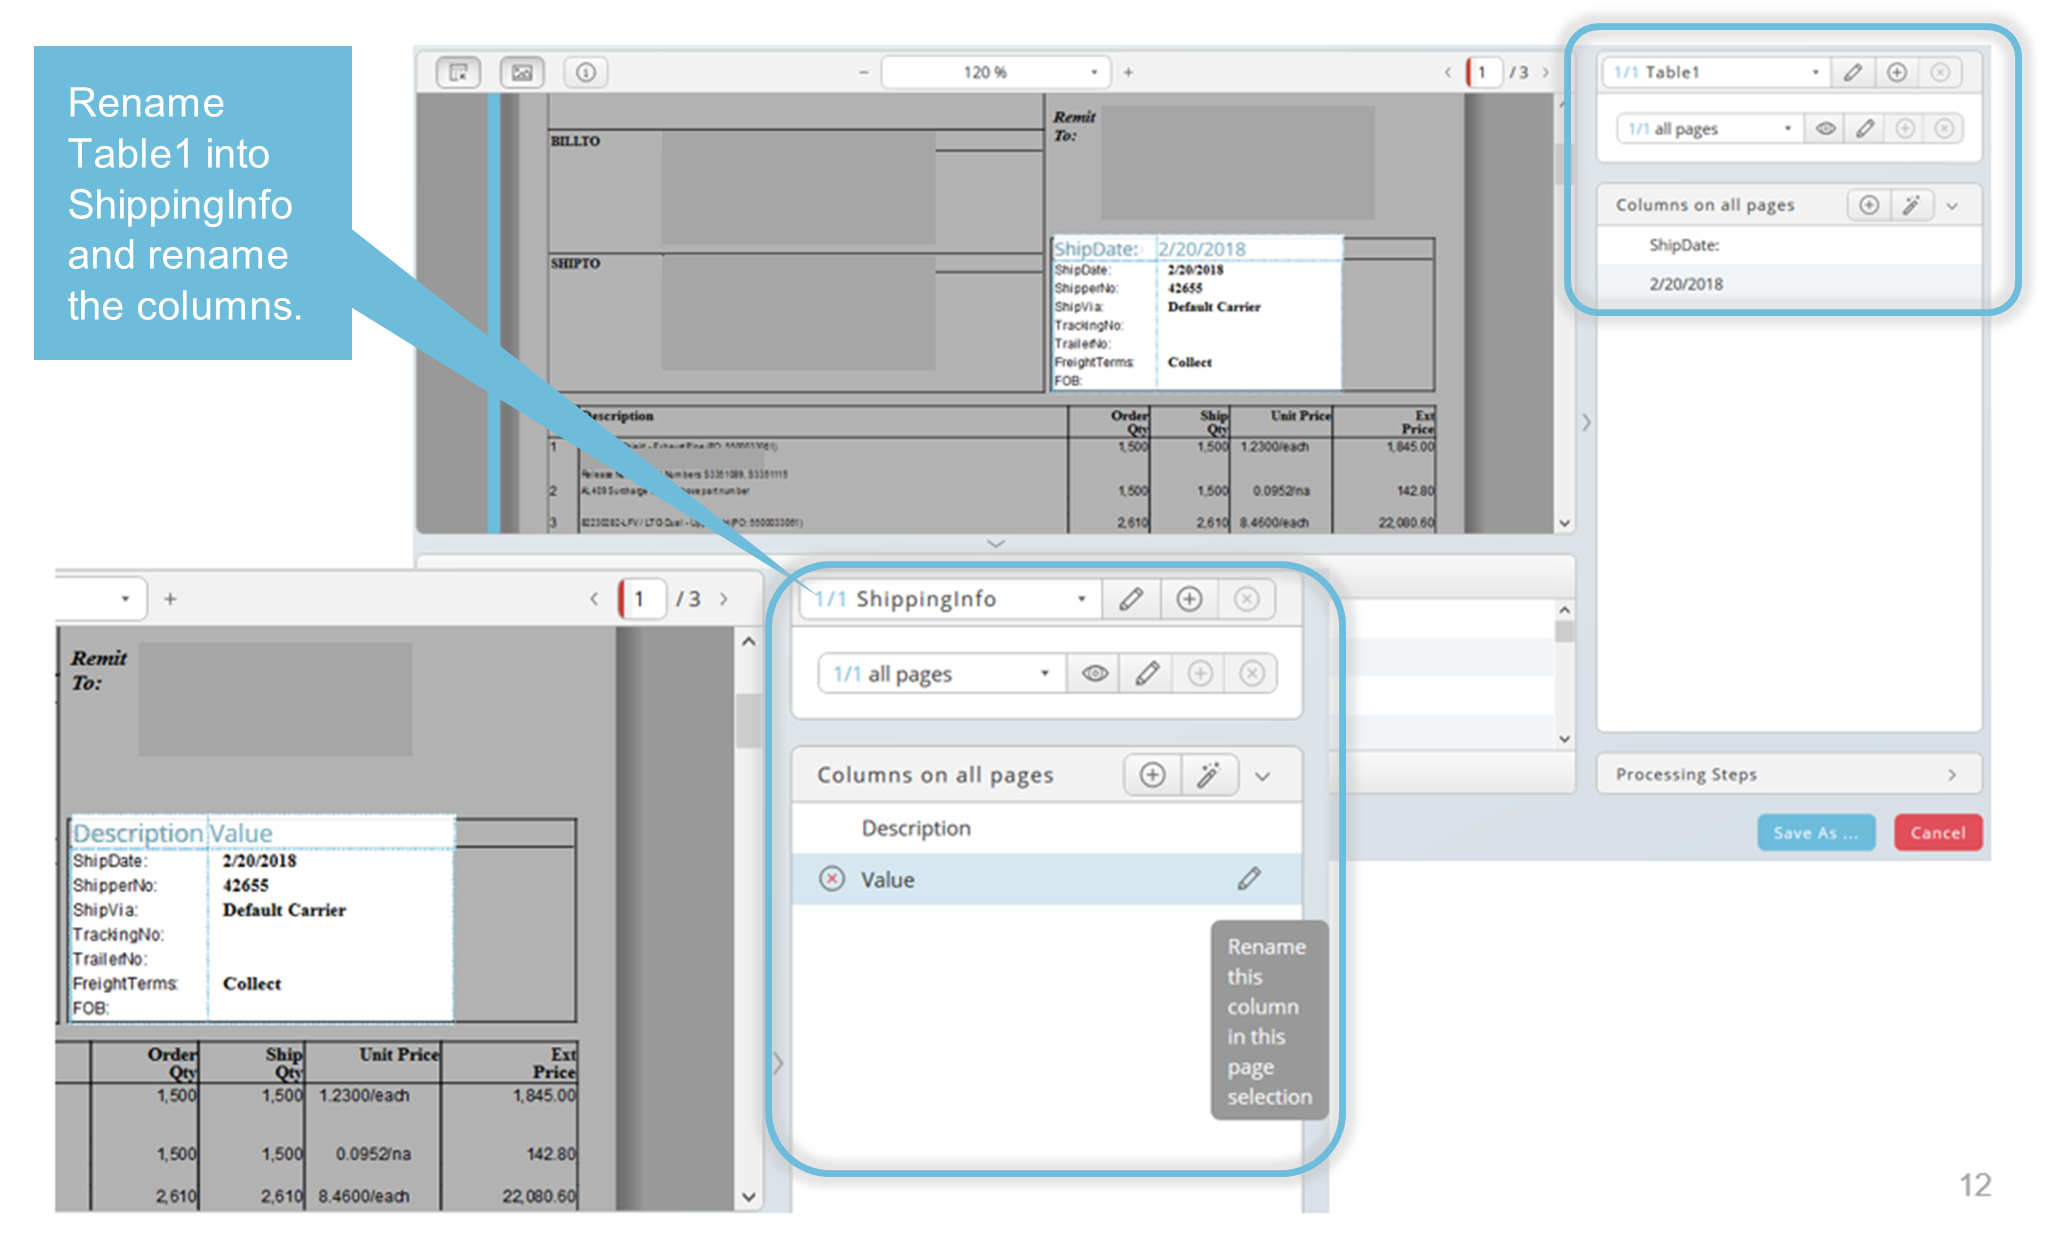
When you select the input data for the first time, the columns are automatically labelled, and the data is stored in "Table1". These labels can be renamed according to your needs. Use the pen icon to edit and the icon with the red cross to delete a column.
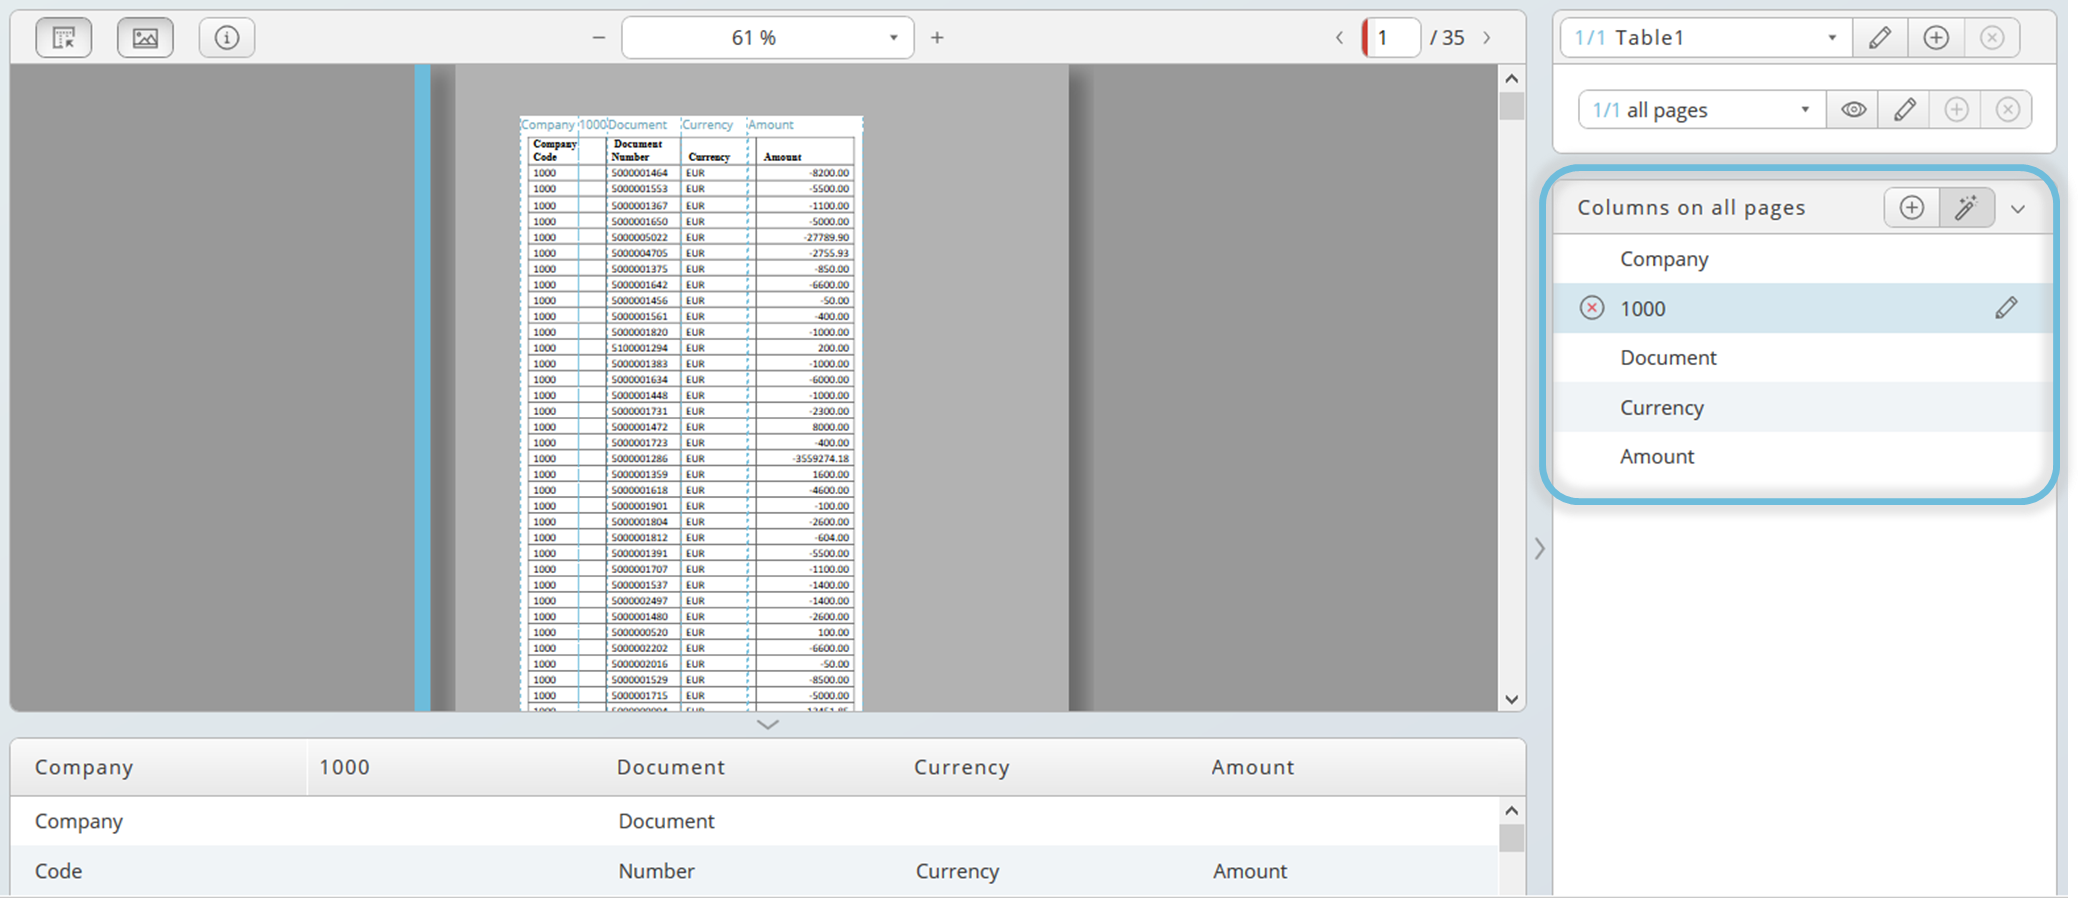
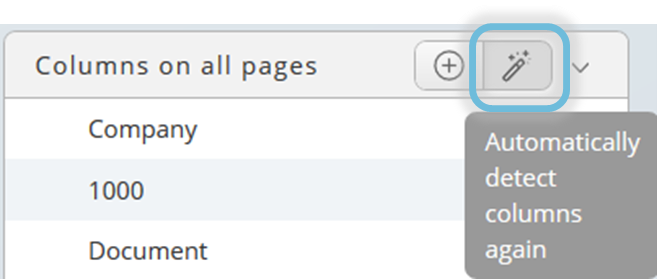
With the magic wand button, you can detect the columns automatically again, for example if your first selection was not precise enough and the input selection area needs to be adjusted. The selected area can be adjusted afterwards. Tooltips will help you.
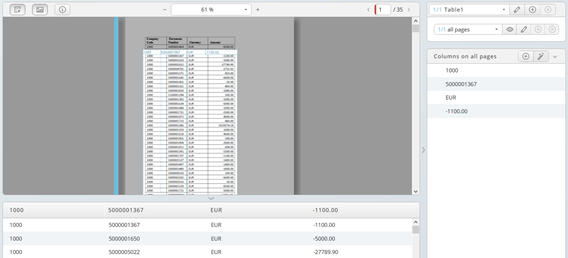
Example: column title are the values because the upper end of the selection is not high enough. Adjust the selected area and press the magic wand button and you do not need to rename every column.
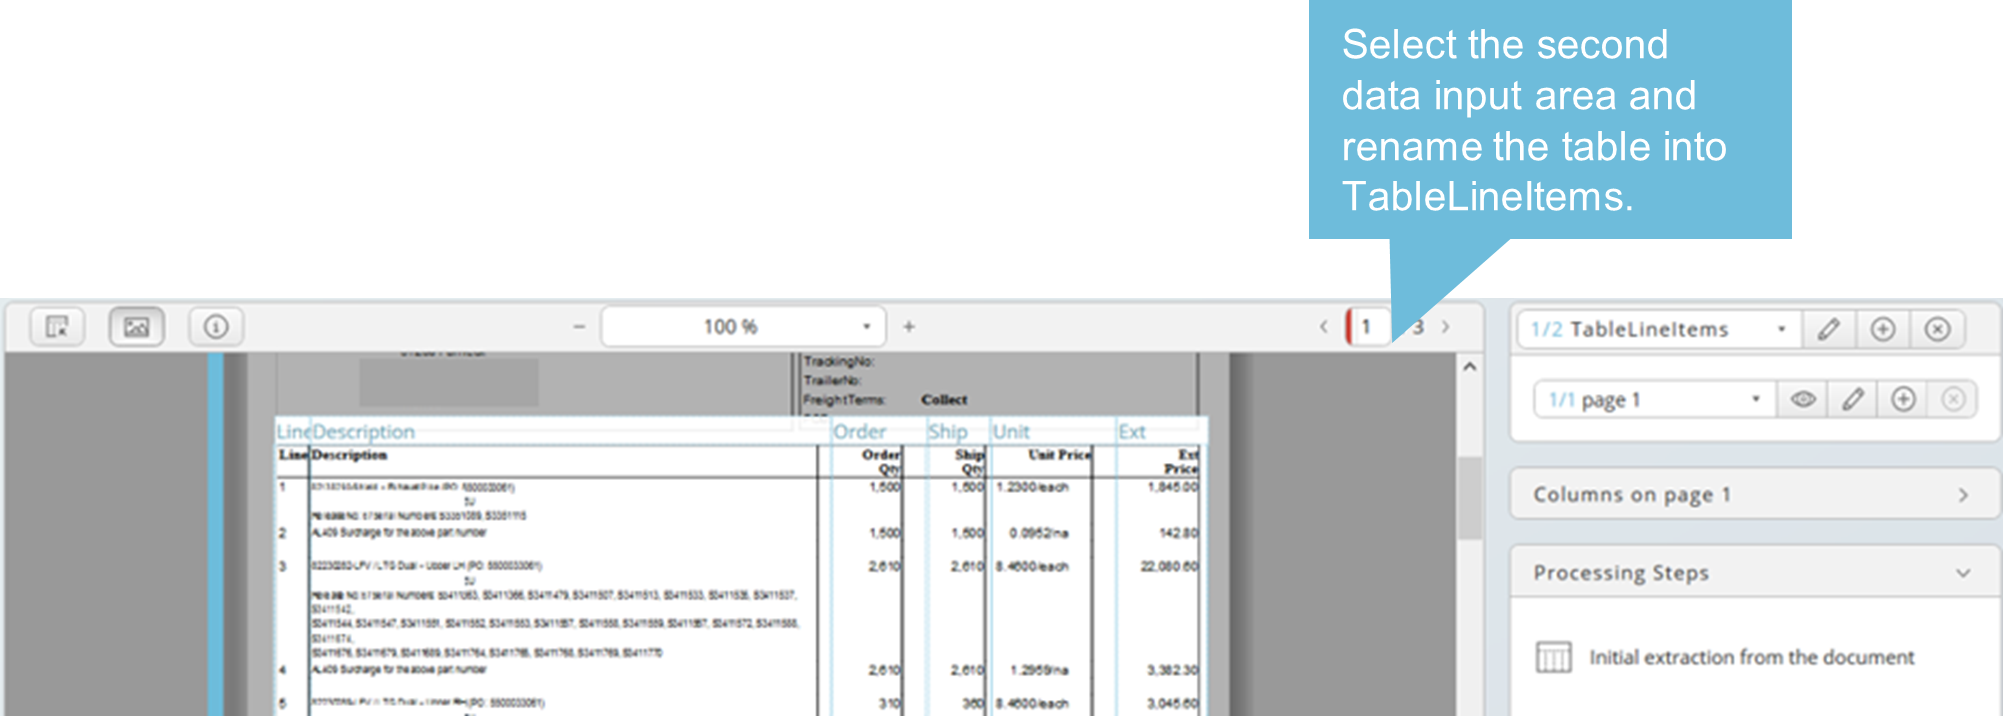
Multiple data selection is also possible. Each section can be stored in different tables. Click on the Add icon (plus sign in circle) to create a new table. One RTX output file will be created for each table defined when the Data Extractor runs.

Select the next data area when a new table is created. Your pointer is automatically in dragging mode. Now you can toggle between two tables and data selections.
Page Selection
By default, all pages of a document are selected for each table defined. To select certain pages, edit the page selection. A blue stripe left-hand indicates data selection on the page. A red stripe indicates no selection.
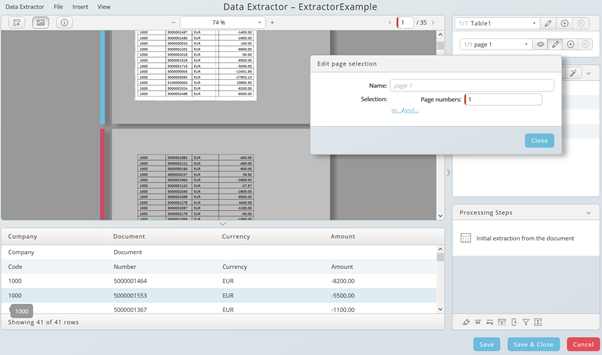
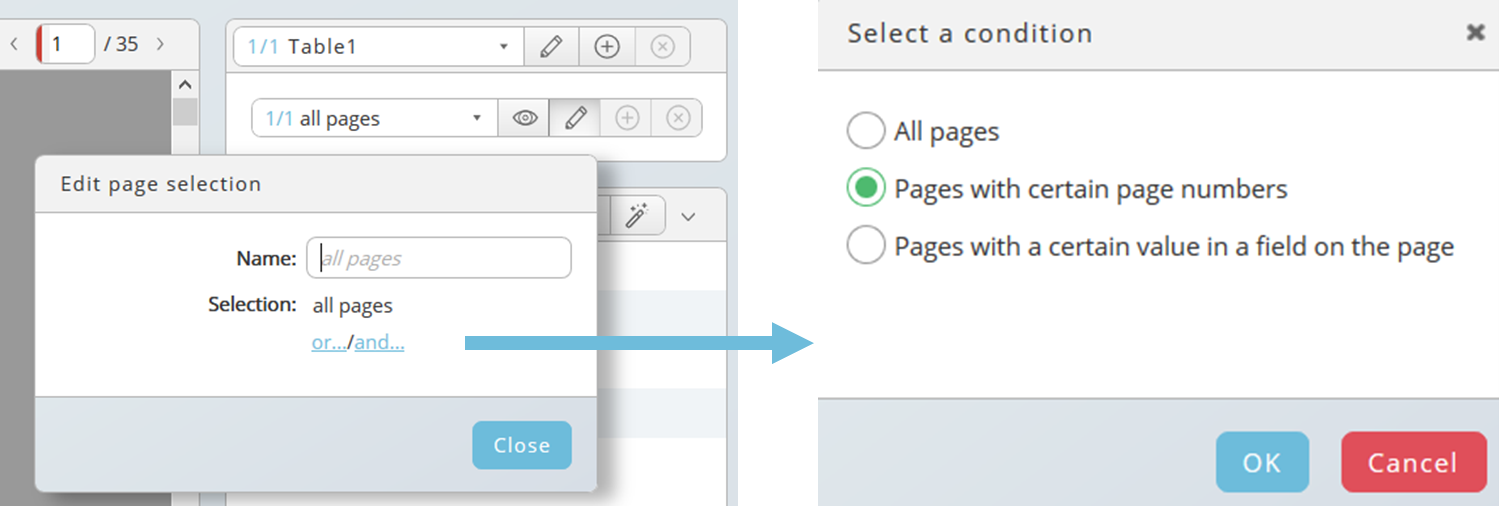
Click on the pen icon to open the dialog, then click on or... or and... and choose a condition.
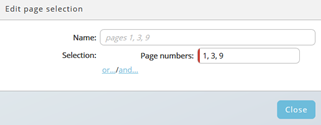
Various options are available if you want to select data from certain pages, for example a comma-separated list of page numbers or ranges:
- x-y (from x until y, always inclusive x and y)
- -x (from 1 until x)
- x- (x until the end)
You can also search for certain values on a page.

For this purpose, you need to select the area where you expect a certain value. "The contents of a yet undefined area" indicates this. Click on the dragging button right-hand and select the area. Selected area is highlighted.
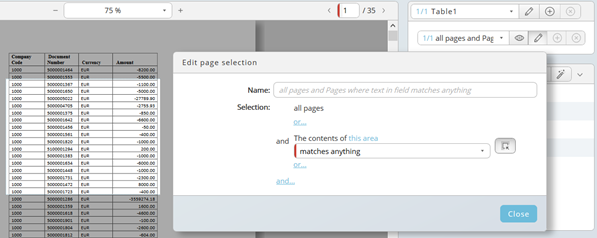
Clear the field in the middle and choose an appropriate option, for example contains 1339, in our example. If the option allows to enter a value, a second field appears automatically underneath the chosen option.

Now only the data is selected where a page contains 1339 and only in the selected area of the page.
Processing Steps
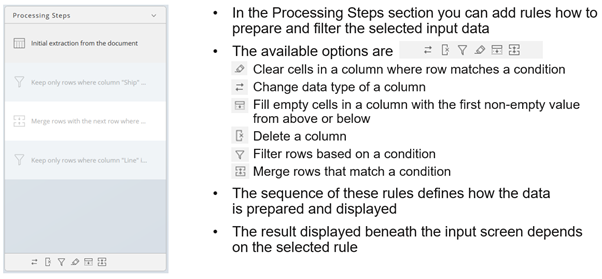
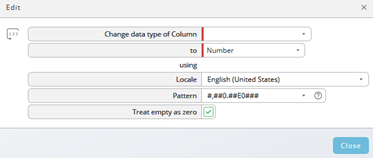
In newer 4.1.4 versions the change icons have been replaced. This opens a dialog for first data conversions. If the resulting RTX (Redwood Table XML) will be used by the Data Transformer this step is not necessary because the Data Transformer offers more option for data transformation.
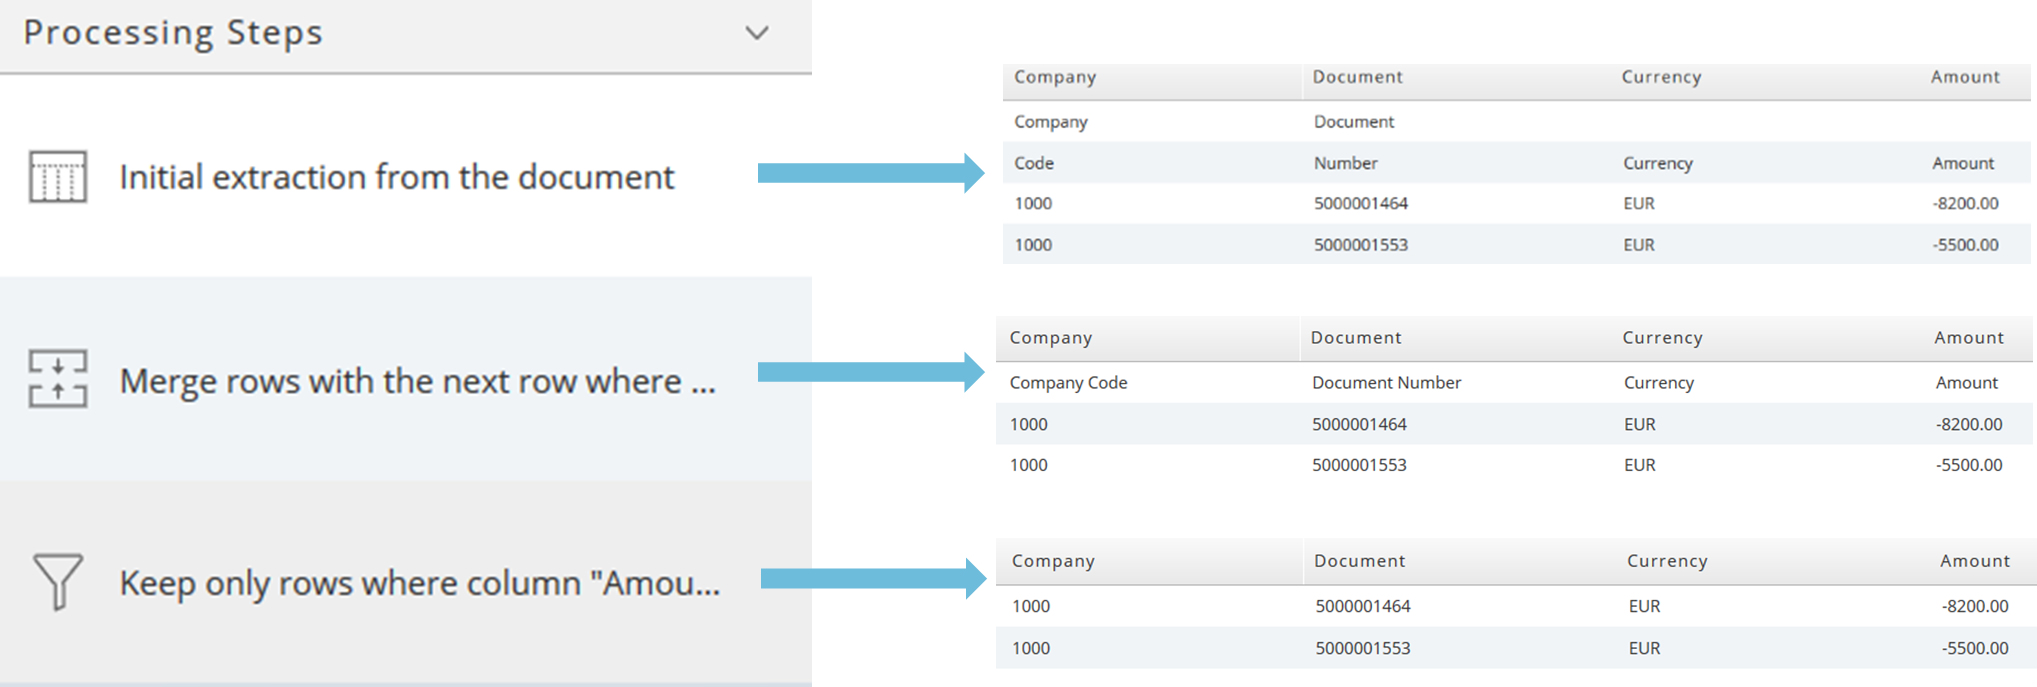
Example: the initial result after the data selection needs to be adjusted. Lines must be merged or removed
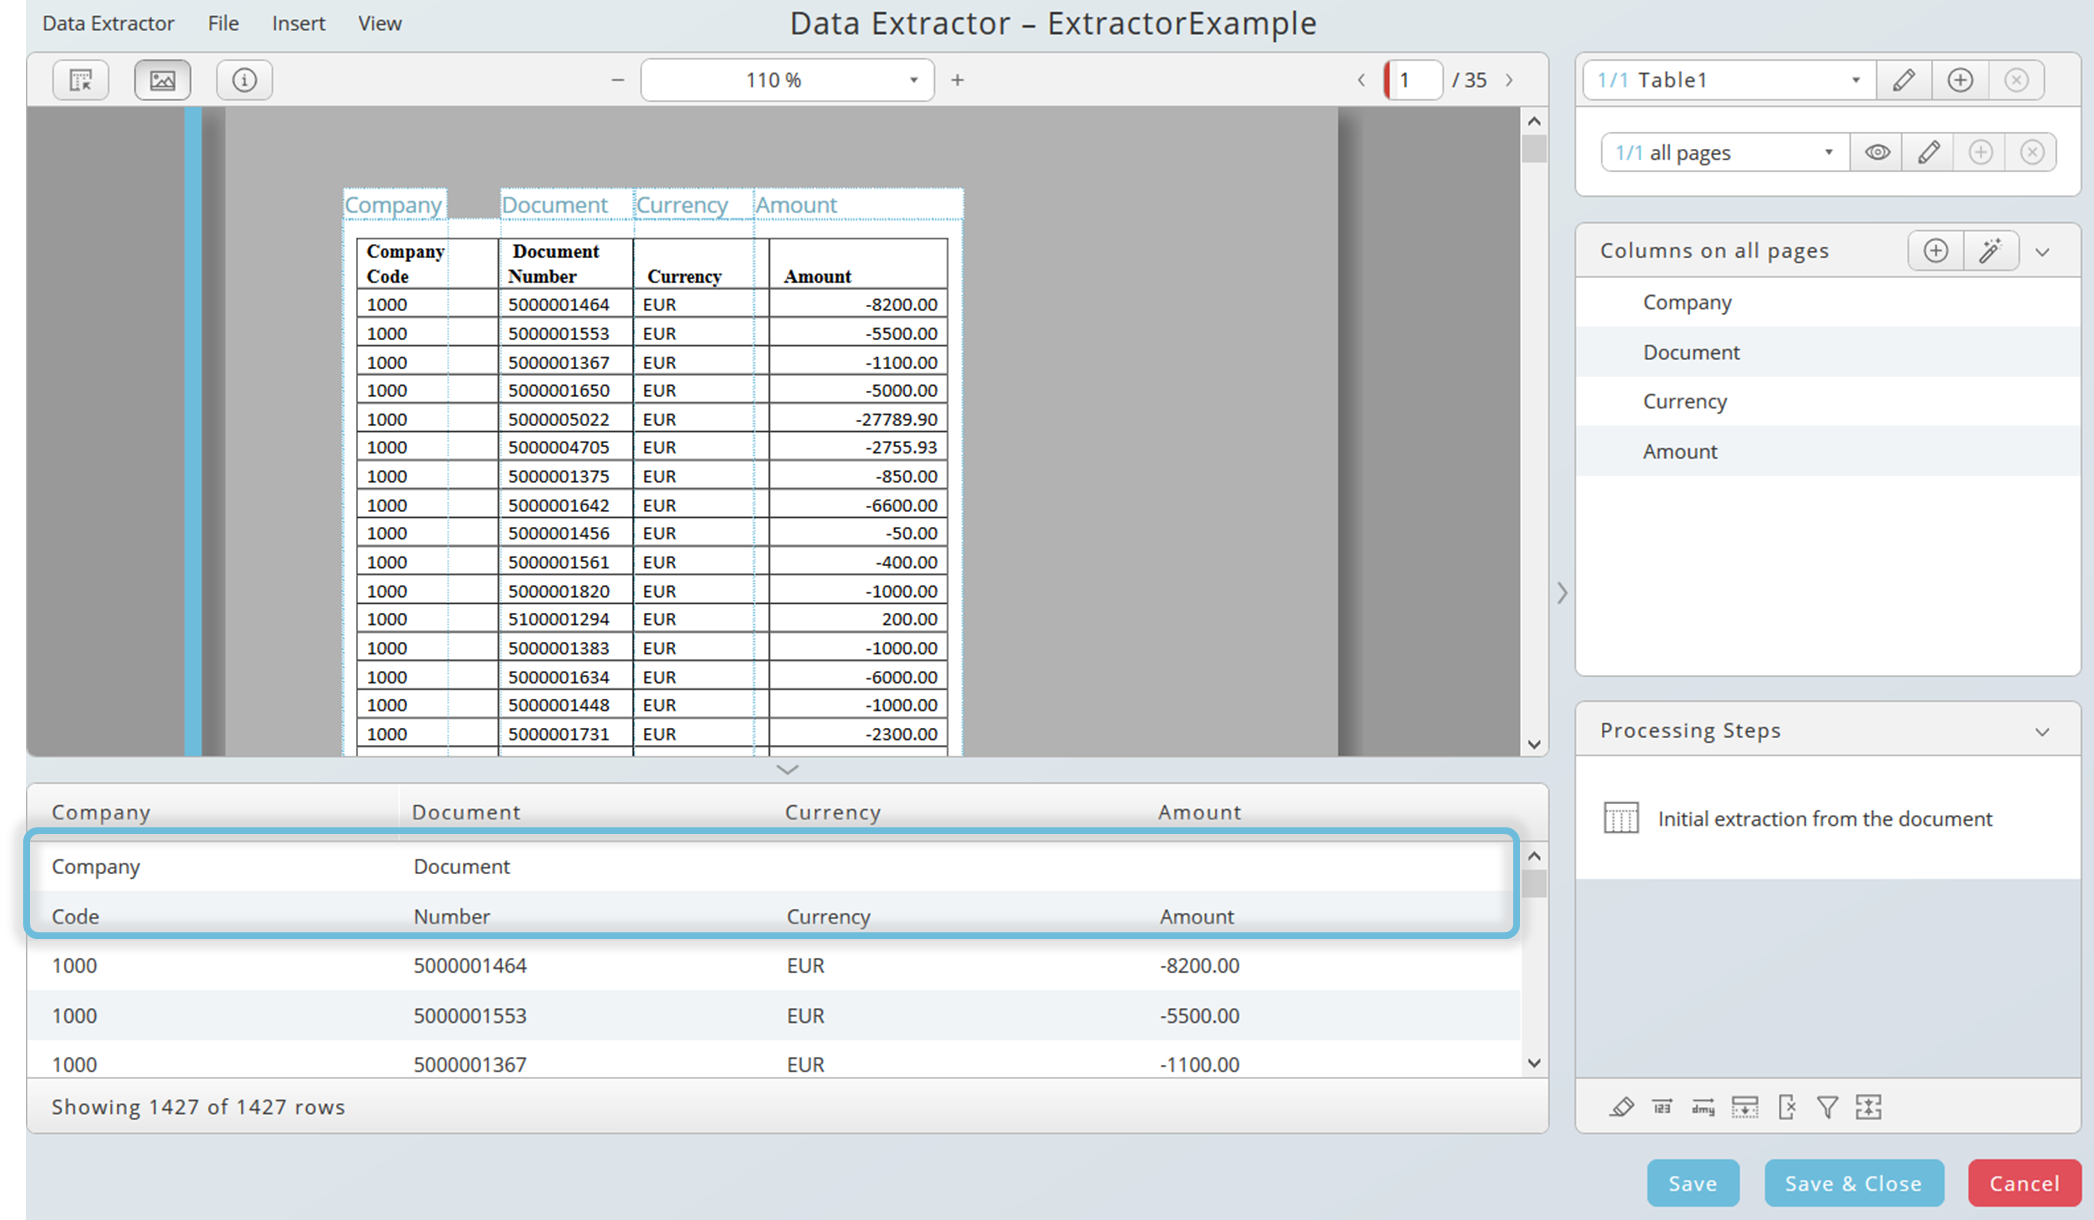
Step 1: merge the first two lines. Click on the merge icon and edit the condition.

Step 2: remove the first line. Click on the filter icon and edit the condition.

Now the first, unnecessary line has been removed and you have got the expected result. You can also filter for numbers in this case.

Remember: the sequence of the processing steps defines how the data is displayed. When you select the first step, the initial extraction, you see the result after the first, initial extraction. When you select the third step, you see the filtered, expected result.
Run Data Extraction
Data Extractor objects are stored as process definitions. You can run Data Extractor definition using the regular submit dialog or within a bigger process. The outcome of the Data Extractor run can be passed to the next step within a bigger process as data input. The next step can be a Data Transformer definition or any other kind of process definition which is able to process RTX data.
For an immediate start, especially for test purposes, press the submit button on the toolbar\ and choose a Data Extractor definition.
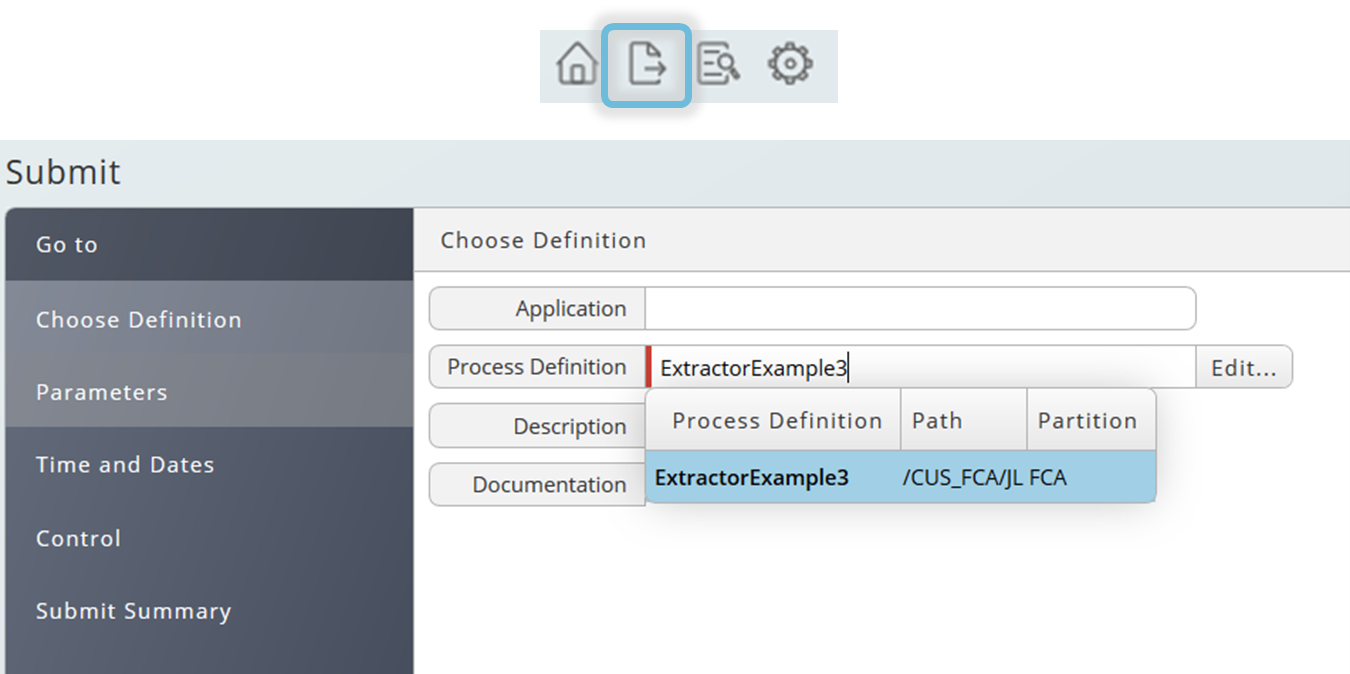
There is a required parameter, the input document. Currently pdf is the only valid input format.

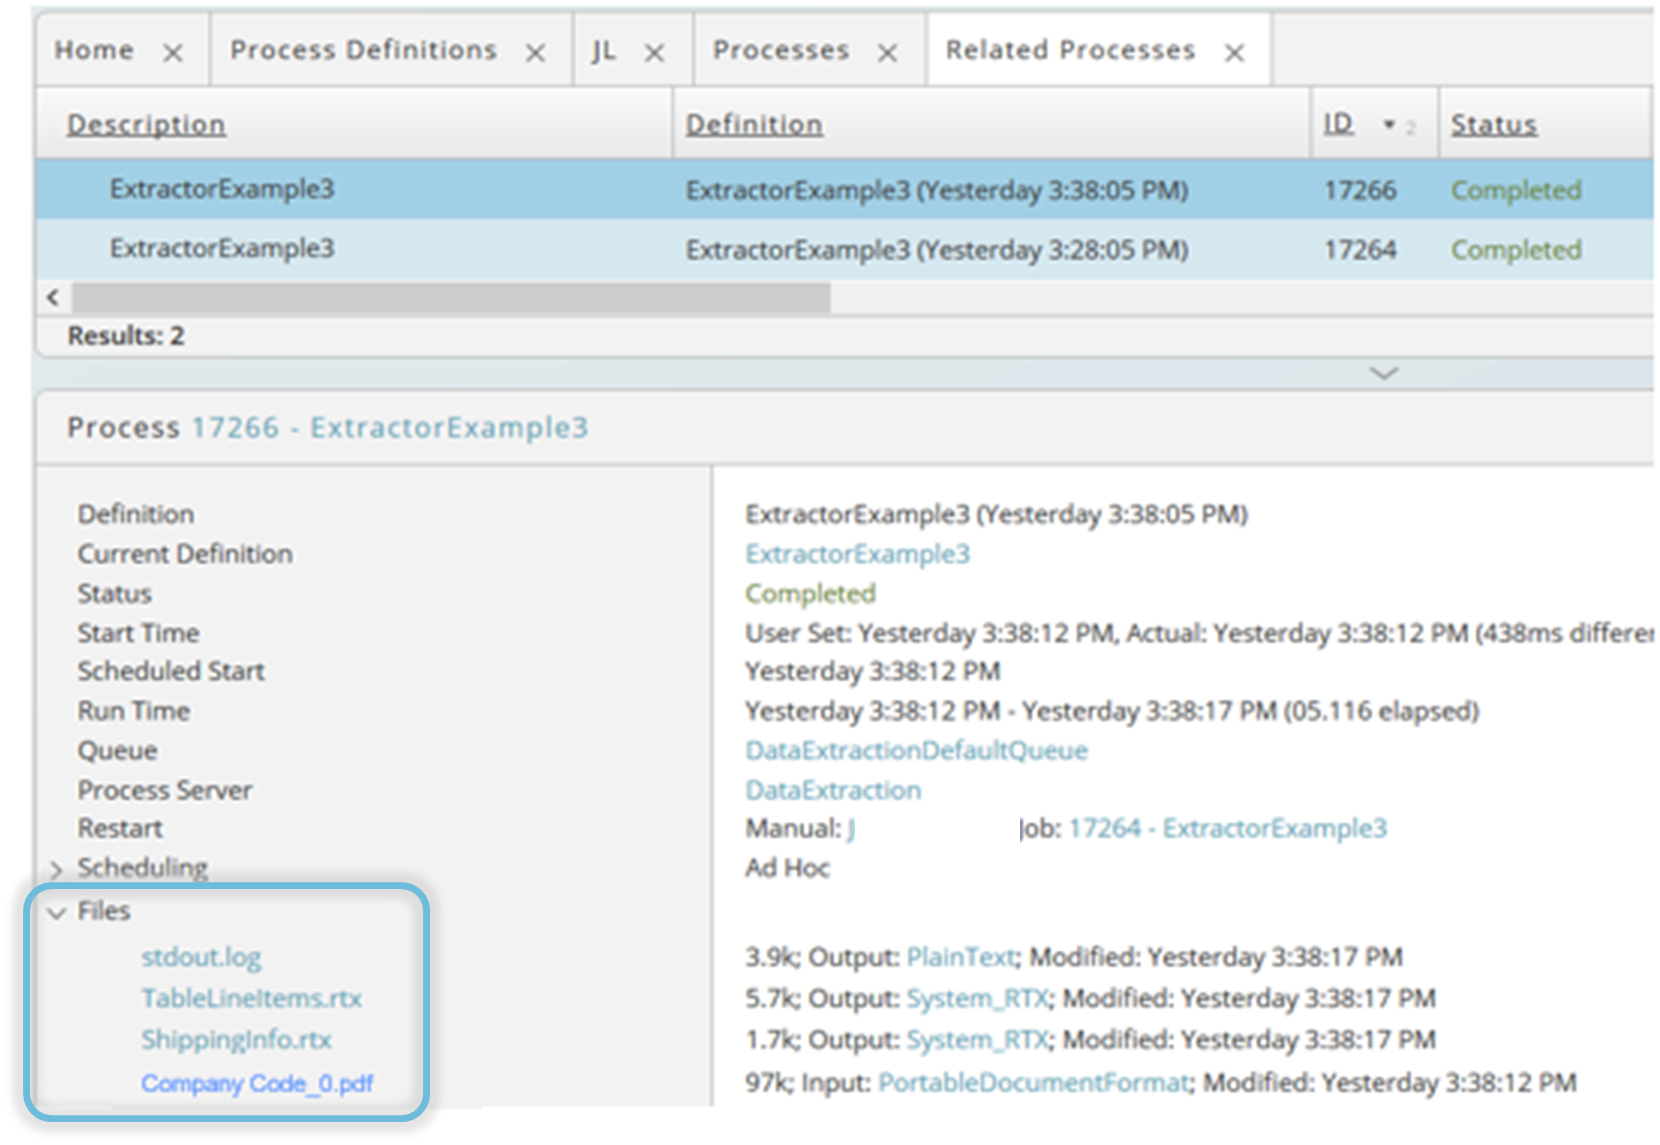
If you choose an immediate start, you can monitor the result in the process monitor.

In the details section of the process monitor the corresponding process files are visible and accessible, depending on your privileges. In our example one log file with information about the progress of the data extraction, the original input file and two RTX files, one for each table defined in the Data Extractor object.
financeTopic
