 Data Transformer User Guide
Data Transformer
The Data Transformer allows a business user to define how the data of Excel or RTX input should be transformed, filtered and amended within a process. Data will be transformed for further processing, for example create input lists for processes or prepare an insert into an Excel file. Bursting allows to create several RTX tables which are grouped by key fields. This can be used to split a large initial data into several packages for different organizations. At any stage, an intermediate result can be exported as RTX, HTML, Excel or PDF. It can be provided as additional tracking information.
Data types can be changed, for example text into numbers, you can define aggregations and filter criteria, or you add additional information like a prefix, as well as remove undesired or useless information, without needing technical expertise or scripting skills.
Open the Data Transformer
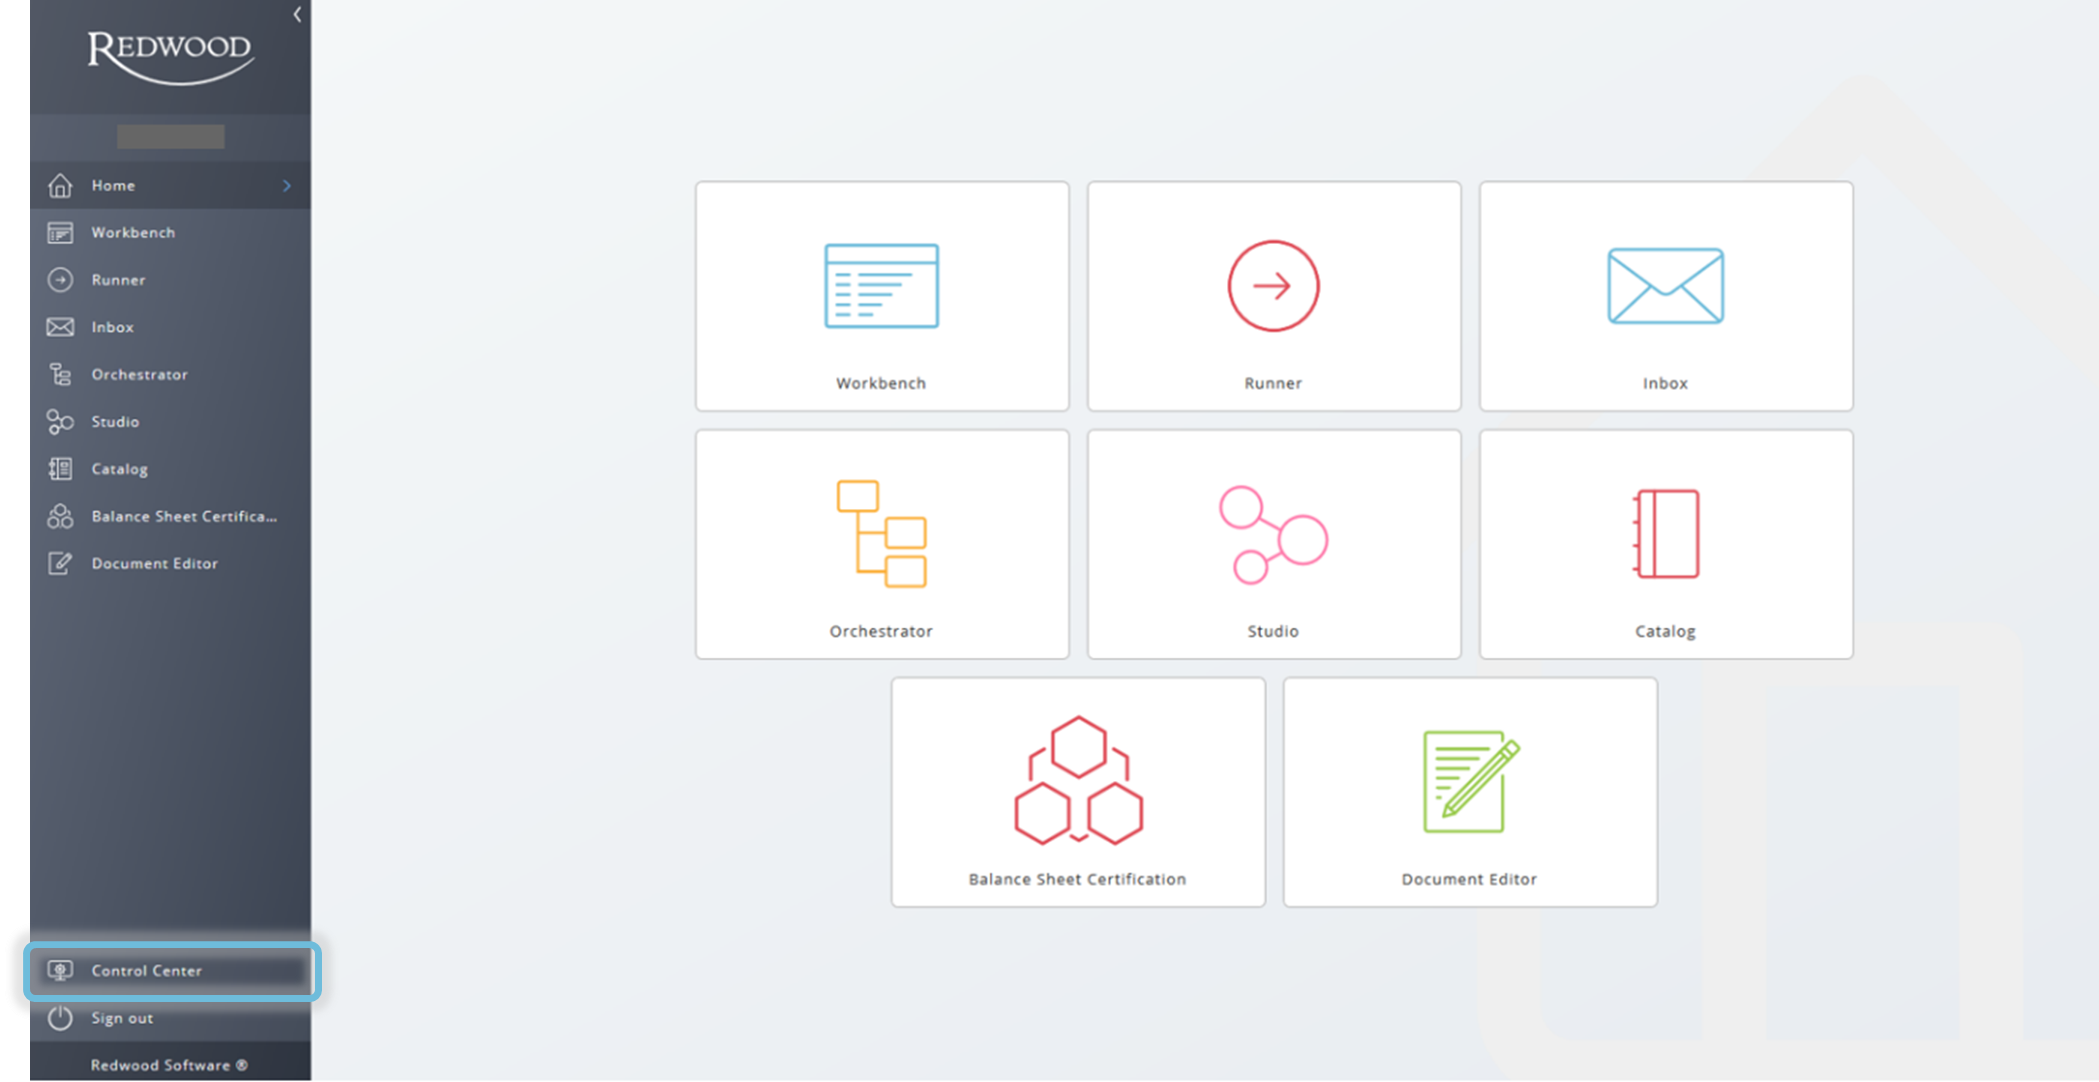
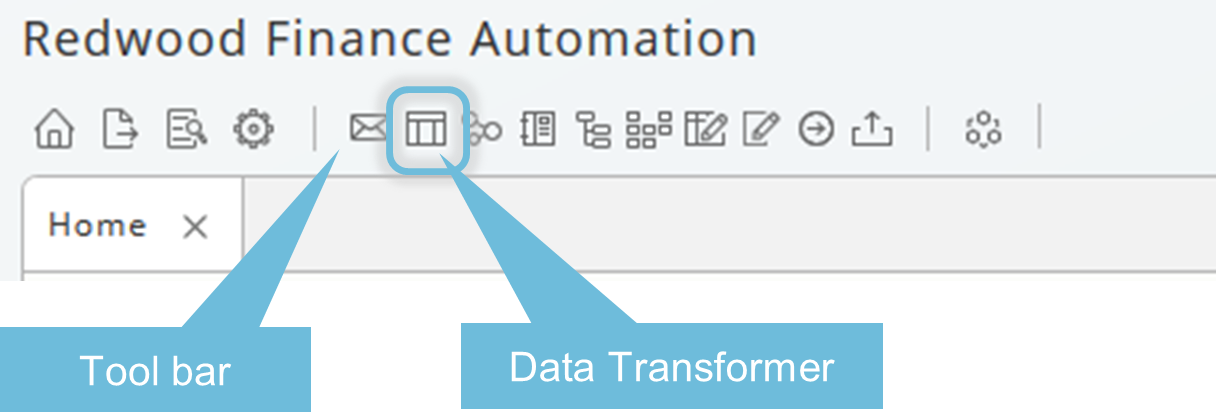
To open the Data Transformer, click on Control Center on the left-hand bar and choose the Data Transformer icon on the tool bar.
To open the Data Transformer from the tool bar click on Control Center on the left-hand bar and choose the Data Transformer icon on the tool bar.
Create a New Data Transformer Definition
On starting the Data Transformer, a popup appears allowing to open existing data transforming definitions or to create a new one. Creating a new Data Transformer will end up in a Data Transformer object, a definition which can be re-used in different processes.
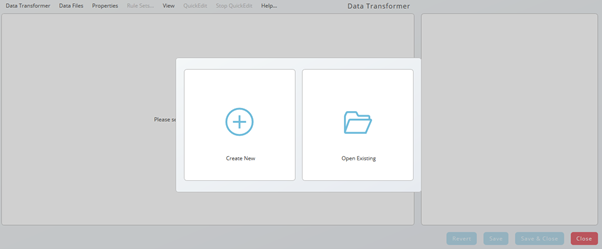
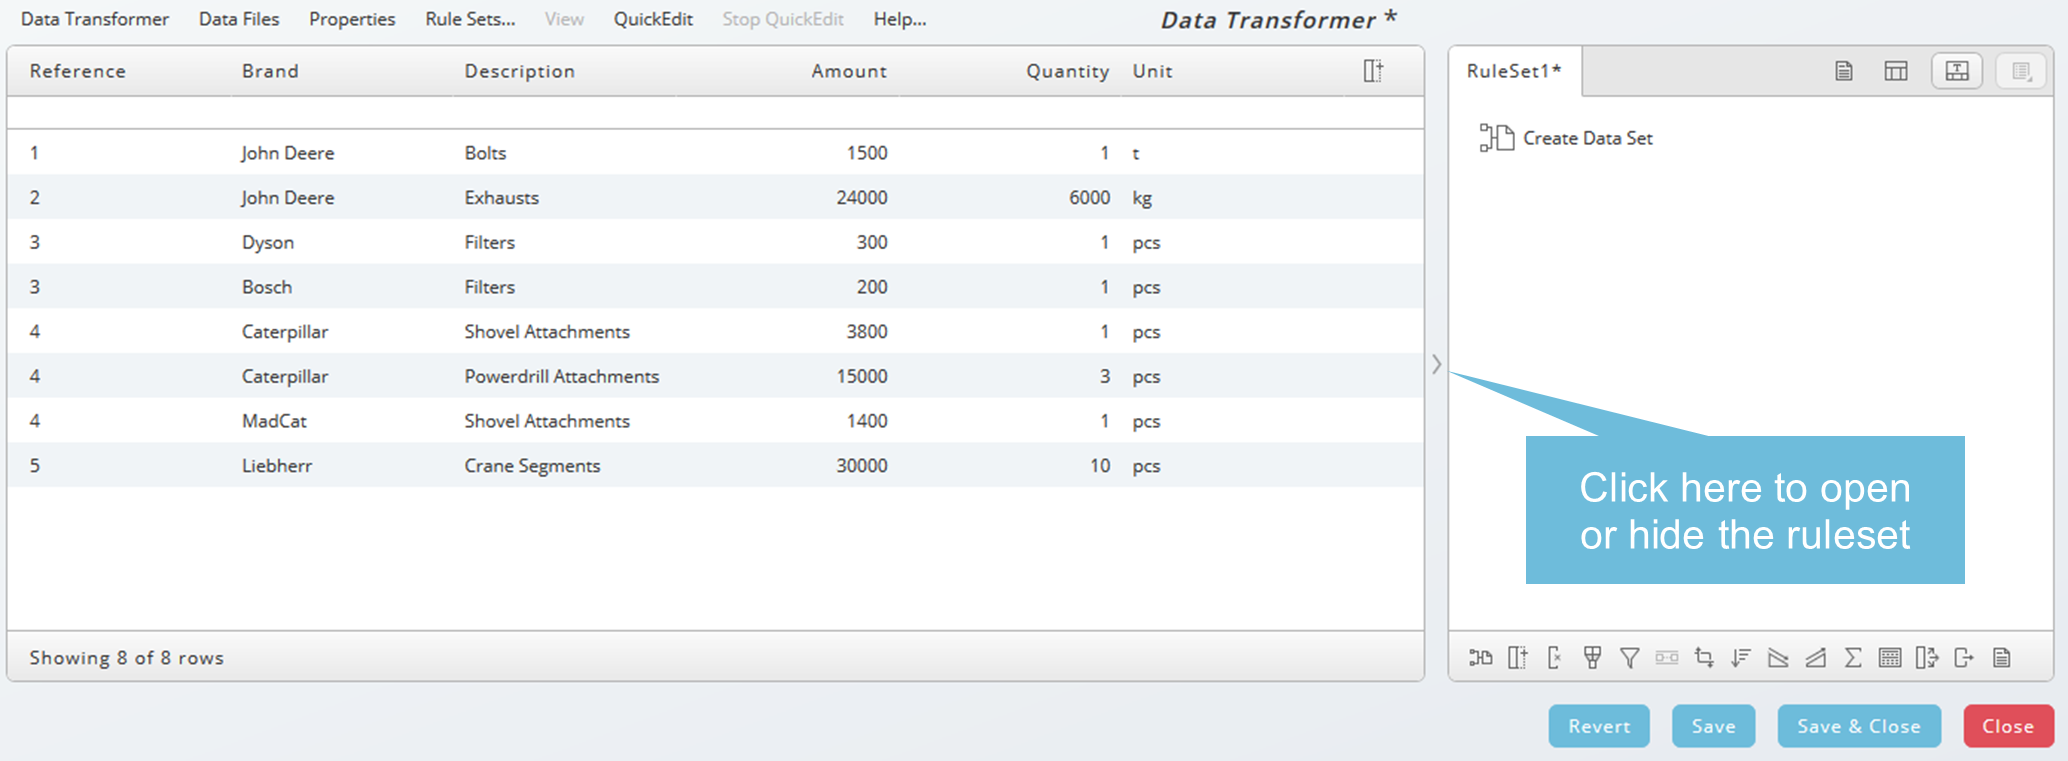
When you choose Create New, you will be requested to choose or drop an input file in a valid format (currently rtx).
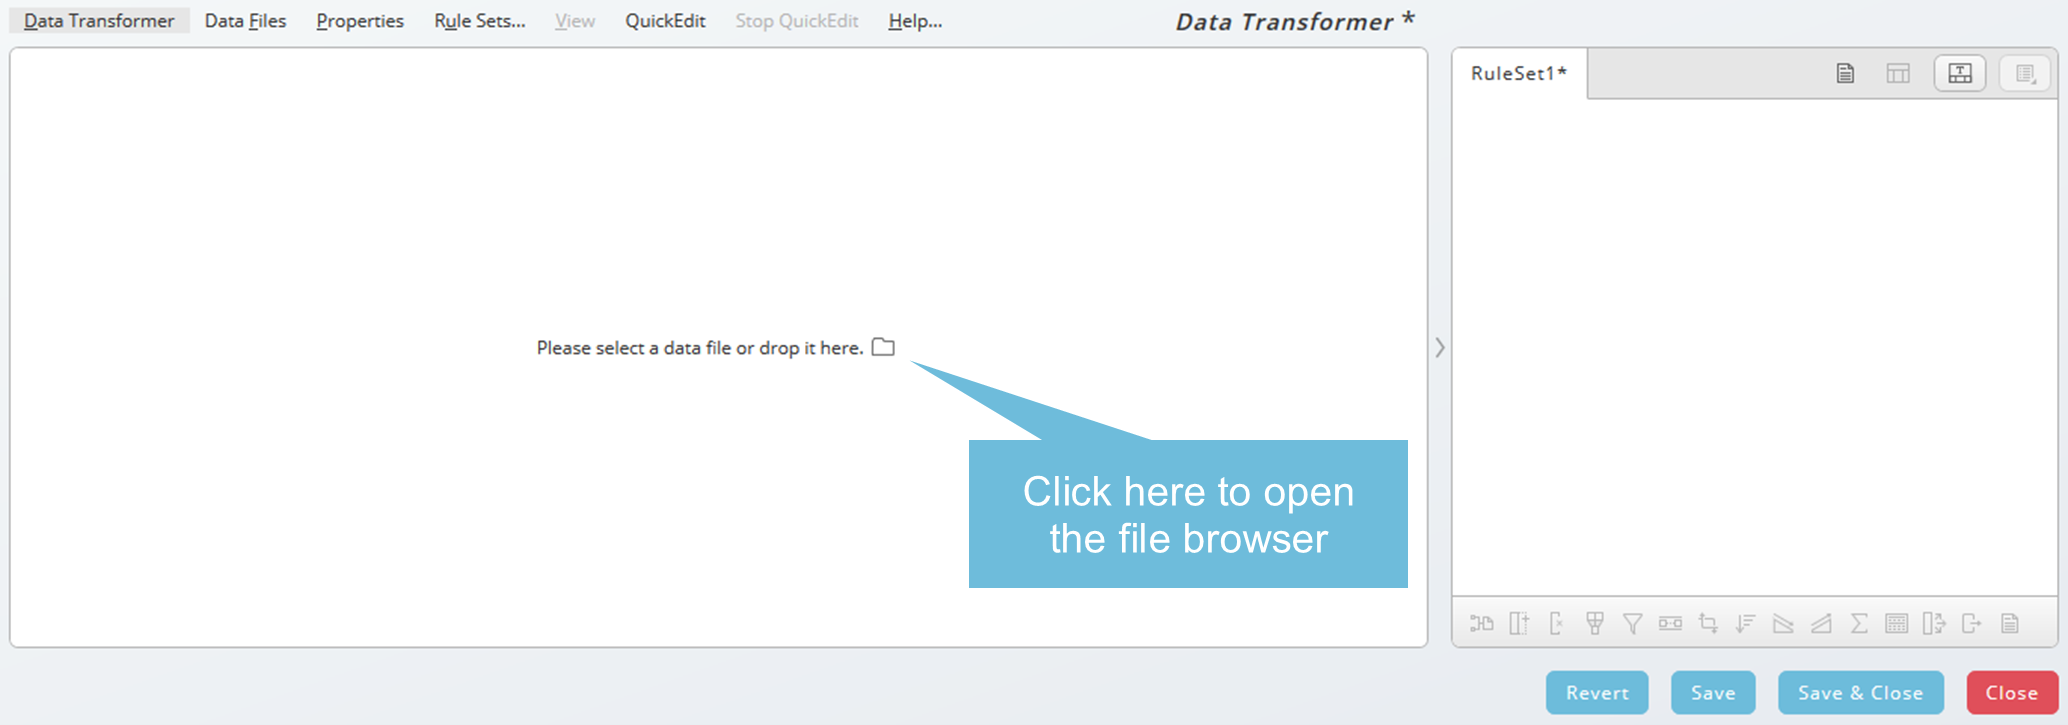
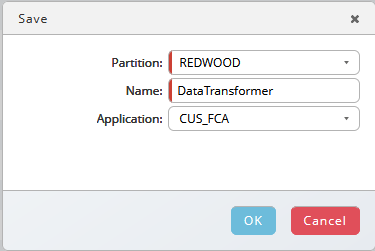
As long the new Data Transformer definition is not saved, the name is RuleSet1. Choose Save button and specify at least Partition and Name, the required information indicated with red stripes.
Data Transformer - Overview
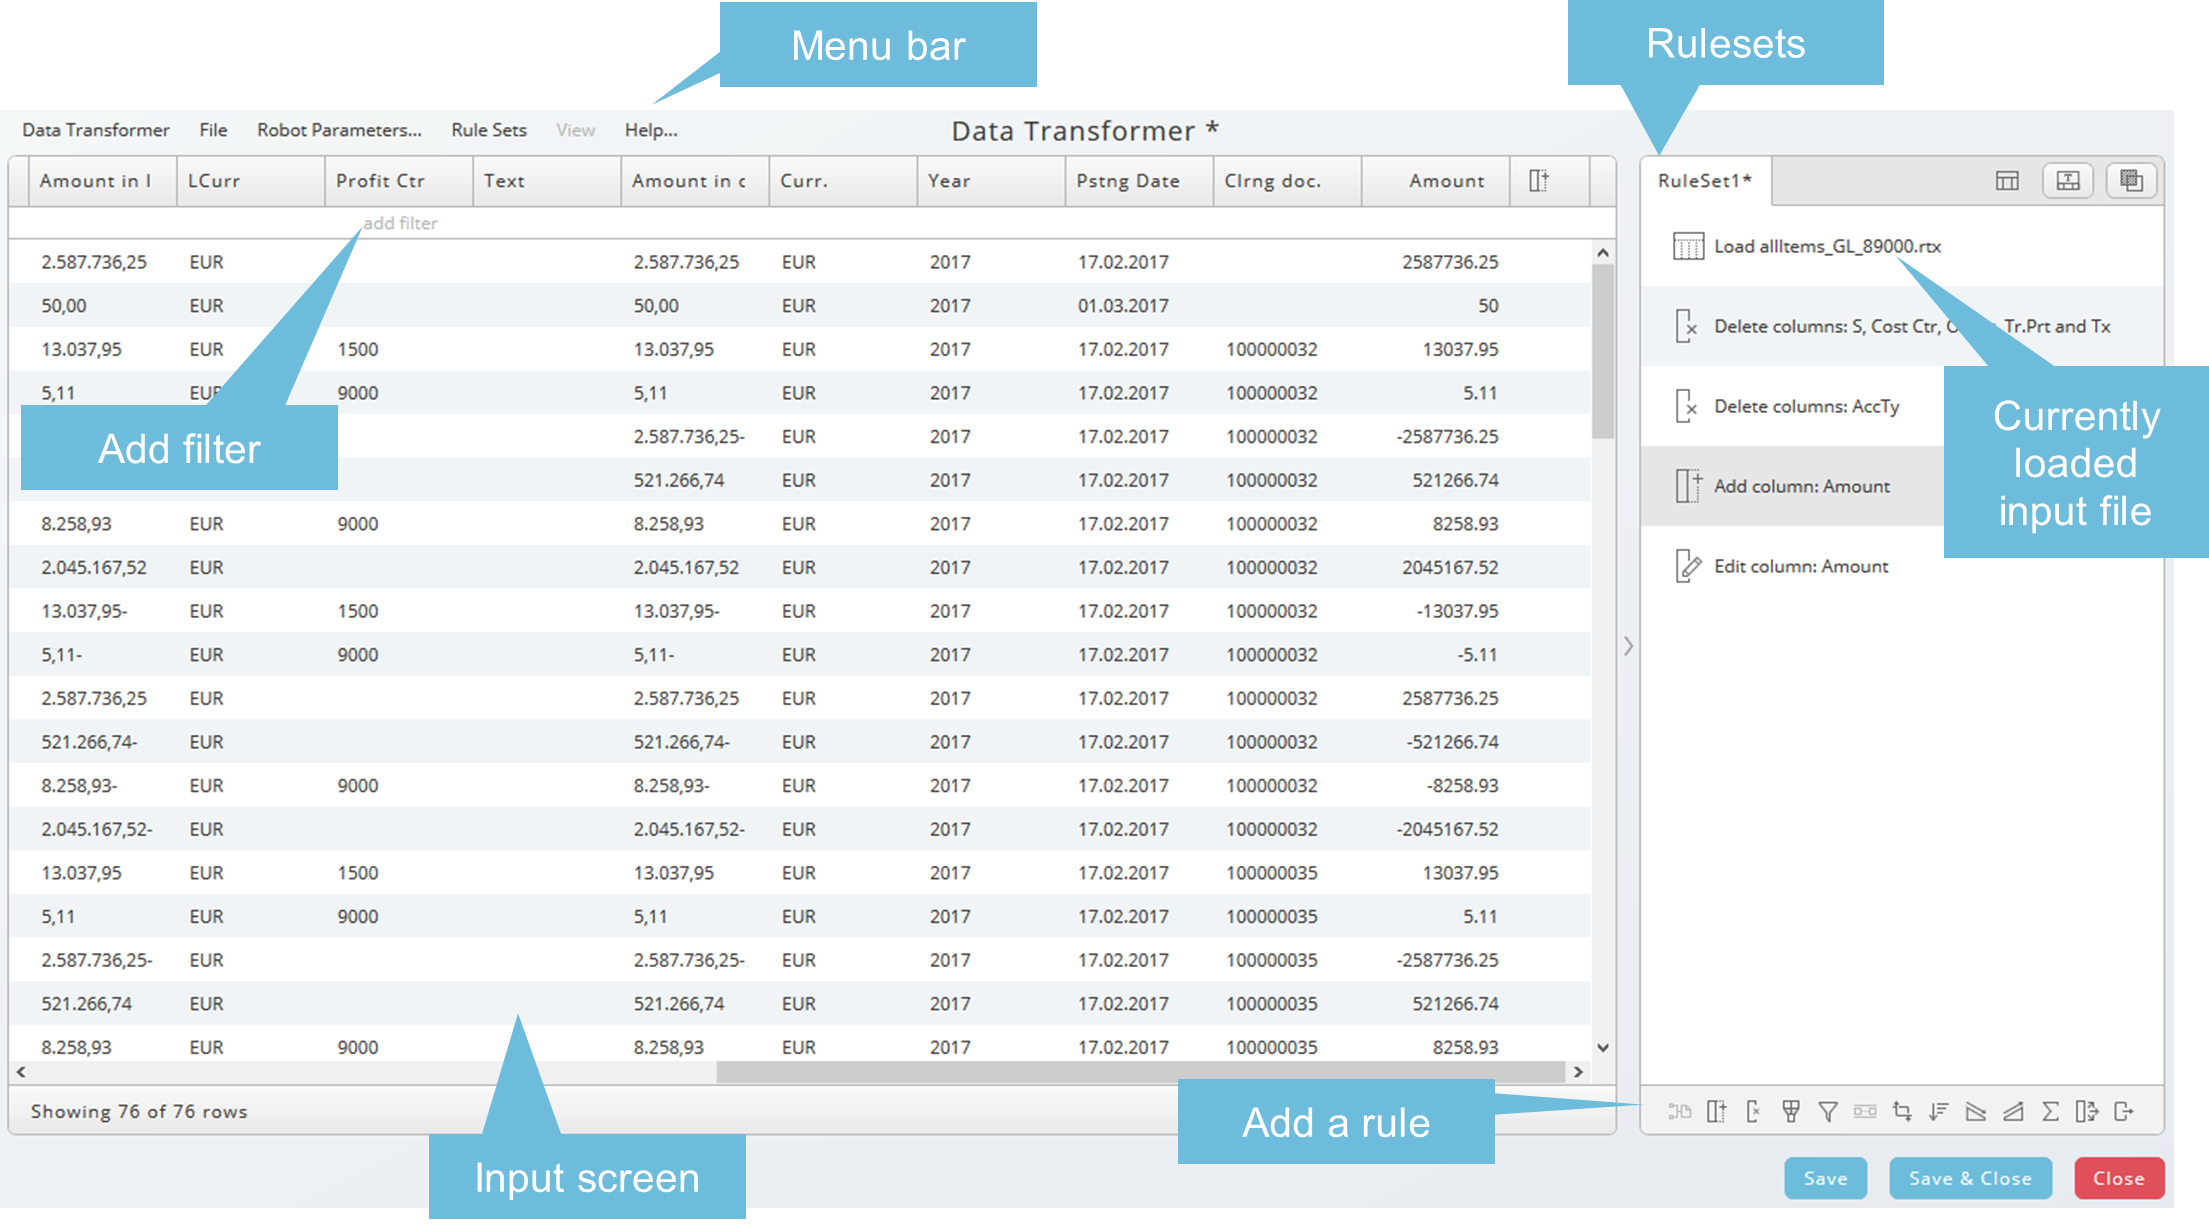
The Data Transformer has two resizable areas:
- The input data on the left
- The rulesets applied to the input on the right
You can hide the ruleset area using the arrow icon. Double arrows appear as a tooltip when it is possible to resize the areas.
Menu Bar
The menu bar consists of the following items:
Data Transformer
- Create a new Data Transformer definition
- Open an existing Data Transformer definition
- Open recent Data Transformer definition
- Refuse all changes until the last saving
- Save all changes
- Save all changes to a new Data Transformer definition
- Close the dialog
Data Files
- Add data file (input file)
- Opens the dialog to replace or delete data files
Properties
- Parameters opens the parameter dialog to add or delete parameters to the Transformer definition
- Add documentation
Rule sets opens the rule set dialog. See Rule Sets below.
Quick Edit allows you to edit multiple columns. Stop Quick Edit ends the Quick Edit mode.
The Help menu consists of the following help items:
- How to use the Input Expression Language (incl. merge option examples)
- How to use the Redwood Expression Language
- How to use Number formats
- How to use Date and Time formats
- How to use Tolerance Expressions for Grouped Match rules
- Detail information about the available Operators for a transformation
Keyboard Shortcuts
The Data Transformer supports Ctrl+z to undo and Ctrl+y to redo an operation.
Use of the Data Transformer
The Data Transformer is used to create rules which are applied to input data. Goal is a filtered, transformed and/or amended result which can be used for further processing.
Rule Sets
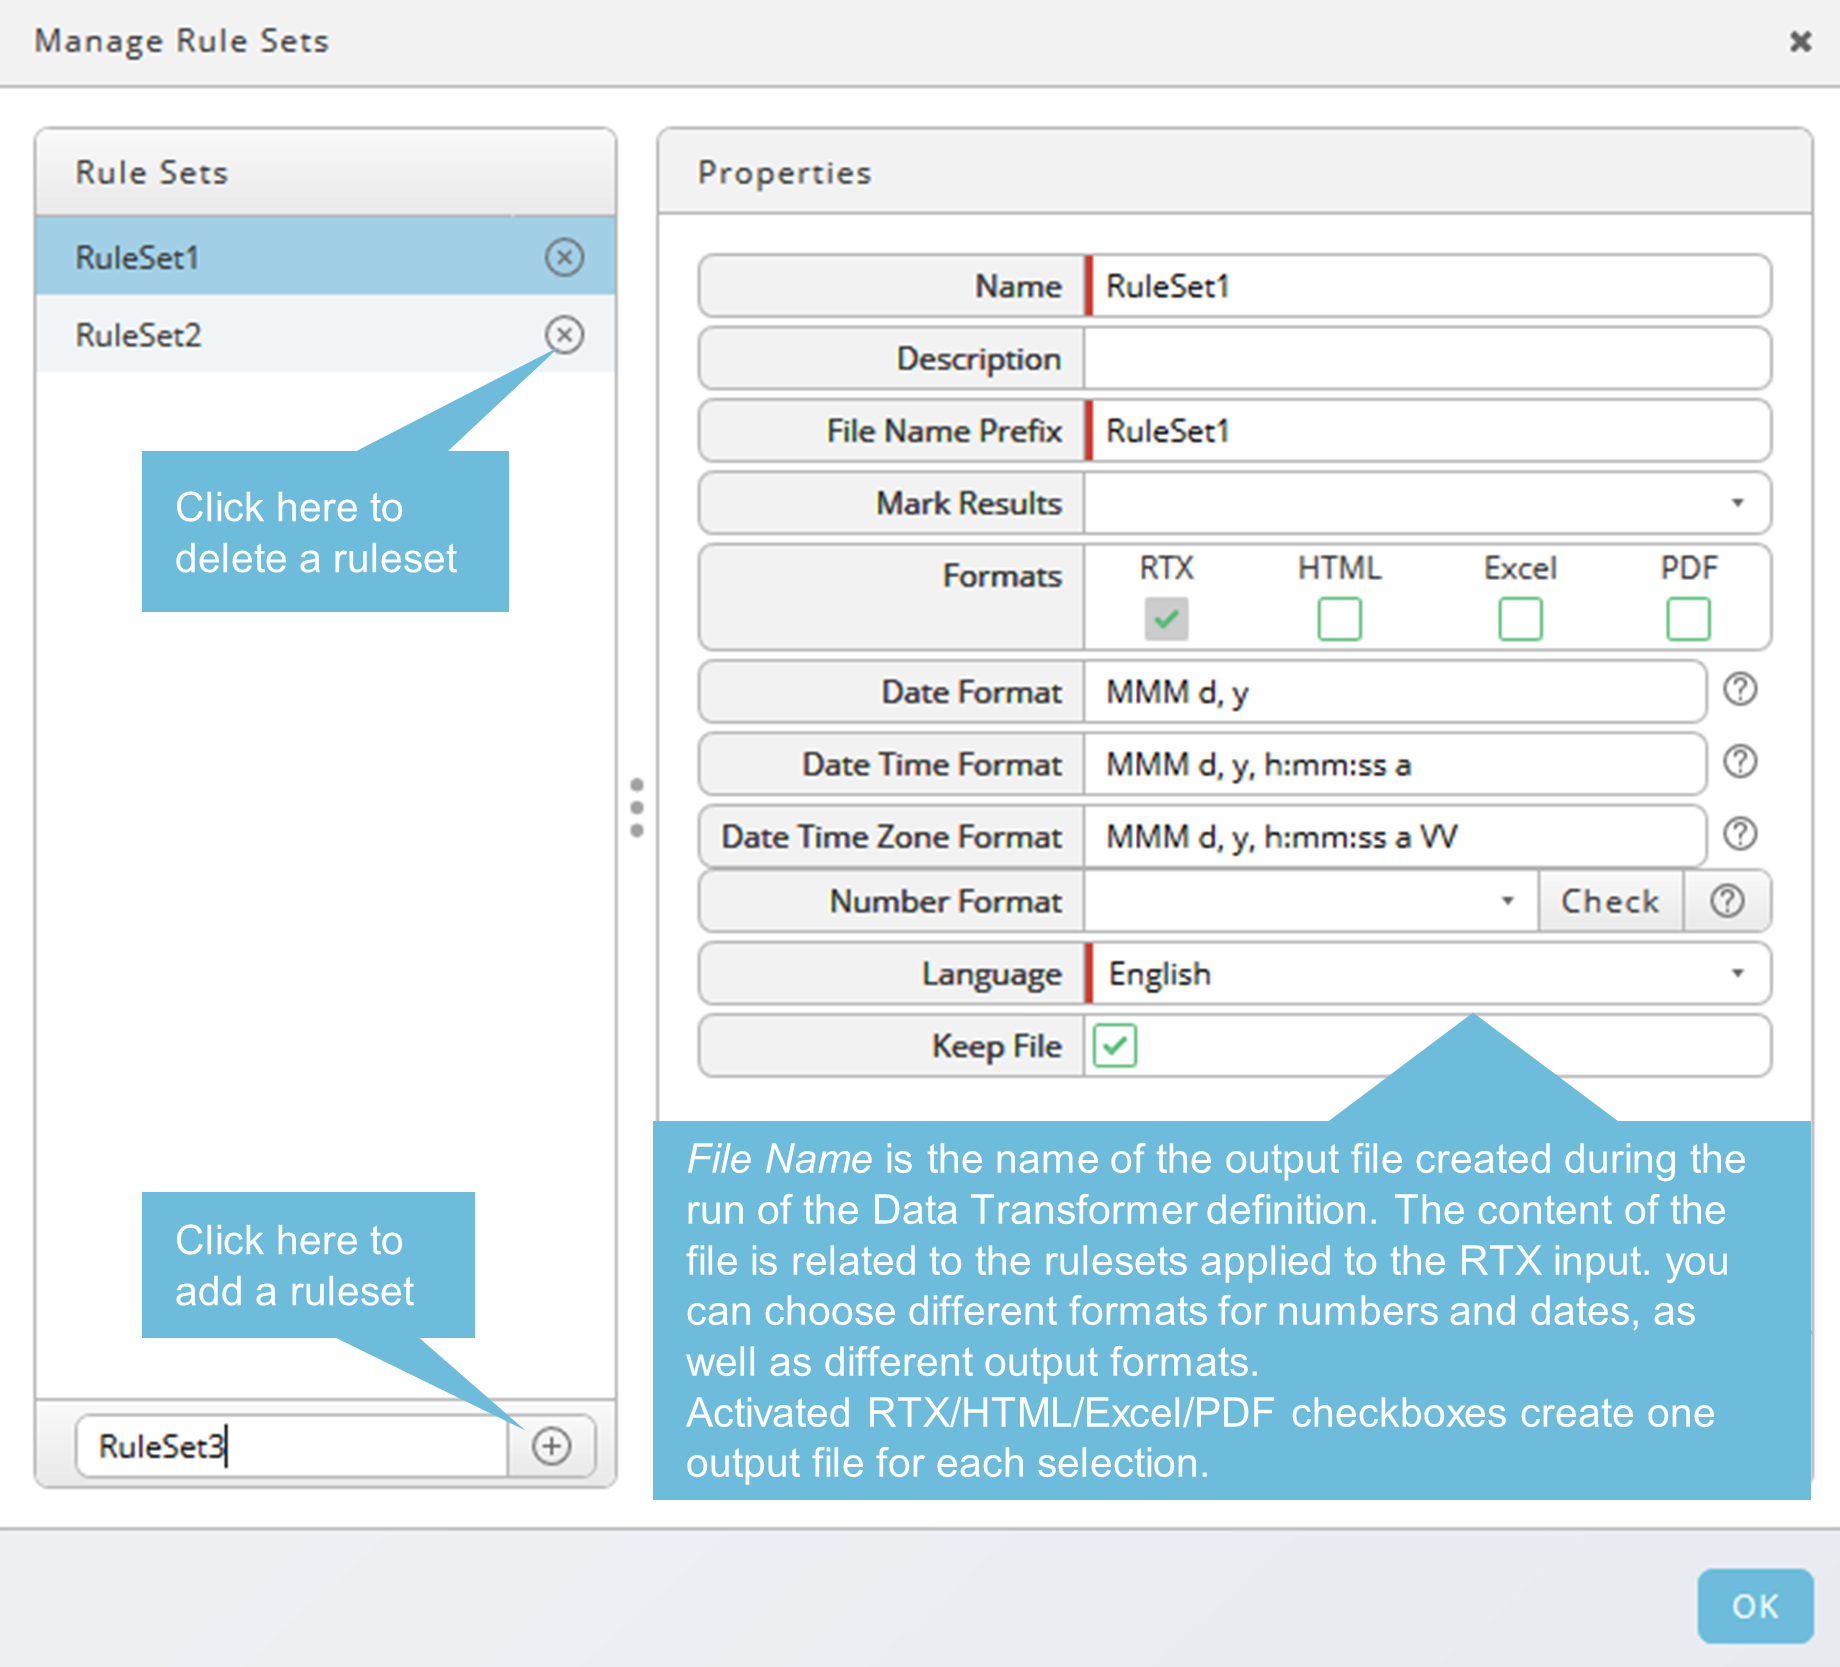
A rule set consists of one or more rules applied to the input. Multiple rule sets are allowed. Each rule set creates one or more output files during the run of a Data Transformer definition.
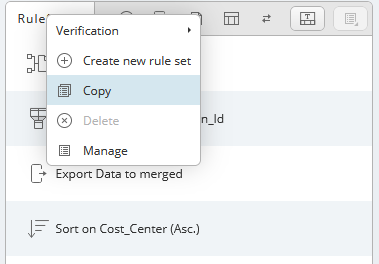
By default, the initial ruleset of a newly created definition is RuleSet1 and can be renamed over the rule set dialog.
Context-menu on the rule set tab allows you to copy or delete the selected rule set, as well as to create a new rule set.
PDF as output format has been added as well as the option to keep or delete interim results when they are not required.
Rules and Transformations
A large variety of operations are available to define certain rules.
The operations are also available using the context-menu (right-click; see also how you can edit or hide a column) on a specific column or below the rule sets.
 - Create a new data set
 - Add column
 - Reorder column
 - Delete column
 - Retain column
 - Edit column
 - Delete rows
 - Remove duplicates
 - Grouped match
 - Transformation
 - Sort by column
 ,
, ,
,  - Min, Max, Sum
 - Group concatenation
 - Identify first row in group
 - Burst
 - Export
 - Documentation
 - Filter column
 - Delete
 - Hide
 - Unhide/Unhide all
 - Audit
 - Synchronize scrolling, available with multiple input files
To delete or disable a rule use the appearing icons. Evaluate to this rule means the visible until this rule has been applied. To edit a rule, choose Edit Rule or use double click.

How to Add a Parameter
You can define additional parameters which can be used for certain transformations, to filter or to fill a new column with predefined values. Examples in Add and delete a column (Figure 4), Filter and Transformation. To add a new parameter, select Parameters in the Properties menu. Click on the Add icon (plus sign in a circle) to add the new parameter.

Enter a name, default expression, example value and choose an appropriate direction and number. The values must correspond to the chosen type, for example 1000 is a number, abc is a string.
Available types are Date(Time(Zone)), Number and String.
The direction is important if you want to map the defined parameter in a bigger process to pass value to another definition inside of the process.
- In - Parameter gets an input value, but no output value, parameter can only be used inside the Transformer definition
- InOut - Parameter gets an input and an output value, parameter can be used inside and outside the Transformer definition
- Out - Parameter gets only an output value, not usable inside the Transformer definition, but outside
Add and Delete a Column
To add a new column, click on the Add Column icon. Enter the name and choose a valid format (Date, String or Number).
The following options are available to create a new column:
- As a copy of an existing column (Figure 1)
- Filled with a specific value (Figure 2)
- Filled by a REL expression (Figure 3)
- Filled with a parameter value (Figure 4)
- Filled with an index (Figure 5)
In our first example (Figure 1) we create a copy of column Amount, type Number. If you choose column, a list of available columns appears automatically when you click on column.
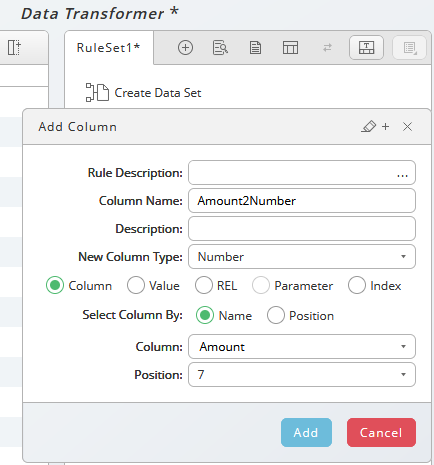
Figure 1
In the second example we create a new column, type string and filled with a specific value (abc).
Depending on the next rules and how you want to use the column, ensure that the type is corresponding to the value.
tip
1000 can be used as a number or as a string. You can only execute mathematical operations on numbers.
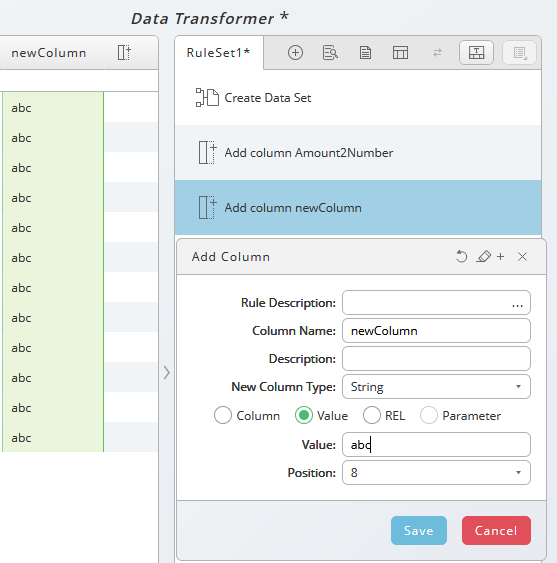
Figure 2
Now filled by a REL expression. Additional Check and Help buttons are available for REL. In this case we fill the new column with the values of the existing column Company_Code.

Figure 3
Now, the column is filled with the value of a parameter. The list of available parameters appears automatically when you click on the field Parameter.
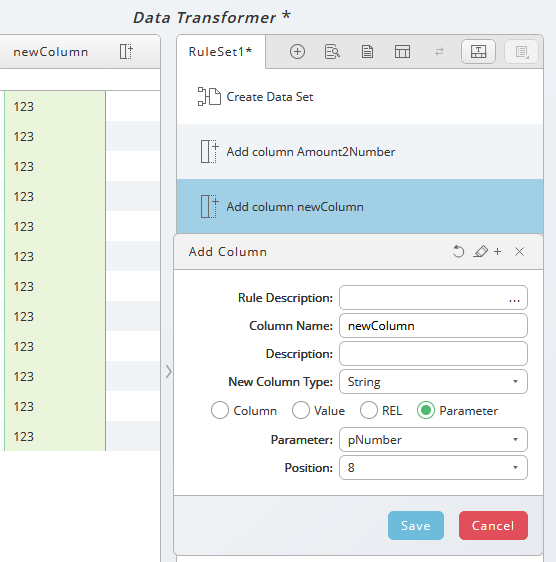
Figure 4
Now, the column is filled with a row index starting at the value specified in the Value field, the index in incremented by 1 for each row.
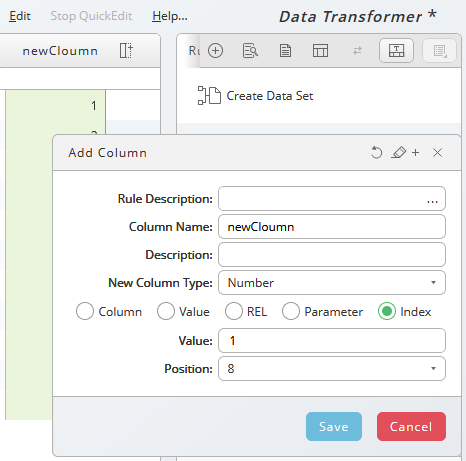
Figure 5
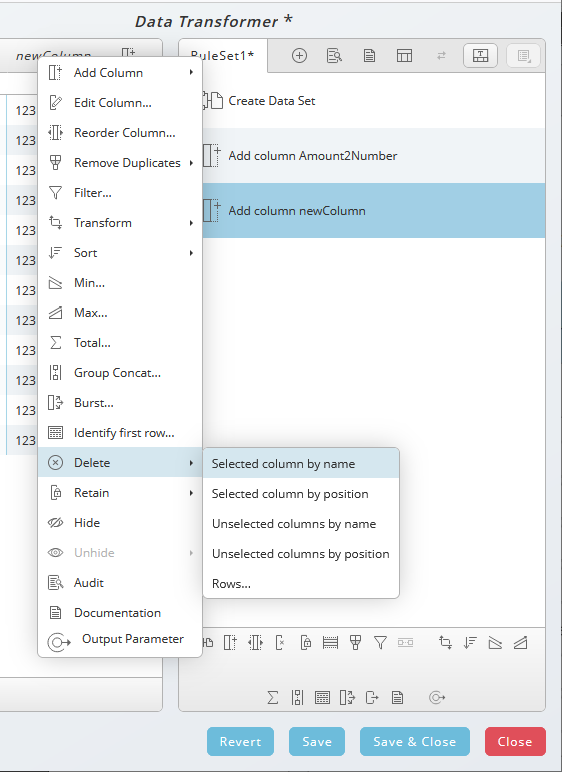
To delete or edit a column use the context-menu on the specific column. Edit is only possible over the context-menu. When editing a column you can also define the positon of the column. The name and the type can be changed when you choose the rule.
To delete a column, you can use the Delete Column ![]() icon in the toolbar beneath the ruleset as well.
icon in the toolbar beneath the ruleset as well.
The context-menu offers additionally the option to hide/unhide and audit columns. Audit tracks the rules on specific column as a short overview.
Remove Duplicates
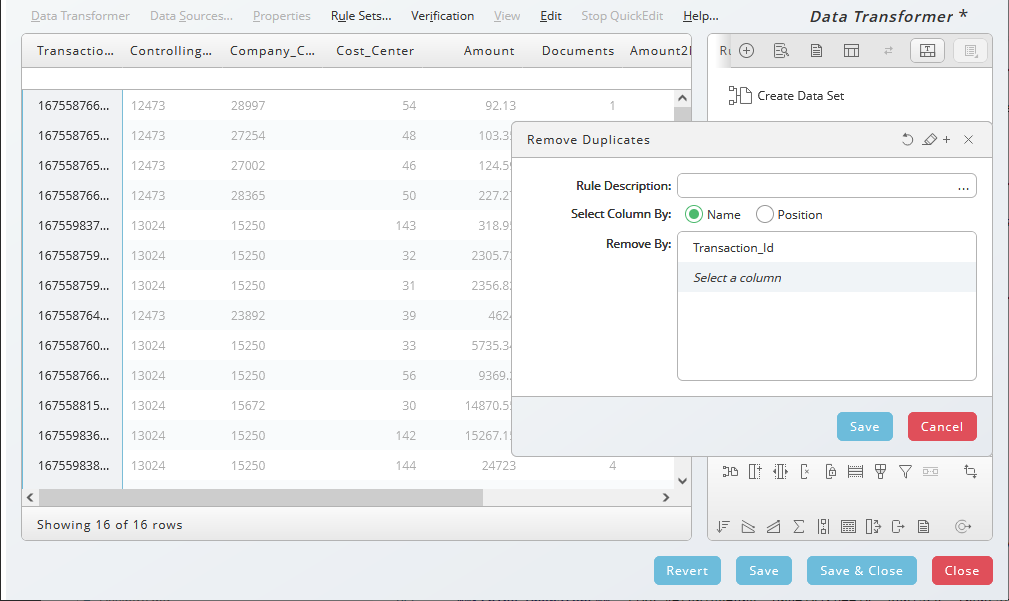
Remove all duplicates in relation to column entries. One or more columns can be selected. Click on the Remove Duplicates icon in the toolbar and select one or more key columns. In our example, only rows with a unique column Transaction_Id are displayed.
Filter

To add a filter, click on the Filter icon ![]() in the toolbar at the end of the ruleset. Many filters can be applied to the data in a sequence to get the desired result. A large list of operators is available.
in the toolbar at the end of the ruleset. Many filters can be applied to the data in a sequence to get the desired result. A large list of operators is available.
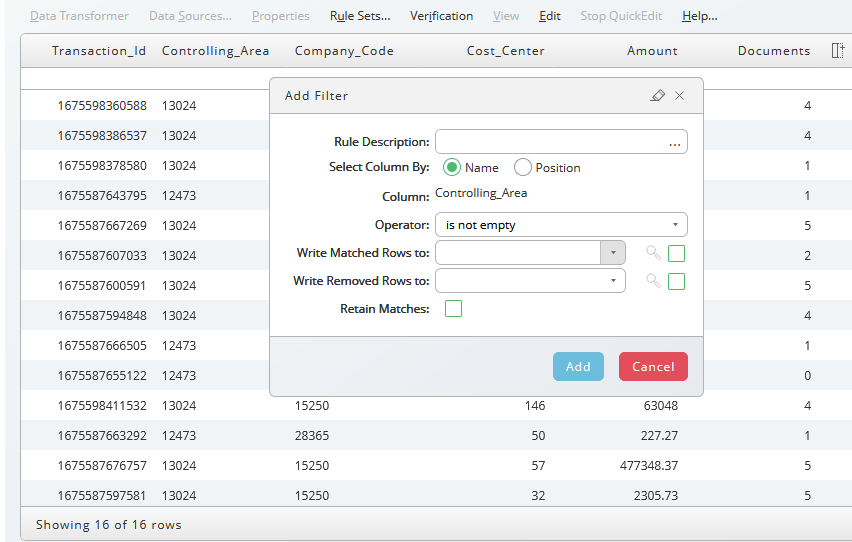
First, we remove the lines where Profit Center is not empty and afterwards the lines where Amount is greater than the parameter value, in this case 1000.
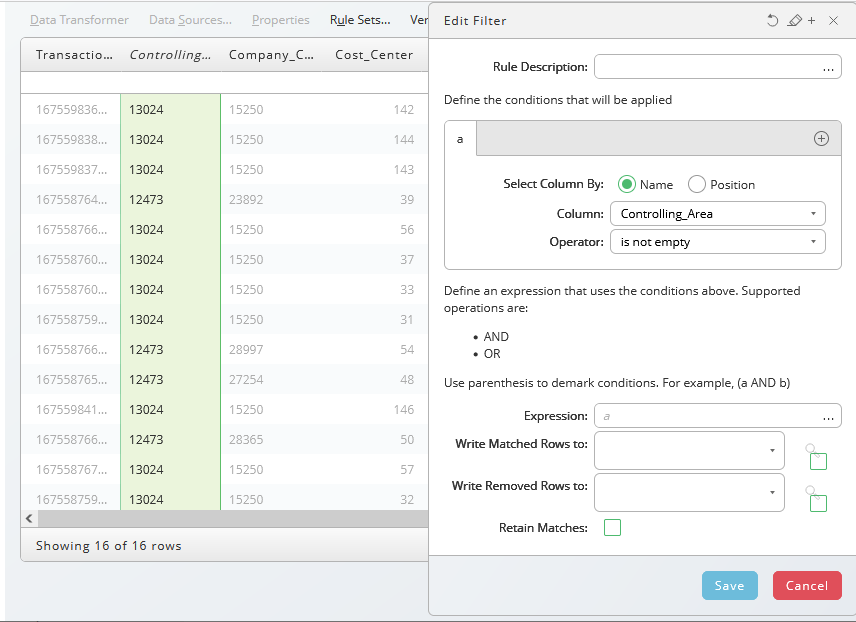
Write matched rows to a filename where all matches will be written.
Write removed rows to a filename where all matches will be written.
The file(s) will be written into the process details when the Transformer process runs.
A preview is accessible when you click on the Spyglass icon.
Transformation
A large variety of operators are available to define transformations. They are classified in three ways:
- String Operators, like After/Before, Prefix/Suffix, Replace, Truncate Uppercase/Lowercase, etc.
- Number Operators, like Add/Substract, Divide/Mulitply, Min/Max, etc.
- Date(Time) Operators, Add/Substract Time, Time between
The list of operators varies dependending on the chosen column. Click on the Question Mark icon for more information.

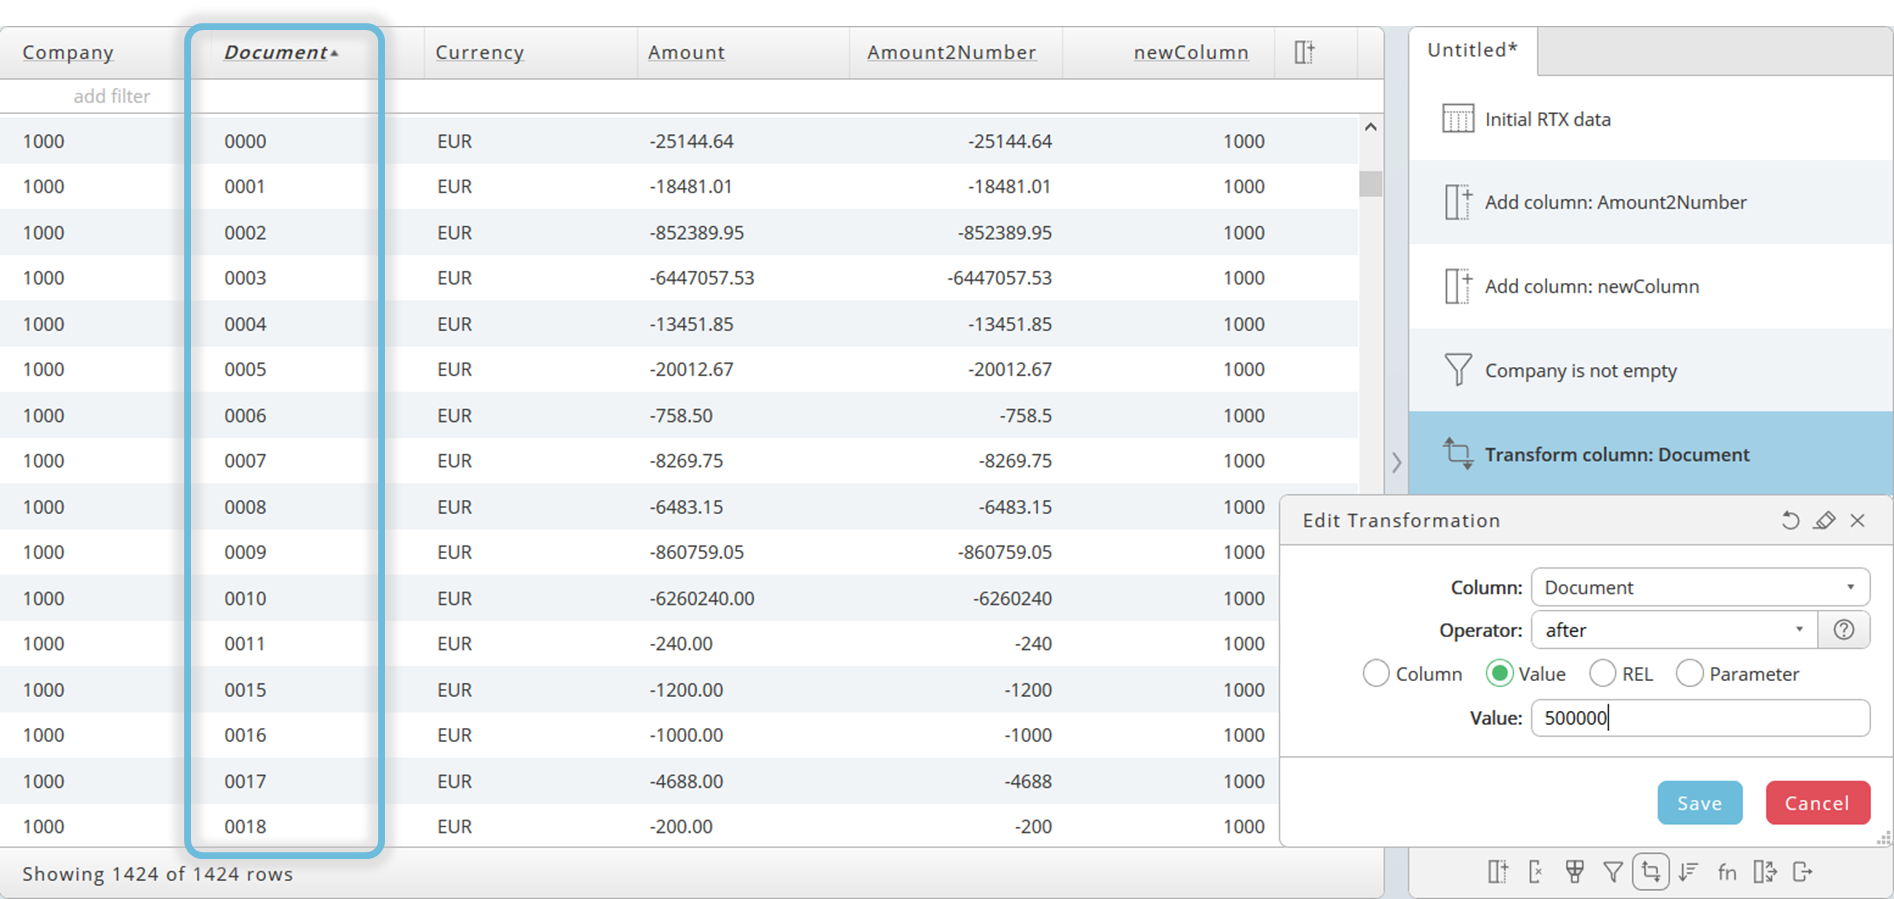
The first example uses the string operator after to get the last four digits of a document number of those documents which starts with 500000.
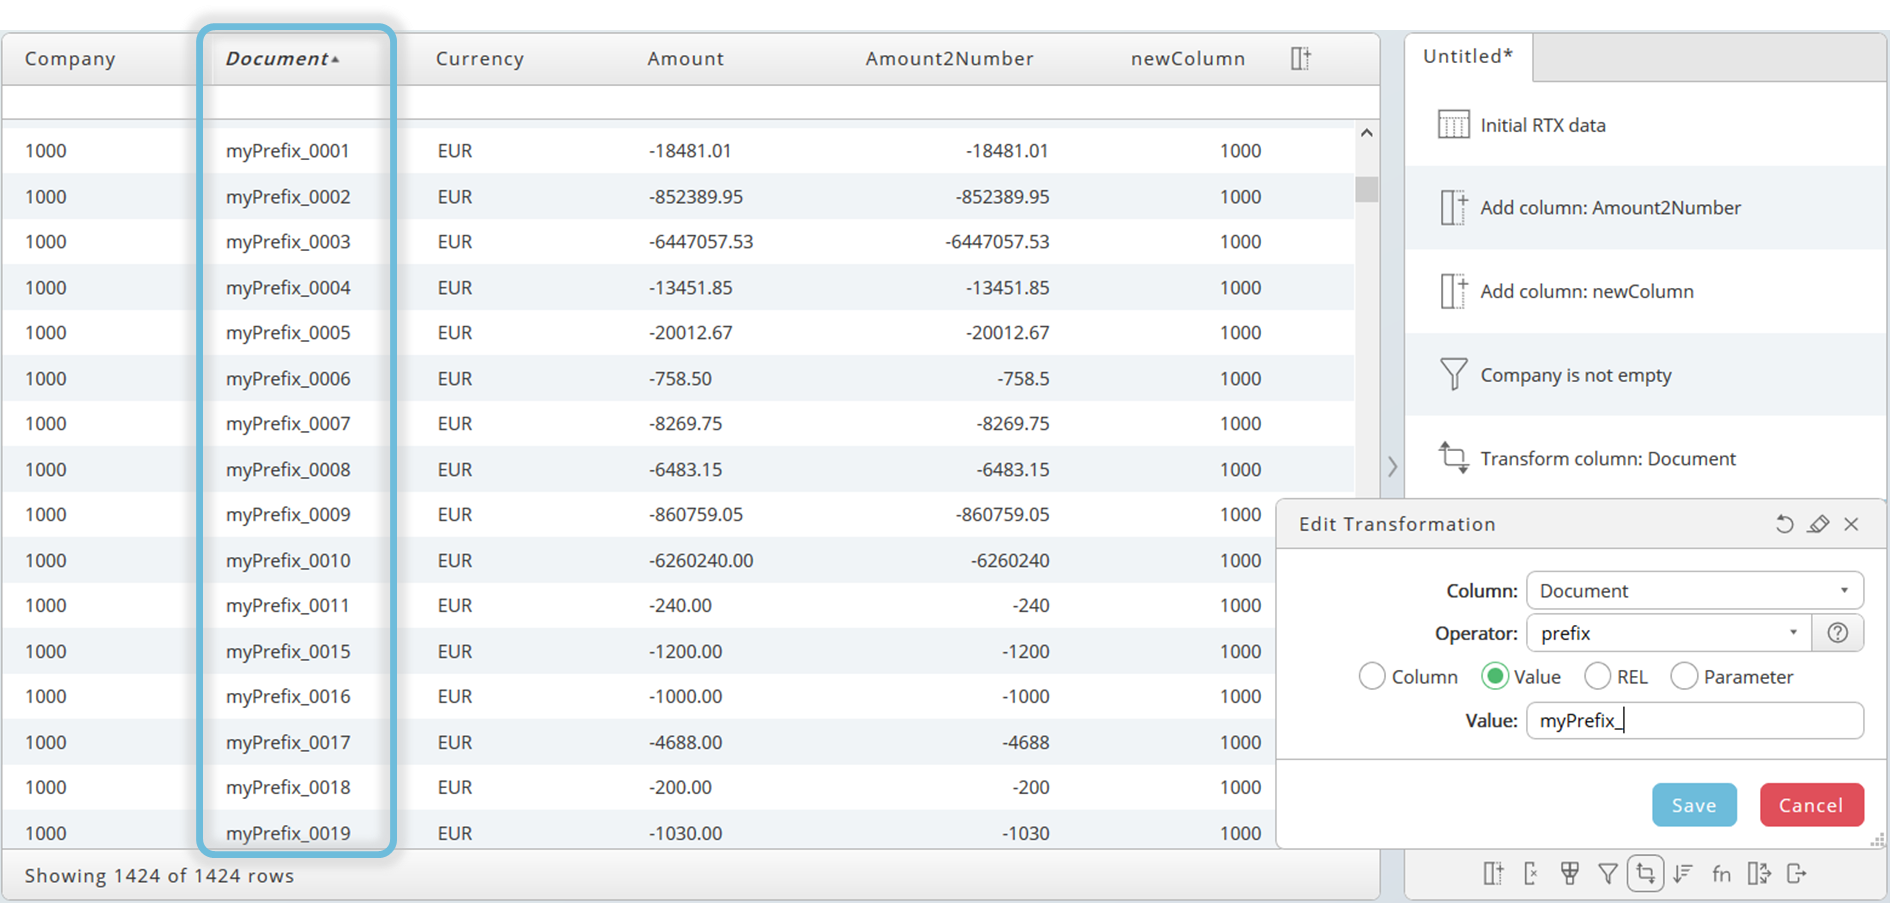
Add a prefix in front of it.
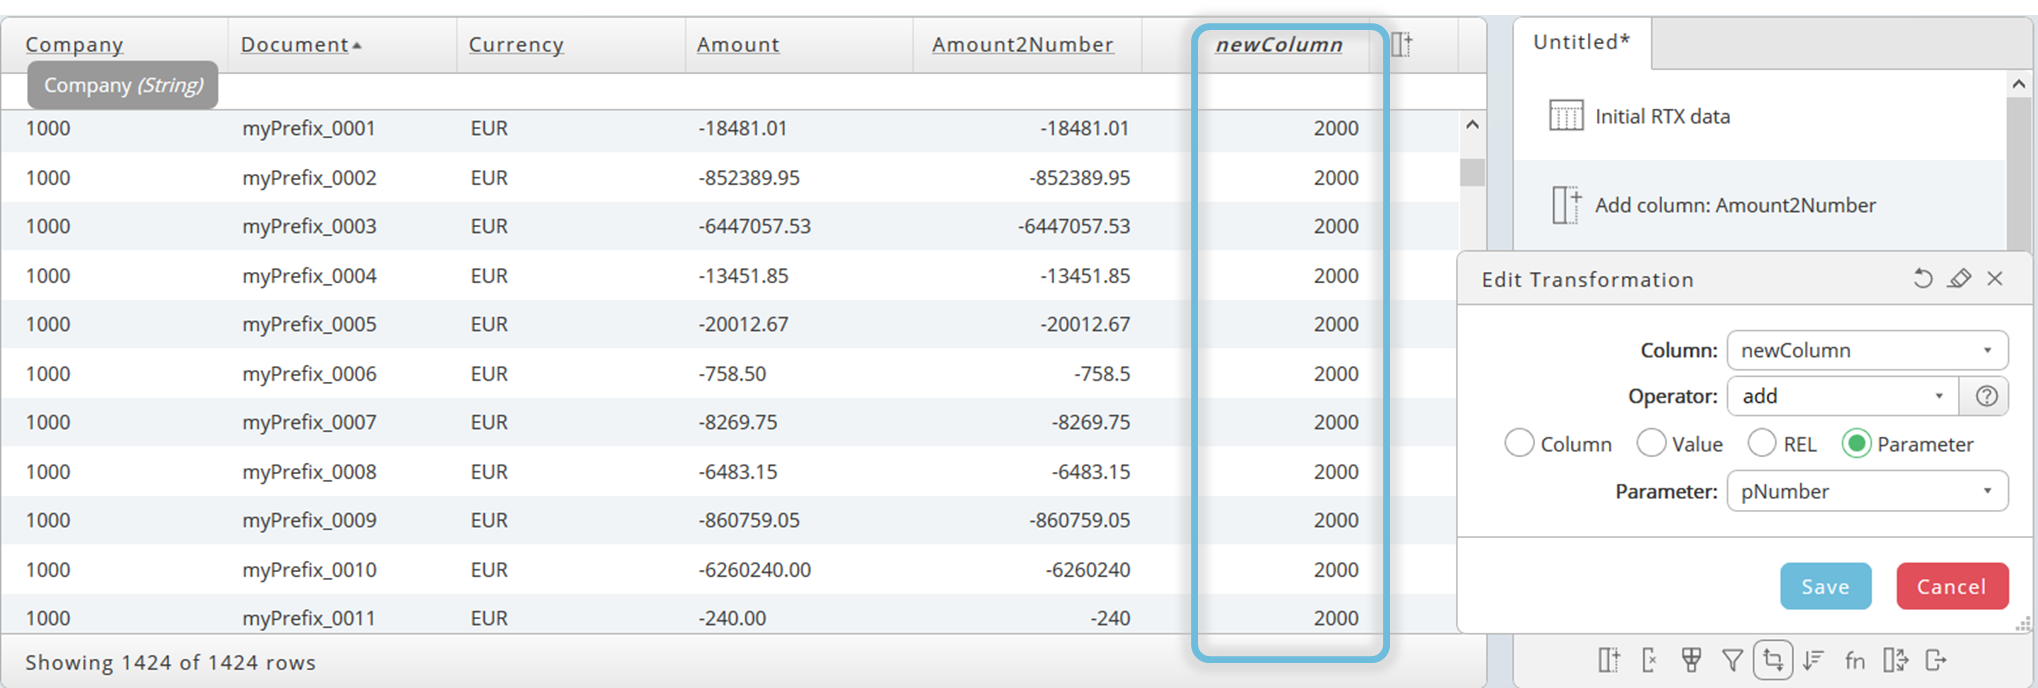
Now add the value of the parameter pNumber to the entries of column newColumn.
Sort
To define a specific sort, click on the icon in the toolbar. You can combine multiple sorts, in ascending or descending order.
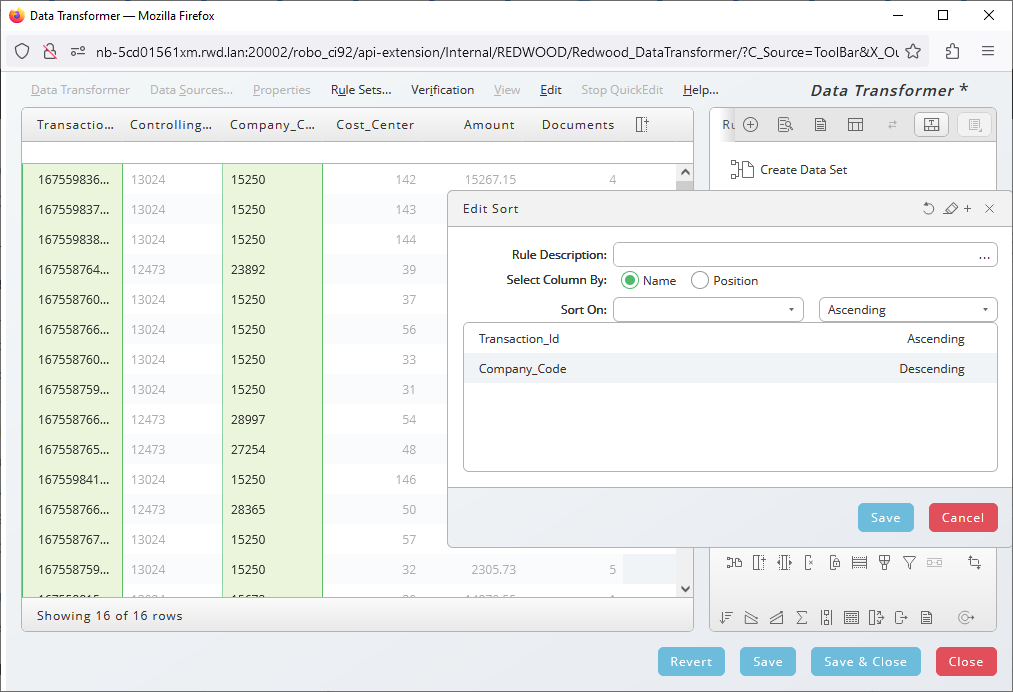
To delete or edit a sort hover over the line with your pointer until the tooltip appears.
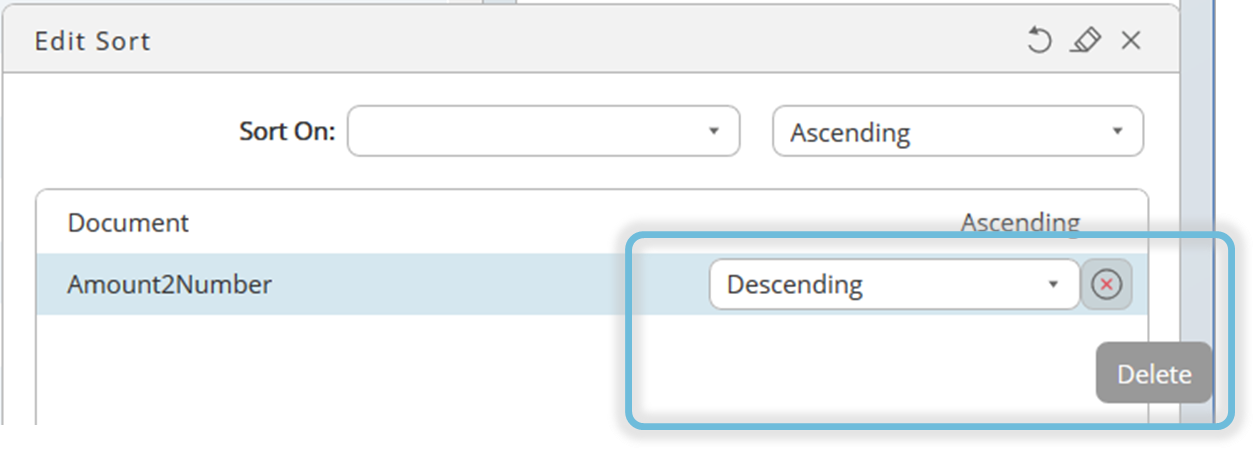
Functions
Functions can be used to create the minimum (![]() ), maximum (
), maximum (![]() ) or totals (
) or totals (![]() ) of a data column, which must be a number format, in relation to a key column, for example totals per Company_Code. Ensure that a rule is selected where at least a number formatted column is visible.
) of a data column, which must be a number format, in relation to a key column, for example totals per Company_Code. Ensure that a rule is selected where at least a number formatted column is visible.
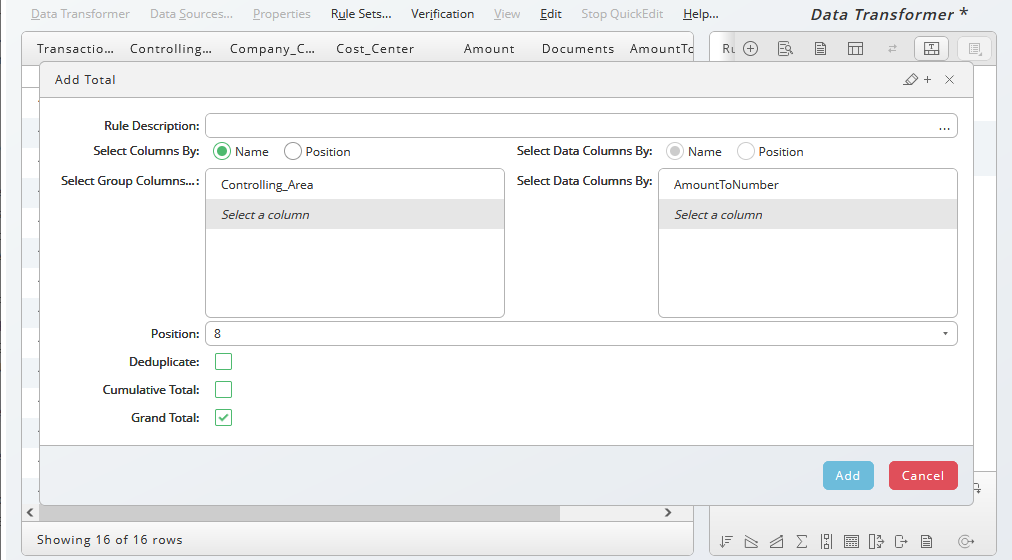
In this case we got totals for each Company_Code, however, they are duplicated.
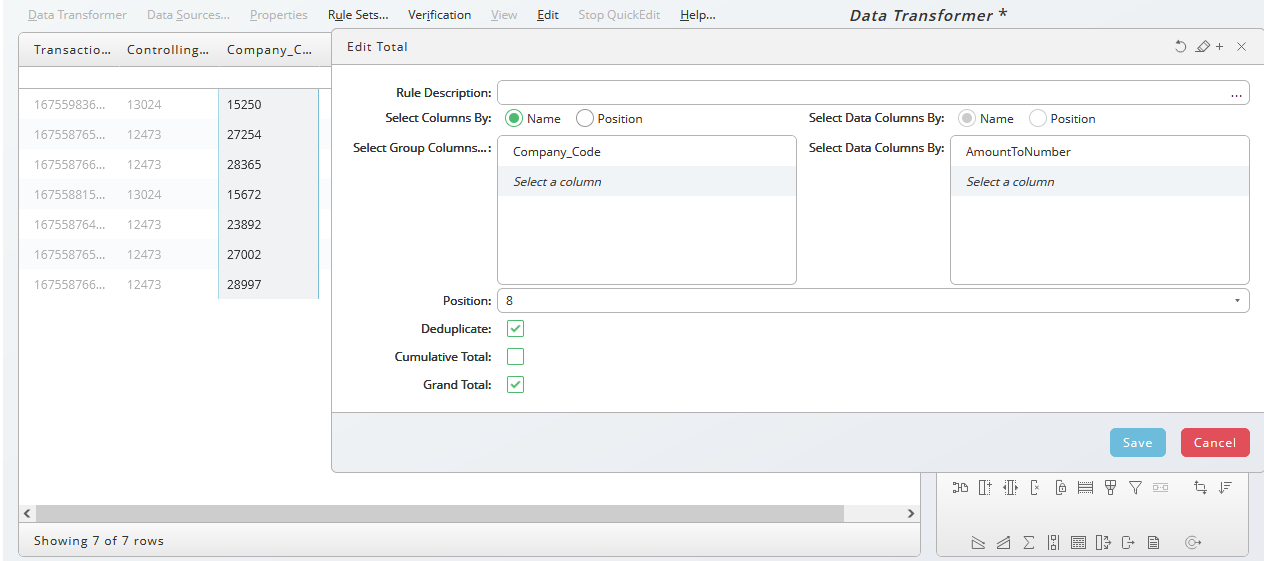
We choose Deduplicate to get unique totals for each Company_Code.
Identify First Row in Group
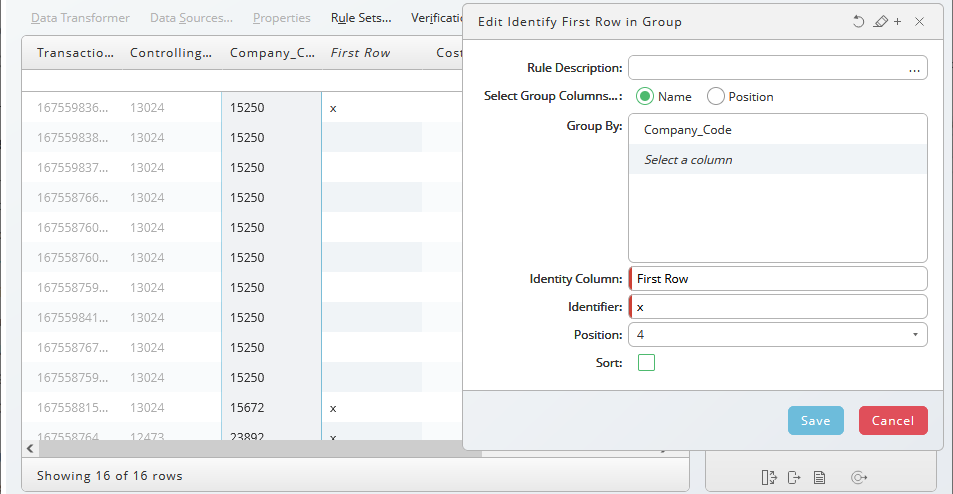
This rule (![]() ) allows you to add an additional column identifying the first row of a group. Select the column (name or position) where you want to apply the rule, the Identify Column (header), an identifier and the position of the identifying column.
) allows you to add an additional column identifying the first row of a group. Select the column (name or position) where you want to apply the rule, the Identify Column (header), an identifier and the position of the identifying column.
Burst
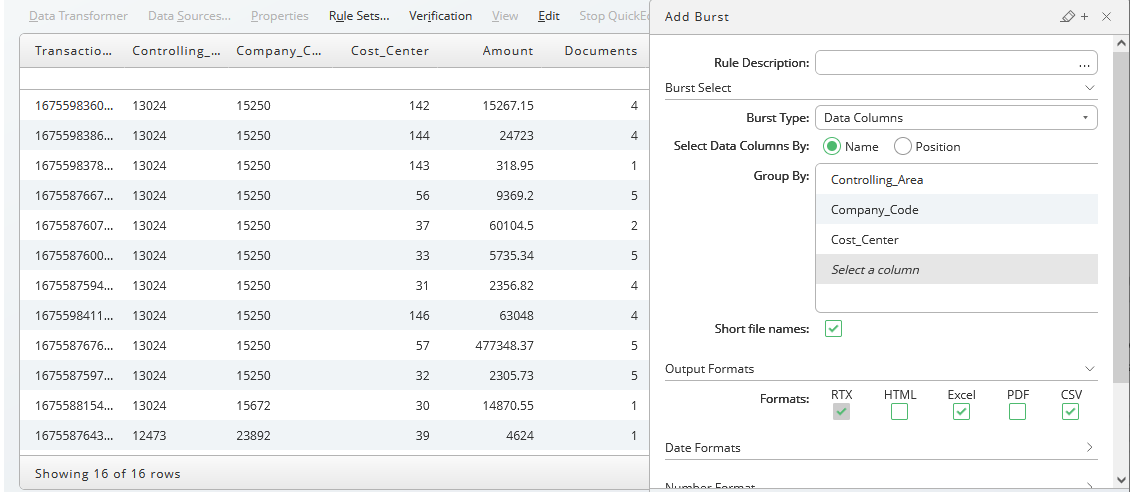
A burst rule generates RTX output files per key. A key consists of one or more columns. In our example the burst rule will generate RTX output files for each combination of the column Controlling_Area, Company_Code, and Cost_Center.
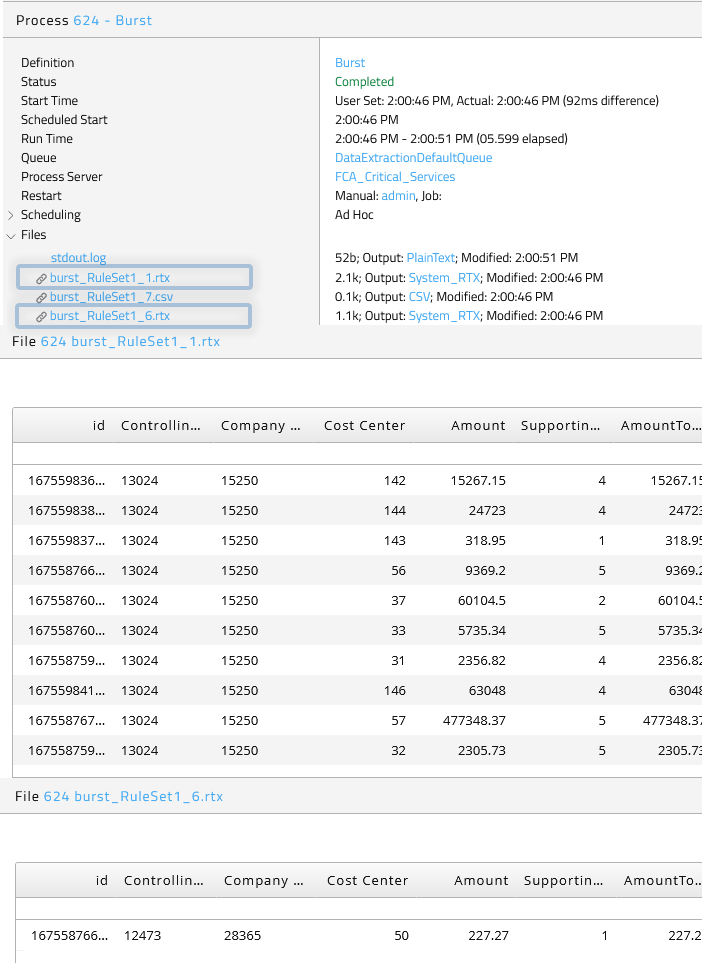
Submit the Data Transformer definition and check the result in the Process Monitor (see Run Data Transformation). For each key an RTX output file has been created. These files reside in the details of the selected process. Each is written in blue, means just one click opens the file immediately.
Export
Exports can create additional results depending on the position within the sequence. Example: before we add the rule Remove Duplicates, we need the complete list in a separate output file. Ensure that the export is placed before the removal rule will be applied. To place the export rule in the right position, select the rule before and choose the export button on the rule bar beneath the ruleset.
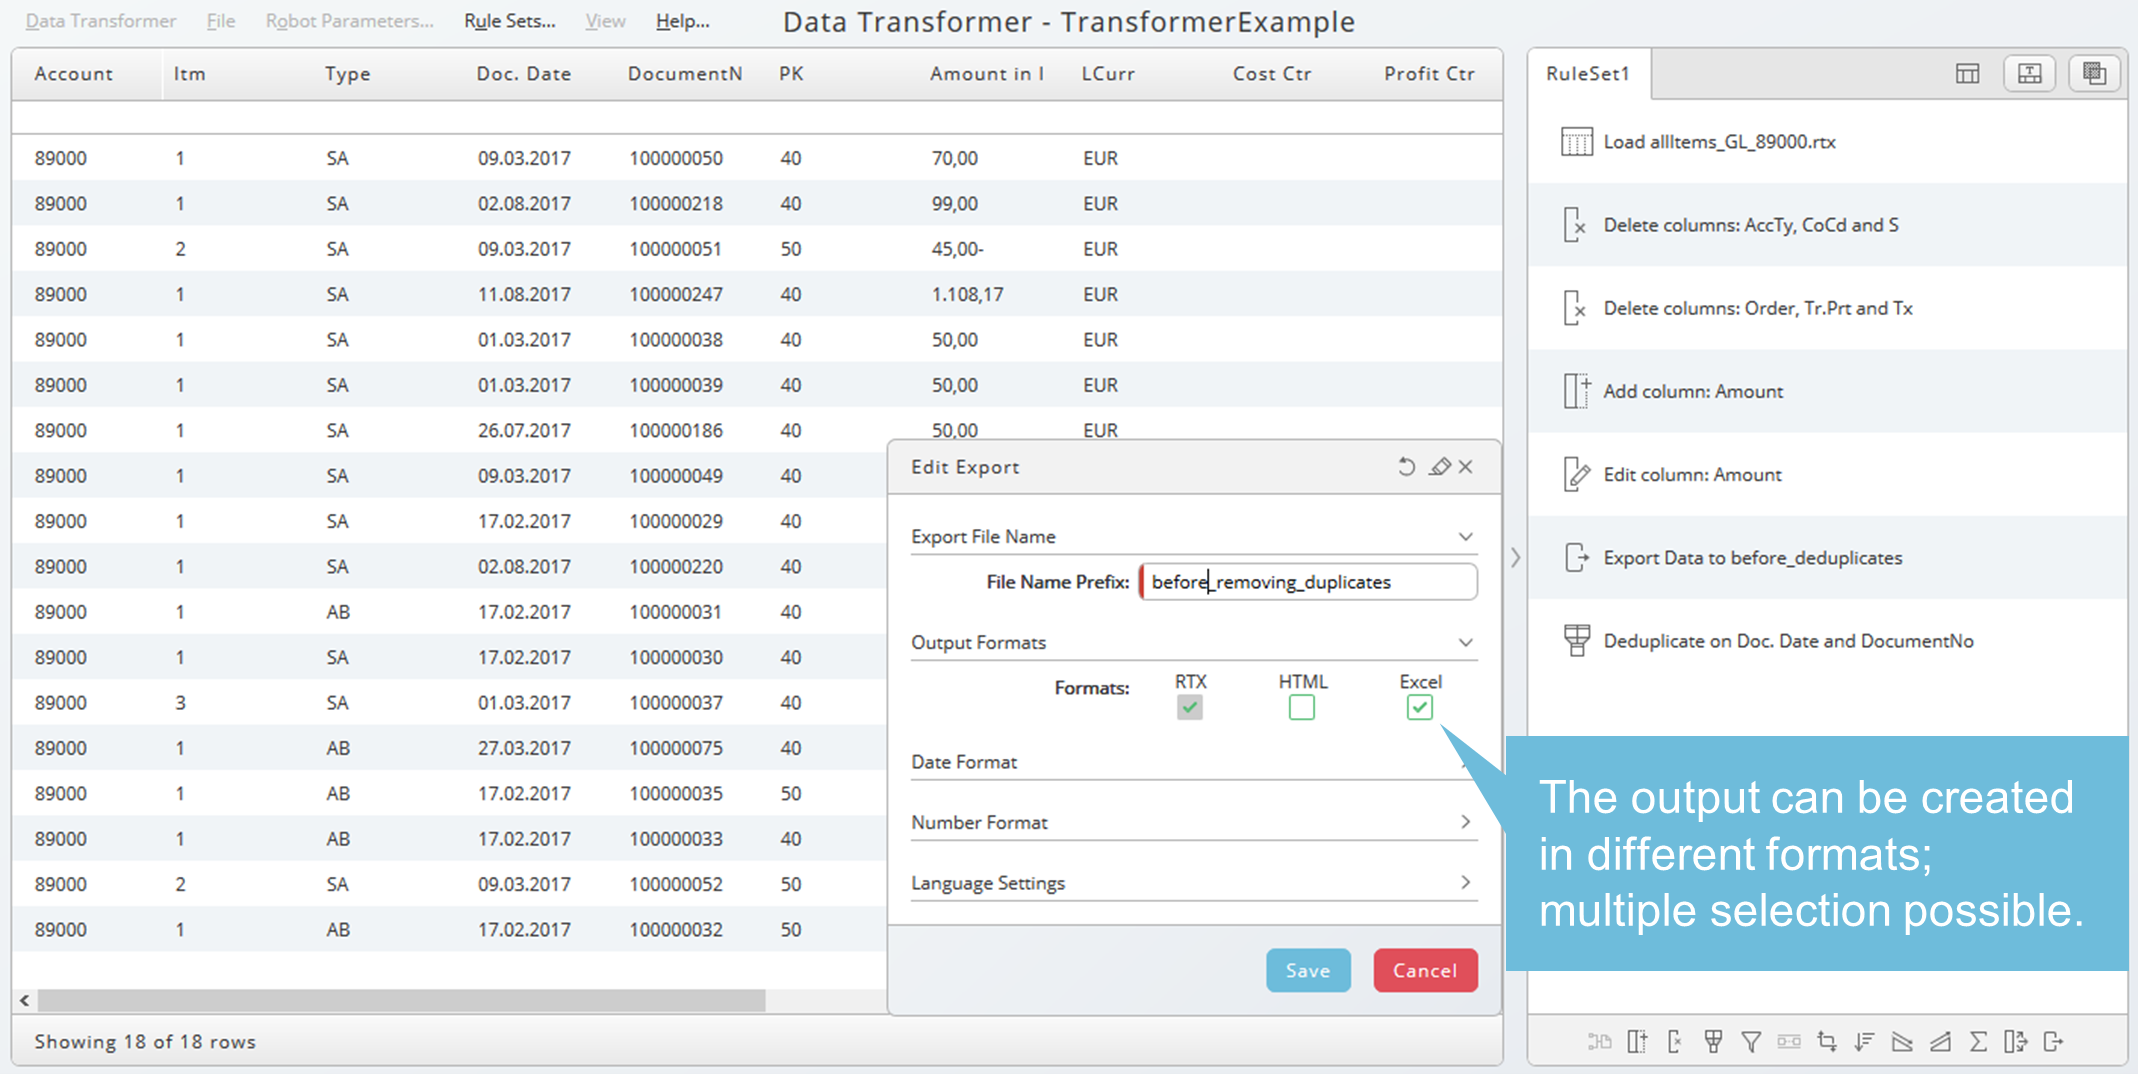
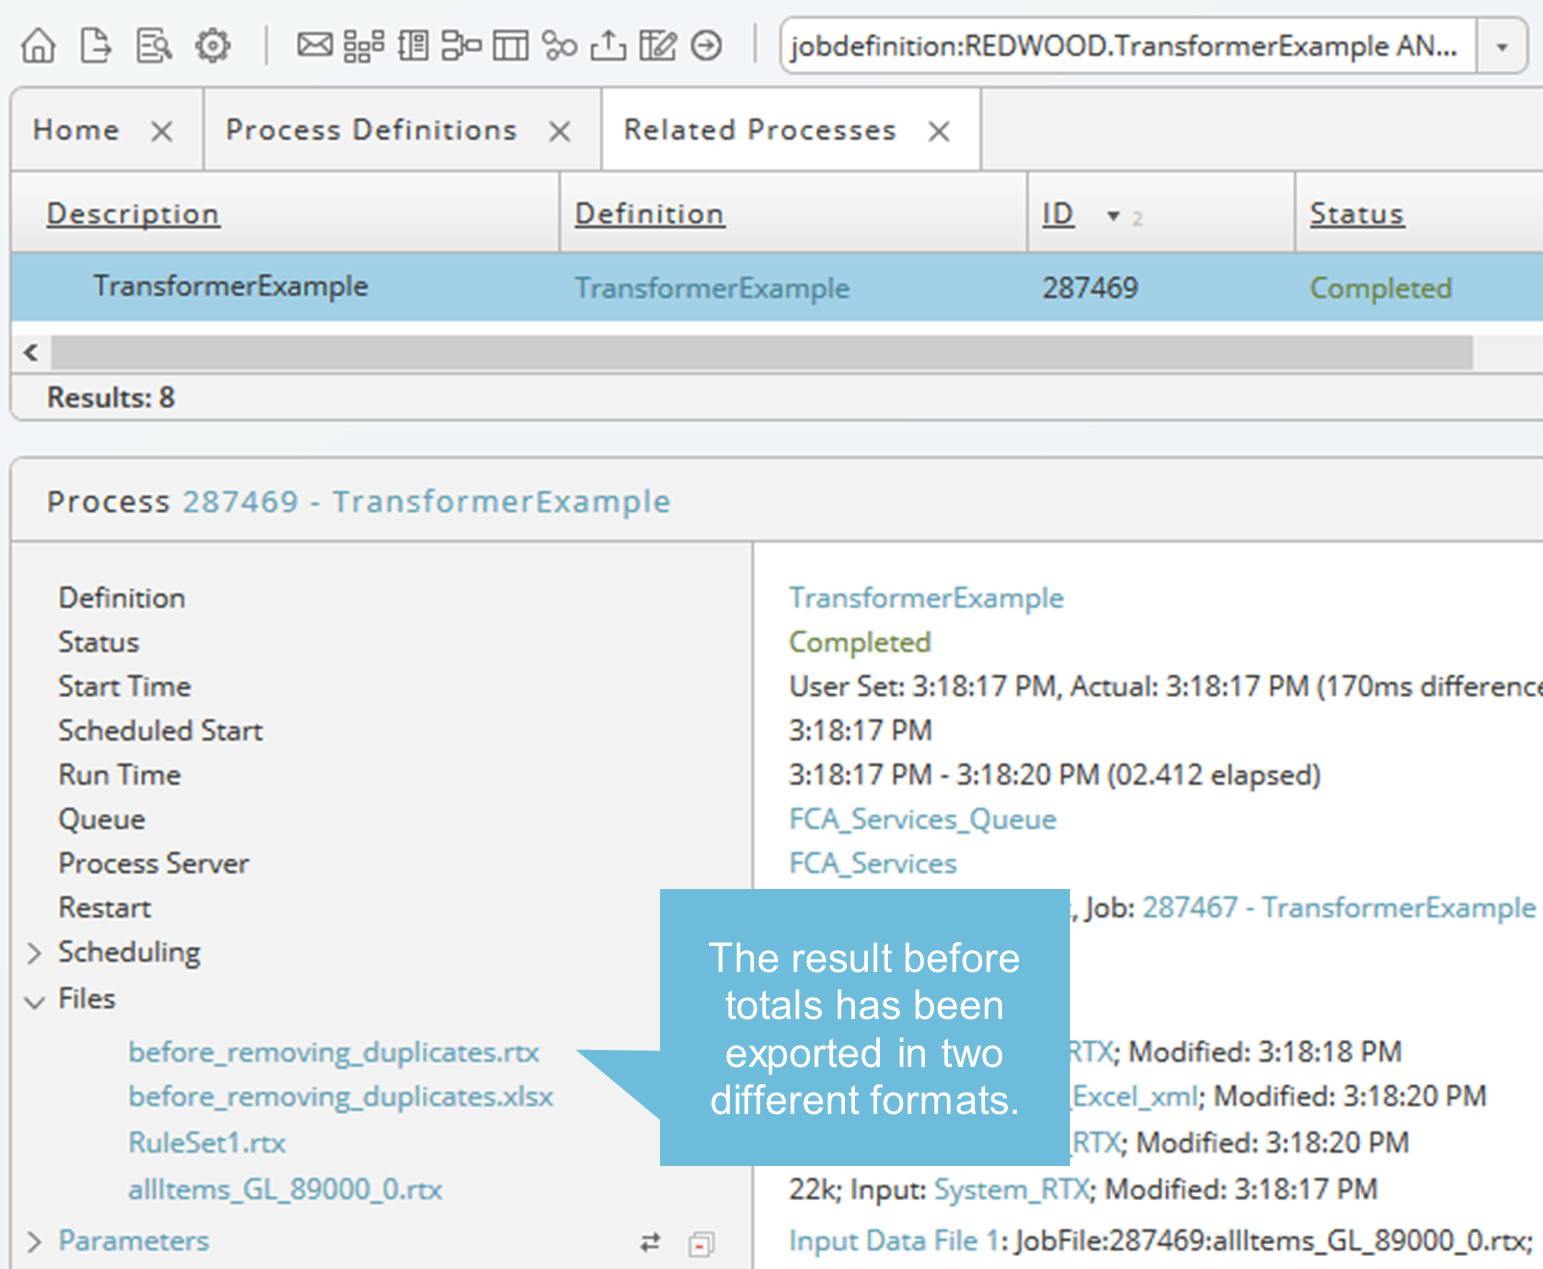
Submit the Data Transformer definition and check the result in the Process Monitor (see Run Data Transformation). For each format you have chosen in the export rule an output file has been created. These files reside in the details of the selected process. Each is written in blue, means just one click opens the file immediately.
Documentation
The documentation rule provides users with the ability to add notes within their lists of rules to help them understand what they were doing and why. Lists of rules potentially grow quite large and having the ability to include a note helps remember or explain what was done and why.
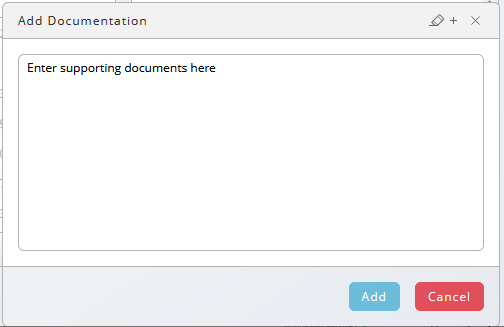
The rule does not do anything with the data.
tip
This rule is independent from the documentation property. The transformer documentation is also visible and editable in the transformer definition outside of the transformer user interface and vice versa.
Create Data Set
Merge Data
The Data Transformer also supports operations that either look up or merge data by using data from each row specified by a set of key columns. These are automatically determined based on the common columns between two or more data sources.
Merged records can be compared using Grouped Match, with or without tolerances to the compared data, for example for account reconciliation to find matching totals.
You load additional data files for Grouped Match or other merge options.
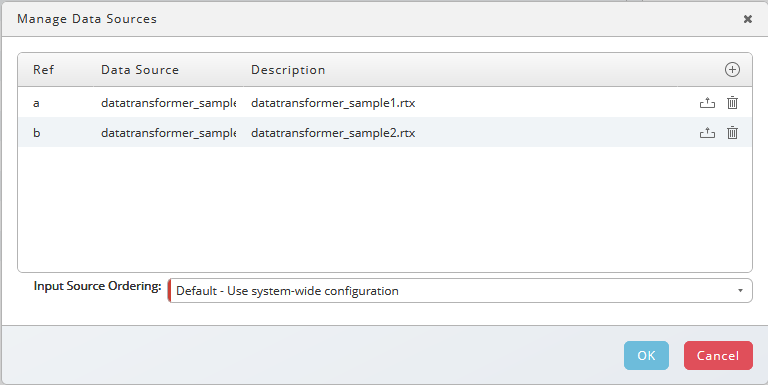
Each new rule set has Create Data Set rule on top of its list; loaded data files, or results of other rule sets left of the current rule set, can be used.
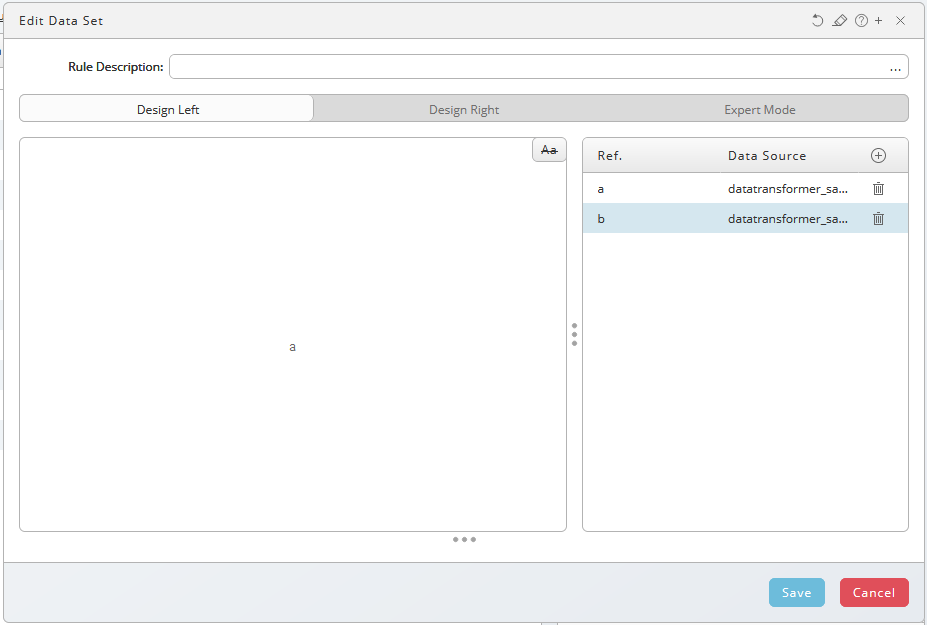
Double-click the Create Data Set rule to open the merge options dialog.
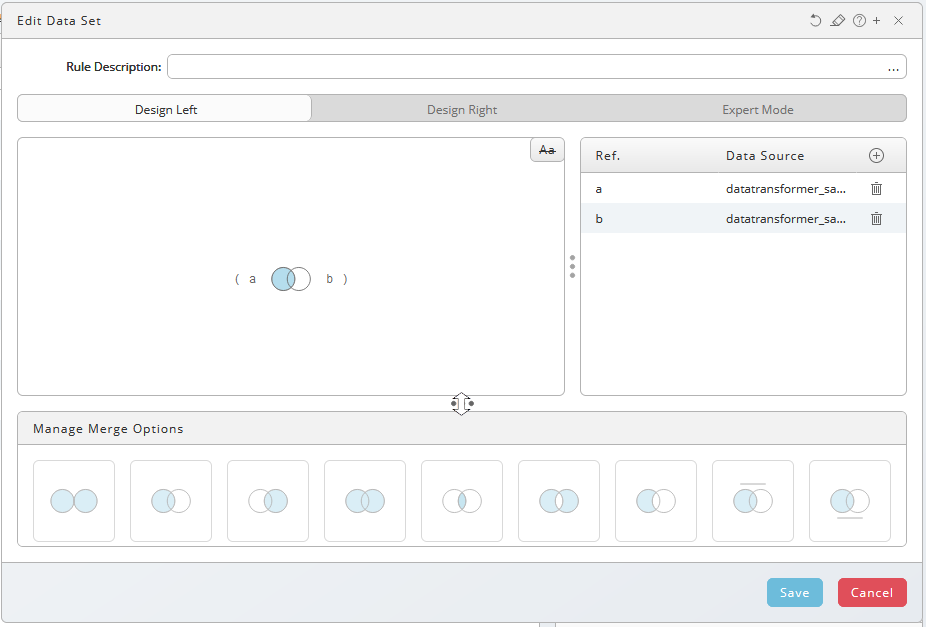
Input a is already Design Left pane. Design Left / Design Right split the input screen in two halves. See also Grouped Match
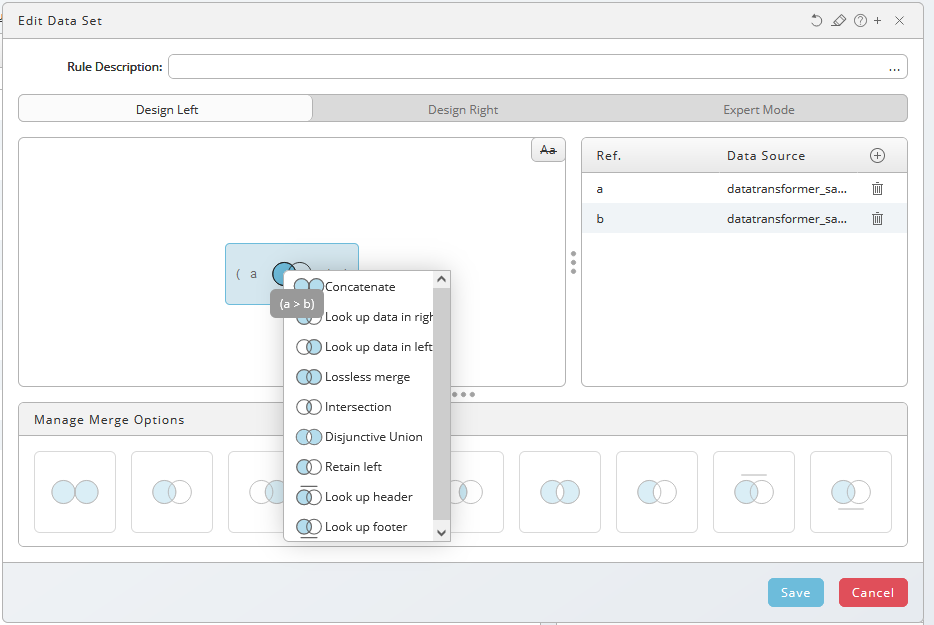
Select input b, use drag-and-drop to move it onto the Design Left pane and the look up option will automatically be used. Use context-menu to choose other options.
The expert mode allows you to define expressions directly. Help for expressions is available on the right-hand side. Examples illustrate the functionality of the merge options.

Red colored areas and messages indicate incorrect usage, something is missing or unavailable

Grouped Match
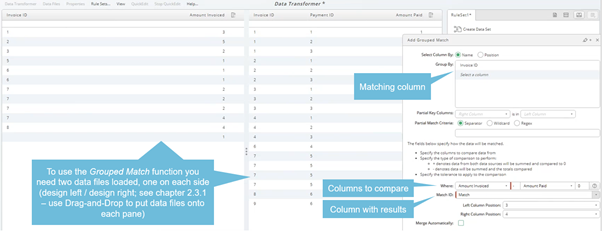
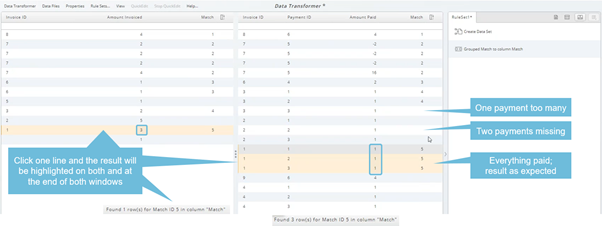
Grouped Match is used to identified groups of data so which a matching total can be found, often used for account reconciliation. If you have two data sets - invoices and payments - and you wanted to work out if you had been paid for all the invoices you had sent out this is the rule to use. It works by identifying criteria to group on between the two data sets and the columns that you wish to use to add up to create the totals. You can specify tolerance criteria within which the totals must match. You can also specify whether you want to compare the totals of the groups to one another or add them both up and compare them to zero.
Run Data Transformation
Data Transformer objects are stored as process definitions. You can run Data Transformer definitions using the regular submit dialog or within a bigger process. The outcome of the Data Transformer run can be passed to the next step within a bigger process as data input. The next step can be a Data Transformer definition or any other kind of process definition which is able to process RTX data or any other produced output file (html or xlsx).

For an immediate start, especially for test purposes, choose the submit button on the toolbar and choose the Data Transformer definition.

There are required parameters, the input documents.
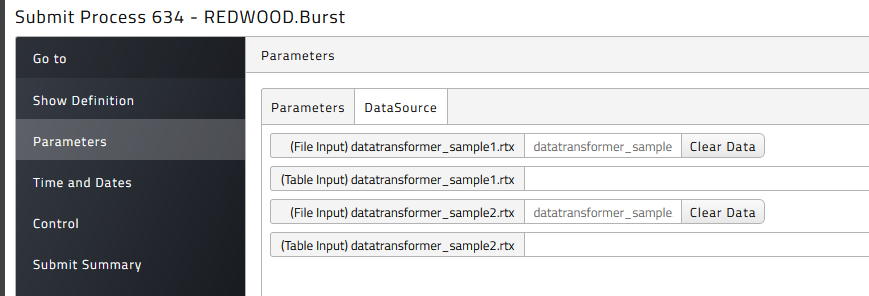
If you choose an immediate start, you can monitor the result in the process monitor. In the details section of the process monitor the corresponding process files are visible and accessible, depending on you privileges. In our example the original input file and the resulting output file(s), depending on the defined rulesets. Furthermore, the outcome of an export in three different formats.

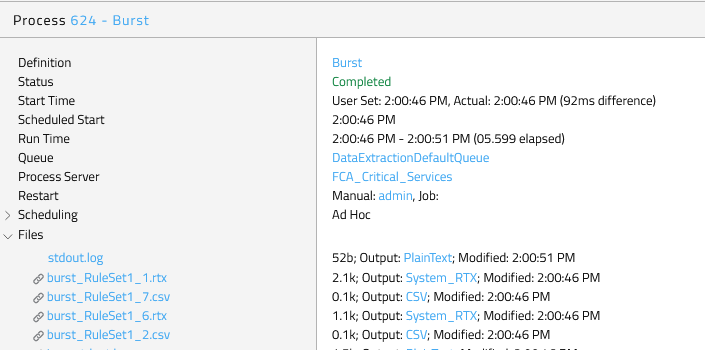
Output files
Data transformation can create many RTX, HTML, Excel, and/or PDF output files:
- By rule set, with an option to choose your own prefix
- By export rule, with an option to choose your own prefix
- By burst rule, fixed name (
burst_<rulesetname>_<columnname or position>_<value>)
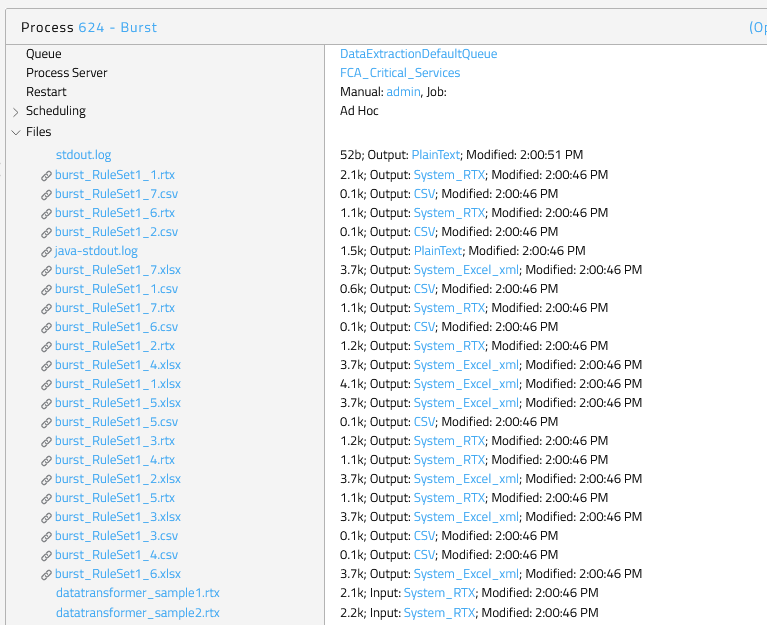
Furthermore, two log files of the data transformation process and the original input file(s).
Example
You wish to delete a column in a spreadsheet. You take a small sample with two controlling areas to define the data transformation that will be used for the bigger file.
Delete a Column
- Choose
on the toolbar.
- Choose
and browse to your file. In this example, we use sample data in this example.
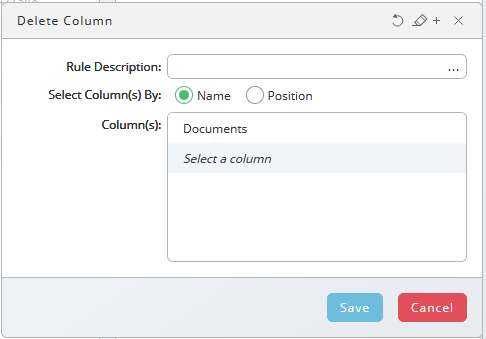
- Choose
 , specify
 Delete Column Documentsin the Rule description field. - Select the Documents column in the Columns field and choose Save.
- Choose
 , fill
 LineItemsinto the File Name Prefix field, ensure the Output Formats is set to RTX and choose Save.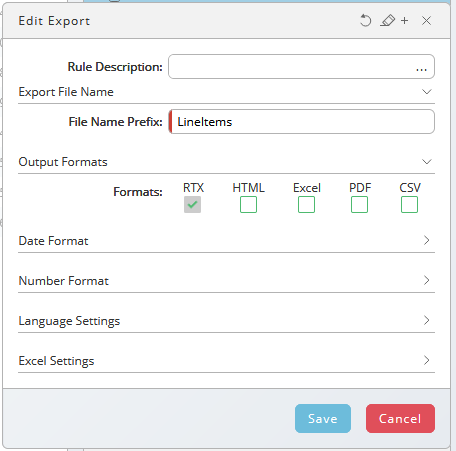
- Choose Save & Close, you will be asked for a partition, name and application (optional, but recommended). Use
ColumnDeletionin this example. - Navigate to Definitions > Processes, locate the definition ColumnDeletion.
- Choose Submit from the context menu.
- Choose Upload and navigate to the input file, in this example
datatransformer_sample1.rtx. - Choose Next, select the appropriate queue.
This must be a platform agent with the Script process server service.
- Choose Next, select Monitor process
<process_id>, the dialog closes and a new tab is opened with the process. - Expand Files, notice the file LineItems.rtx containing the transformed data.
Burst Example
You receive a large file you need to divide (burst) into separate files, one per controlling area. You take a small sample with two controlling areas to define the data transformation that will be used for the bigger file.
tip
The Burst transformation implies output files.
- Choose
on the toolbar.
- Choose
and browse to your file. In this example, we use sample data in this example.
- Choose
 , specify
 Burst by controlling areain the Rule description field, ensure Burst Type is set to Data Columns (default). - Select your controlling area column in the Group By field, in this example ensure the Output Formats is set to RTX and choose Save.
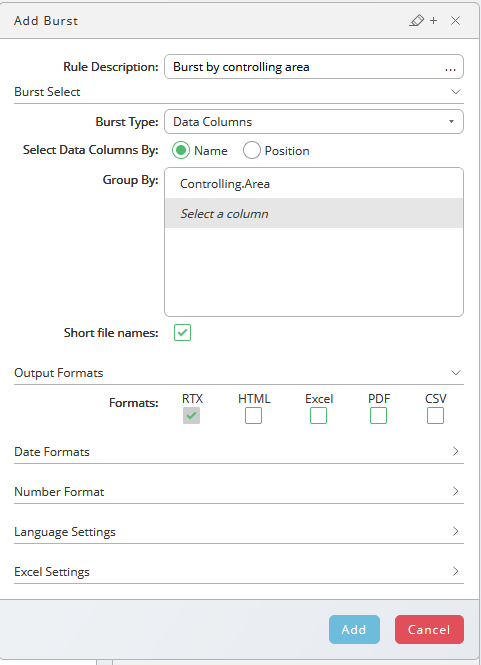
- Choose Save & Close, you will be asked for a partition, name and application (optional, but recommended). Use
ControllingBurstin this example. - Navigate to Definitions > Processes, locate the definition ControllingBurst.
- Choose Submit from the context menu.
- Choose Upload and navigate to the input file, in this example
datatransformer_sample1.rtx. - Choose Next, select the appropriate queue.
This must be a platform agent with the Script process server service.
- Choose Next, select Monitor process
<process_id>, the dialog closes and a new tab is opened with the process. - Expand Files, notice the files burst_RuleSet1_1.rtx and burst_RuleSet1_2.rtx, each containing data for a controlling area.
Merge Example
You wish to merge two data files into one.
- Choose
on the toolbar.
- Choose
and browse to your file. In this example, we use sample data in this example.
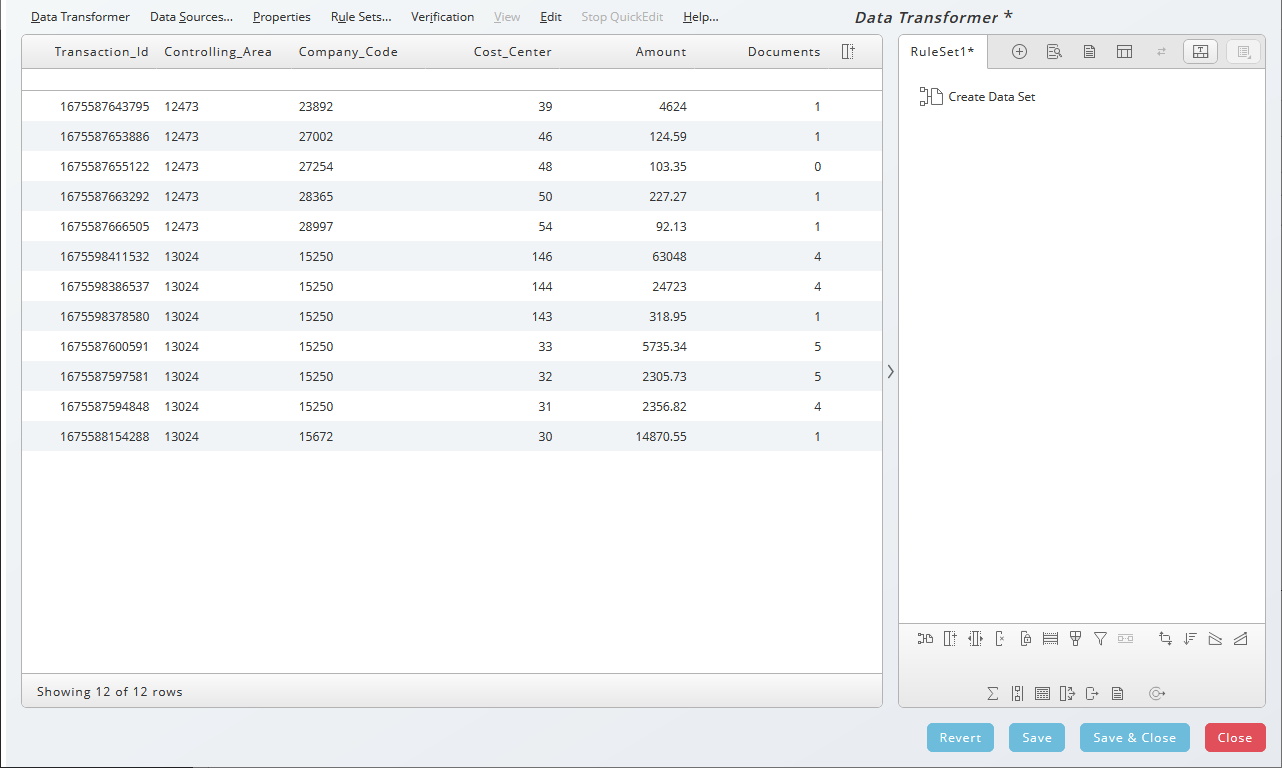
- Choose Manage Data Sources, choose
and add the second file, you use sample data in this example. Choose Ok.
- Choose Edit Rule from the context menu of Create Data Set.
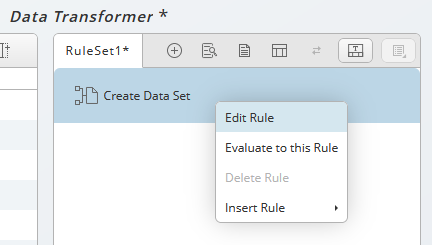
- Drag and drop
b(on the right-hand side) on top ofa(on the left-hand side).
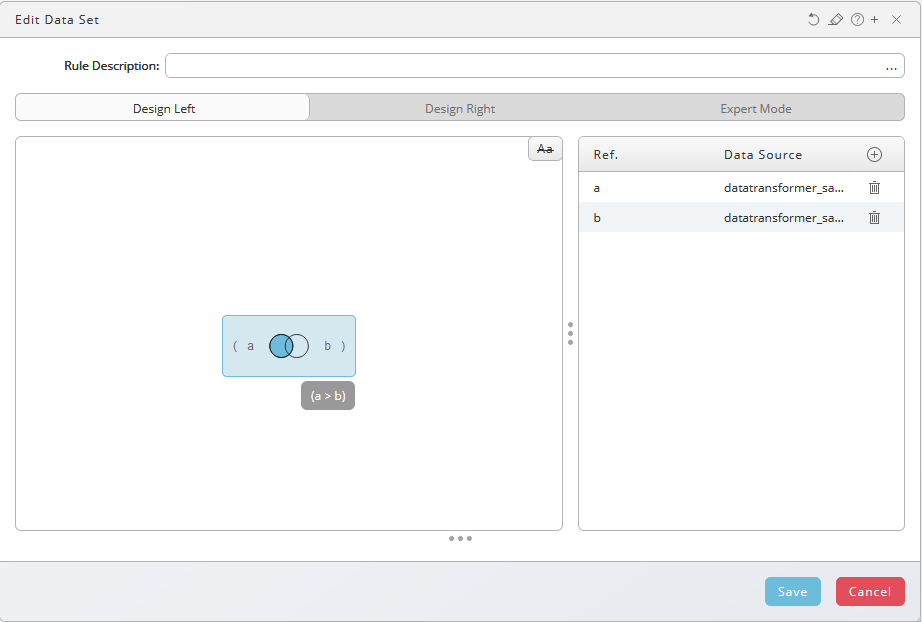
- Drag the devider down the bottom up to select a merge method.

- Choose Lossless Merge.
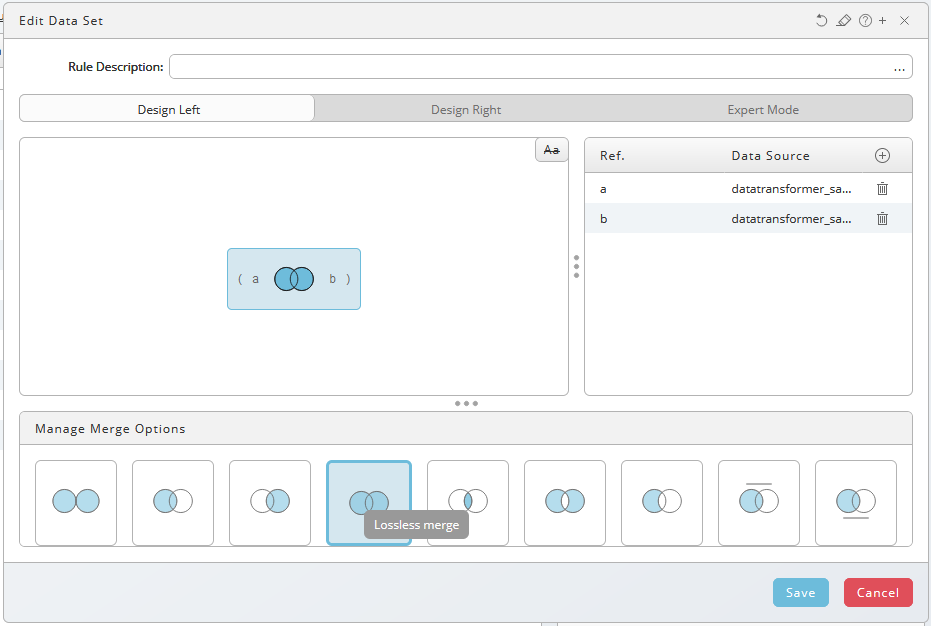
- Choose Save.
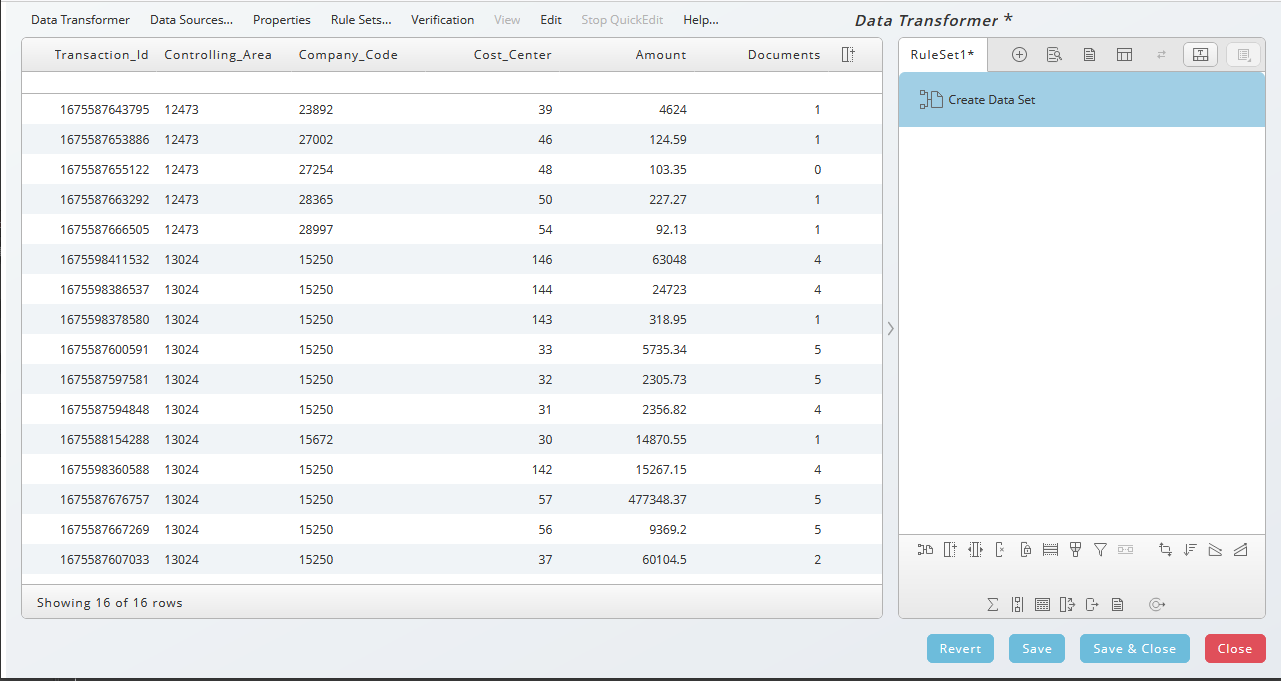
- Choose
 , fill
 Mergedint into the File Name Prefix field and choose Add.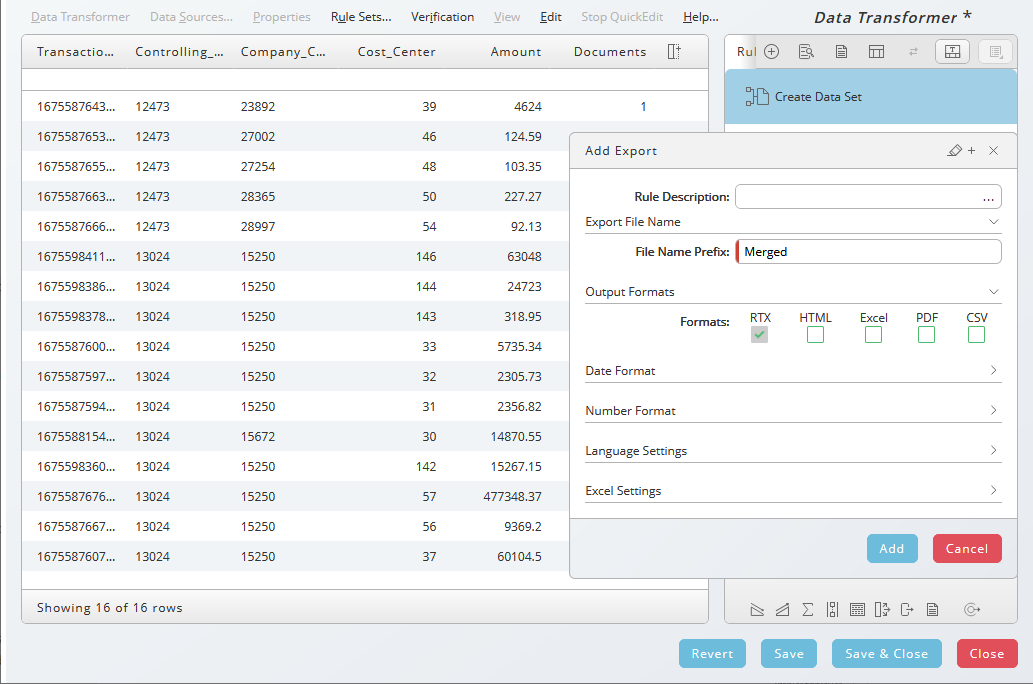
- Choose Save & Close, select partition REDWOOD and fill in
MergedDatainto the Name field. - Navigate to Definitions > Processes, locate the definition ControllingBurst.
- Choose Submit from the context menu.
- Choose Upload and navigate to the input file, in this example
datatransformer_sample1.rtx. - Choose Next, select the appropriate queue.
This must be a platform agent with the Script process server service.
- Choose Next, select Monitor process
<process_id>, the dialog closes and a new tab is opened with the process. - Expand Files, notice the file Merged.rtx, it contains the merged data.
financeTopic
