 Document Editor User Guide
Document Editor
Documents are commonly used to hold information on objects and procedures.
Documents can also hold other types of data:
- Documentation, pictures, logos, spreadsheets, and so forth.
- Formatted templates used by other processes, for example, when sending an email notification or business templates like journal voucher templates
The Document Editor allows you to maintain or create documents easily.
Open the Document Editor
Open the Document Editor from the Document Editor tile on the Home screen or from the tool bar in the Control Center.
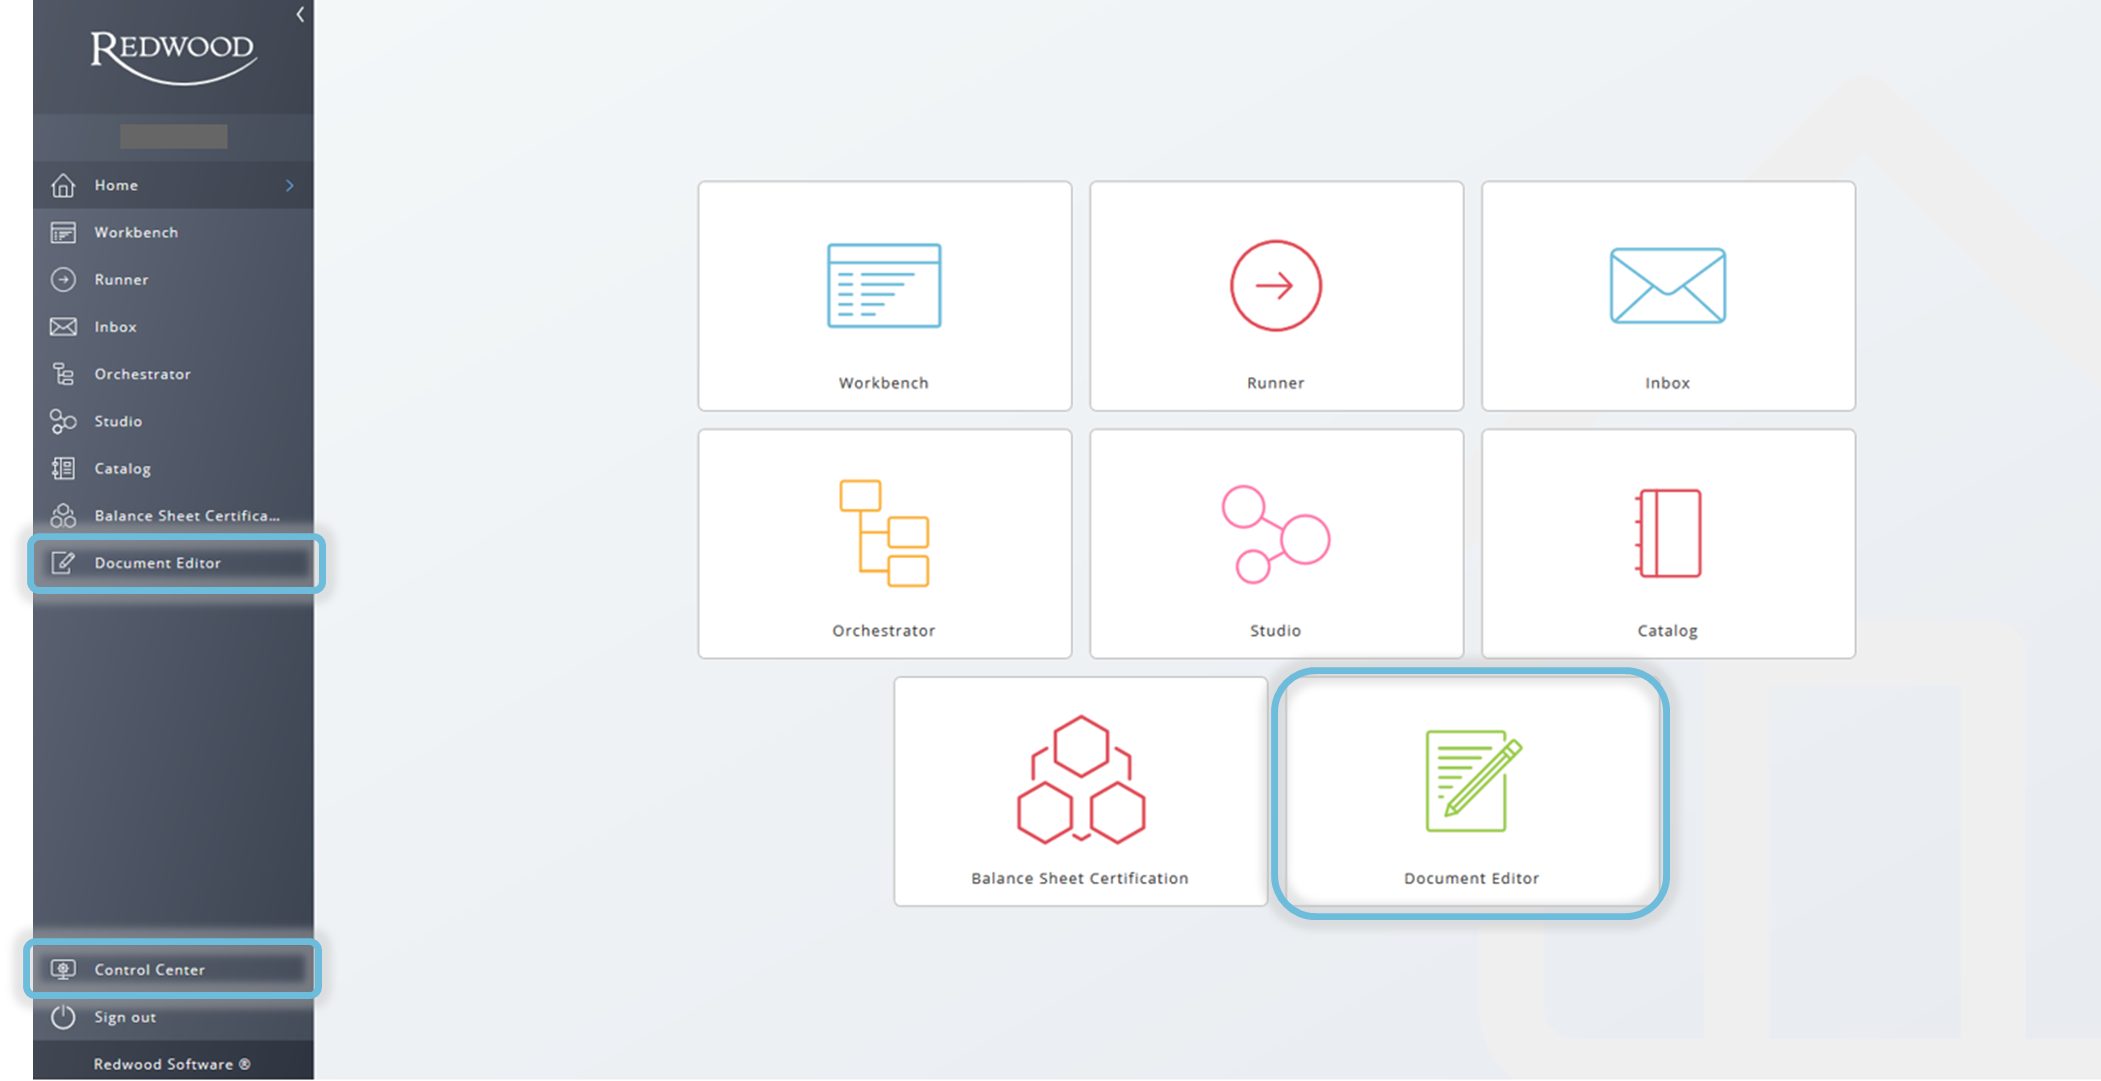
Figure 1: Finance Home Screen - Document Editor
To open the Document Editor from the tool bar:
- Click on Control Center at the bottom of the left-hand navigation bar.
- Click the Document Editor icon on the tool bar that appears above the main screen as shown in the image below.
- Tip: Hovering over the icons displays the name of each icon.

Figure 2: Document Editor Icon in Tool Bar
Menu Bar
The menu bar in the top left-hand corner of the screen provides three dropdown options: File, Edit, and Audit.
- The File dropdown options are Save and Close.
- The Edit dropdown options are:
- Properties: Shows the properties of the selected document
- Documentation: Shows the documentation of the selected document
- Security: Shows the security privileges assigned to a user or role
Clicking on Audit shows all modifications of the selected document.
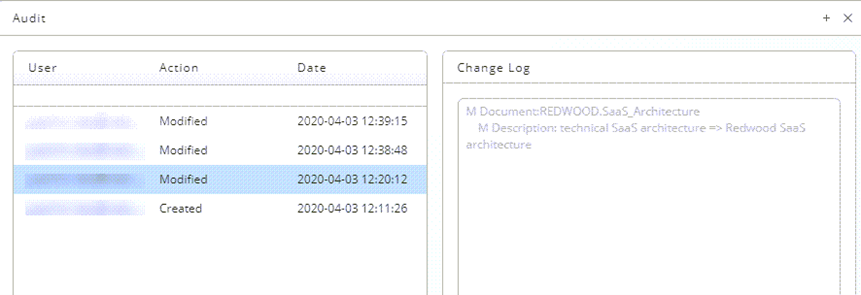
Figure 3: Audit Change Log
View and Edit a Document
Starting the Document Editor opens a new window and displays the Overview screen. The image below shows the action buttons and menus available in the left-hand window pane of the Document Editor.
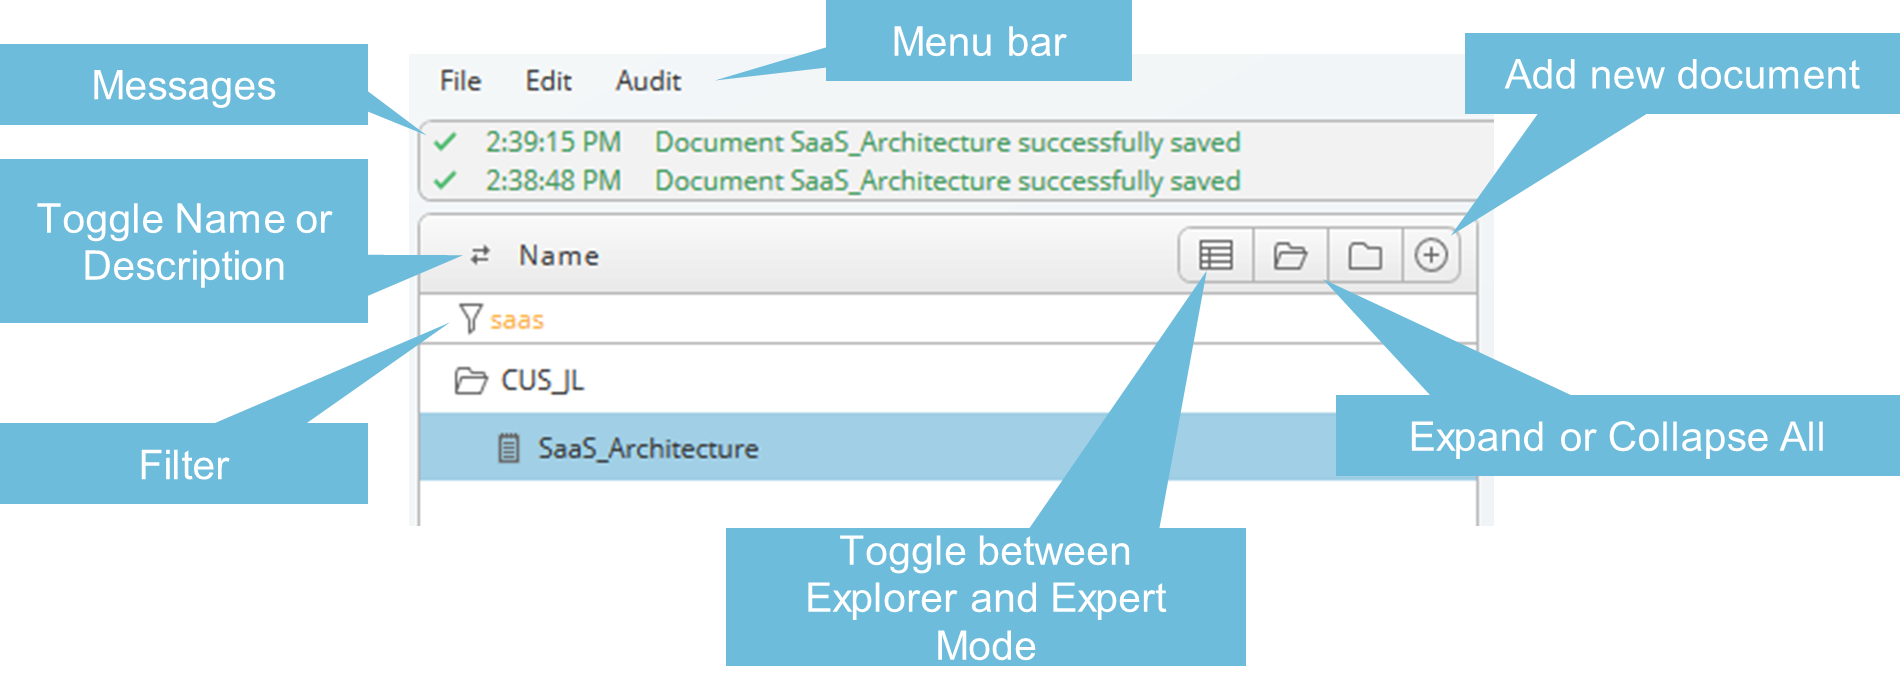
Figure 4: Action Buttons and Menus in Document Editor
Context Menu
The context-menu allows you to delete a document or set its properties.
| Action | Description |
|---|---|
| Delete | Delete the document. |
| Properties | Edit the properties of a document, such as Name, Description, Application, Partition, and Format. |
| Documentation | Edit the Documentation field. |
| Security | Grant or revoke permissions on the document to and/or from users or roles. |
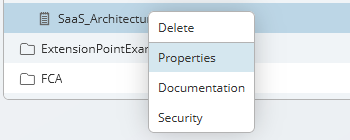
Figure 5: Context Menu
Explorer Mode
By default, the Document Editor starts in Explorer Mode, which provides a hierarchical tree view of files. To toggle between Explorer Mode and Expert mode (which provides more detailed information about the files) click on the Expert Mode and Explorer Mode icons in the top tool bar.
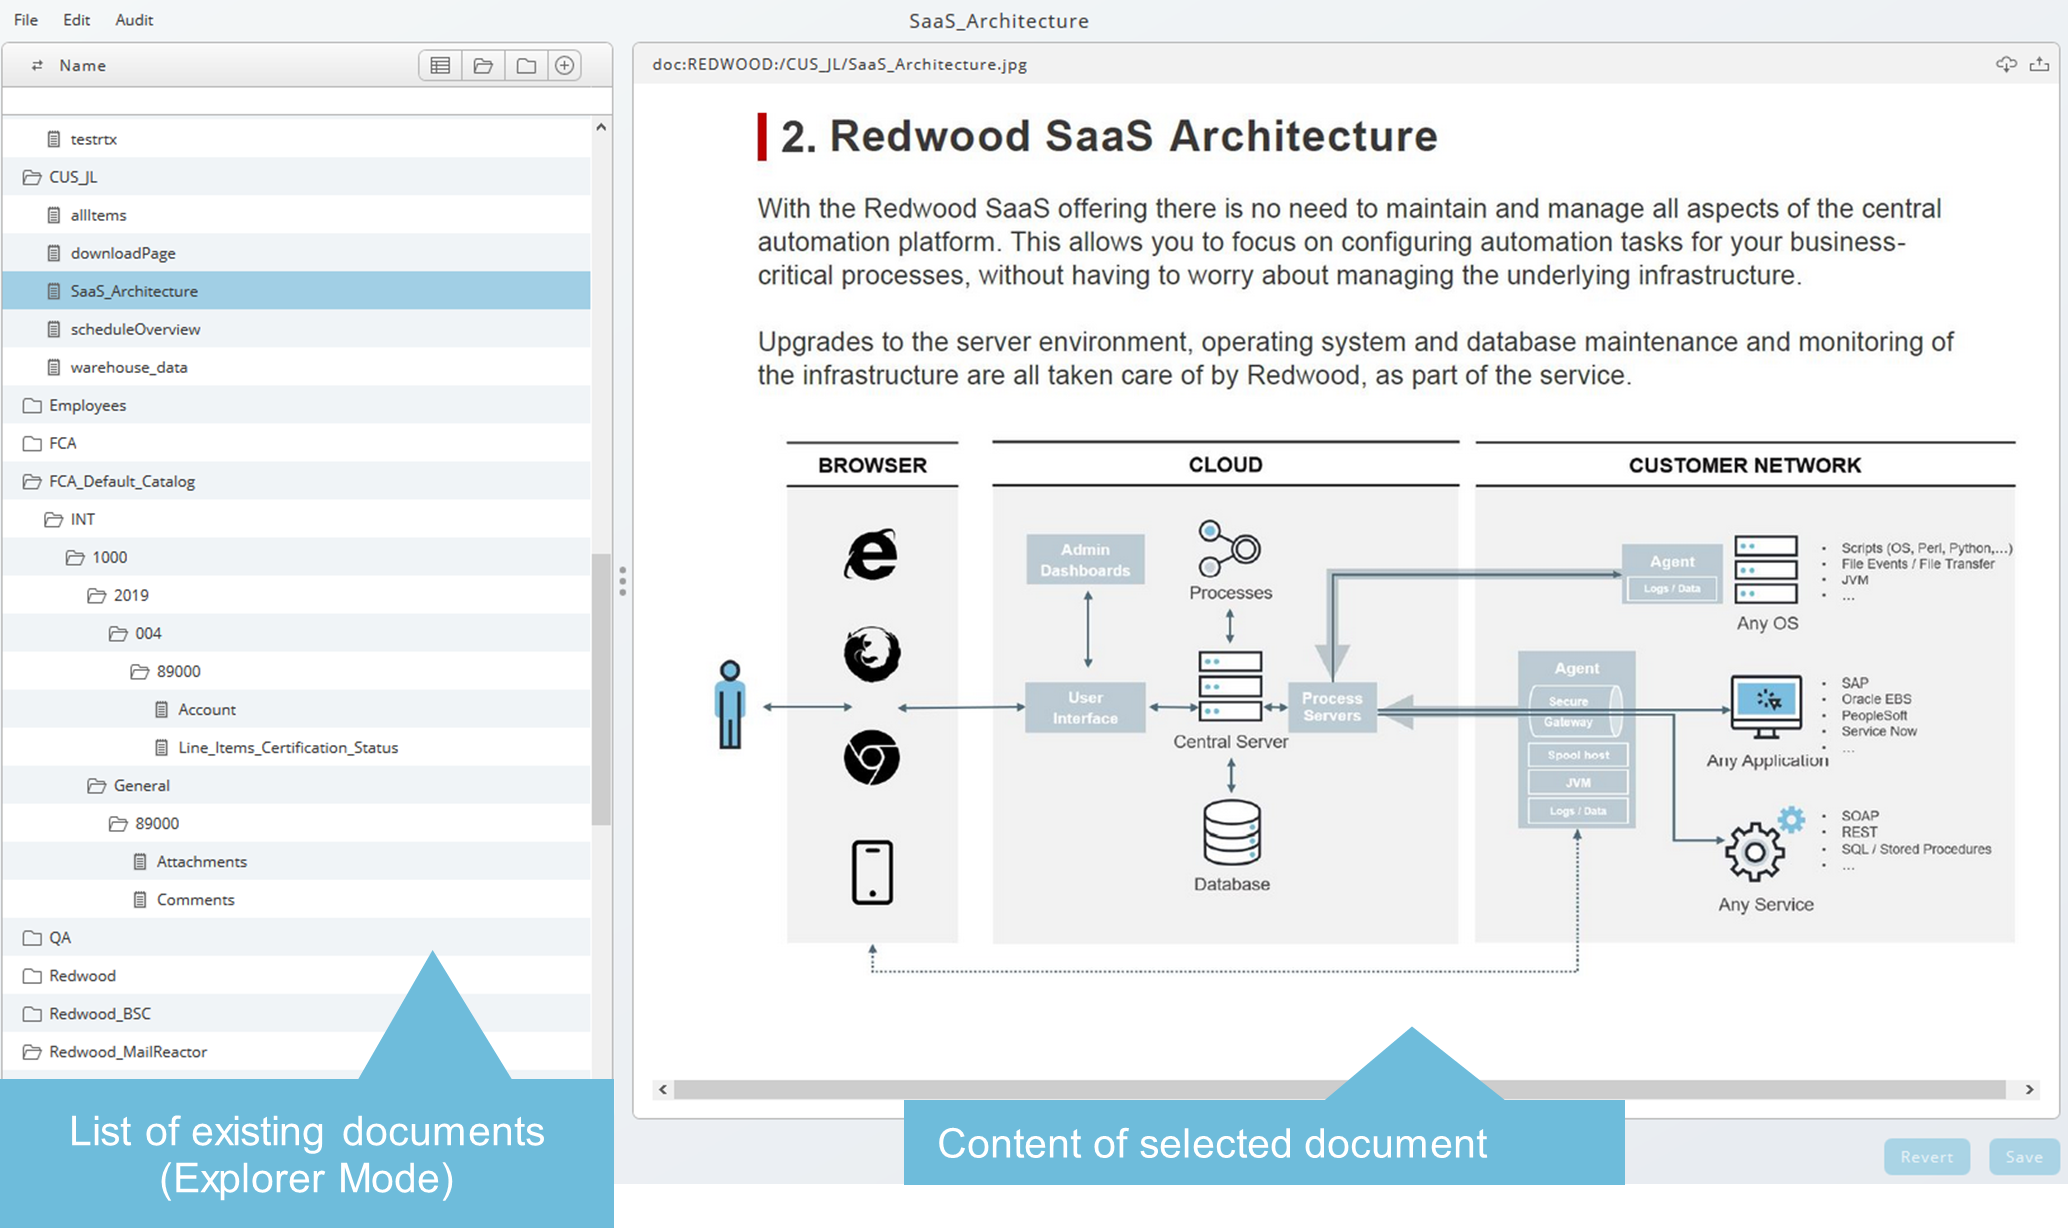
Figure 6: Explorer Mode
Selecting a document from the list displays the content in the window pane to the right of the list.
Certain file types will appear in the pane on the right when a file is selected (plain text, HTML, images), but for other file types (Excel, PDF, Zip) a message will prompt you to download the document before the content can be viewed.

Figure 7: No Preview Download Message
To replace the existing content, use the Upload icon shown next to the Download icon.
Expert Mode
Expert Mode displays the entire list of existing documents and the list of recently used documents on top. Expert Mode is not organized in a hierarchical tree or folder view, but can be sorted by clicking on the names of the columns:
- Name - The document name
- Description - A short explanation of what the document is about
- Partition - Partition of the document (where the object is stored)
- Format - The file format
- Application - The assigned application of the document (where the object belongs)
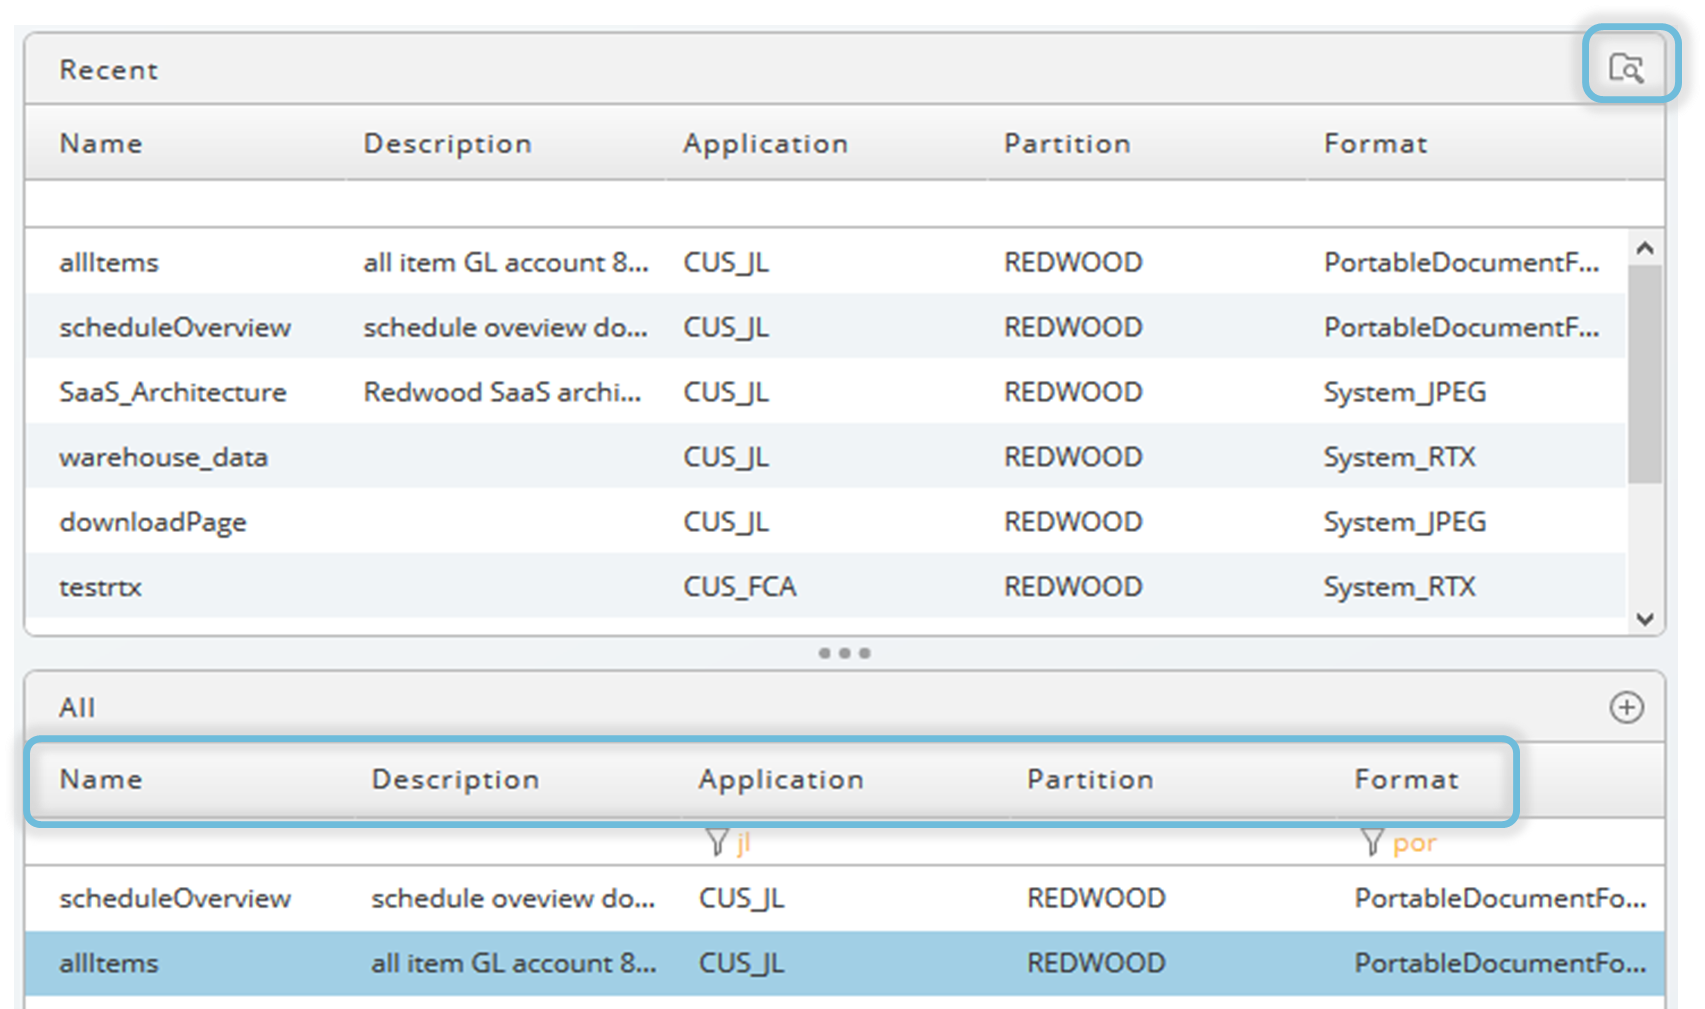
Figure 8: Expert Mode
To toggle back into the Explorer Mode use the Explorer Mode icon shown in the image above.
Add a New Document
Adding new documents can be done in Explorer Mode or Expert Mode. To add new documents:
- Click the Add Document plus sign in a circle (+) icon on the right-hand side of the title bar (above the list of All documents in Expert Mode and to the right of the Collapse all action button in Explorer Mode).
- The Add Document screen will appear.
- Fill in the following required fields:
- Name: Name of the document object.
- Partition: Partition of the document (where the object should be stored - security criteria)
- Format: The appropriate format of the uploaded document
- Application: The assigned application of the document (where the object belongs - organizational criteria) 5 . Content: The chosen file to upload
- Clicking into the Content field or clicking on the Upload button will open the File Explorer. Browse and select the uploaded file. To remove the chosen file click the Trashcan icon.
- The Description and Documentation fields are optional.
- Click the Add button to add the documentation or the Cancel button to go back.
An added document can be removed by right-clicking on the name of the document and choosing Delete from the Context menu.
Filter Documents
Filters can be applied in Explorer Mode and Expert Mode.
To filter a column:
- Hover over the empty line in between the column title and the list of documents until the add filter tooltip appears.
- The mouse pointer will become a hand.
- Click on add filter.
- Enter the search string.
When hovering over any filter that has been applied, a red x will appear next to the Filter icon as shown in the image below. Click the Filter icon with the red x to delete the filter.
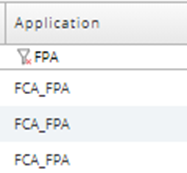
Figure 9: Deleting a Filter
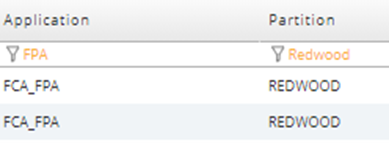
Figure 10: Combining Filters
note
Multiple filters can be applied. When a filter is being actively edited the filter text is black, but after the filter has been applied, clicking anywhere else on the screen will turn the filter text orange.
financeTopic
